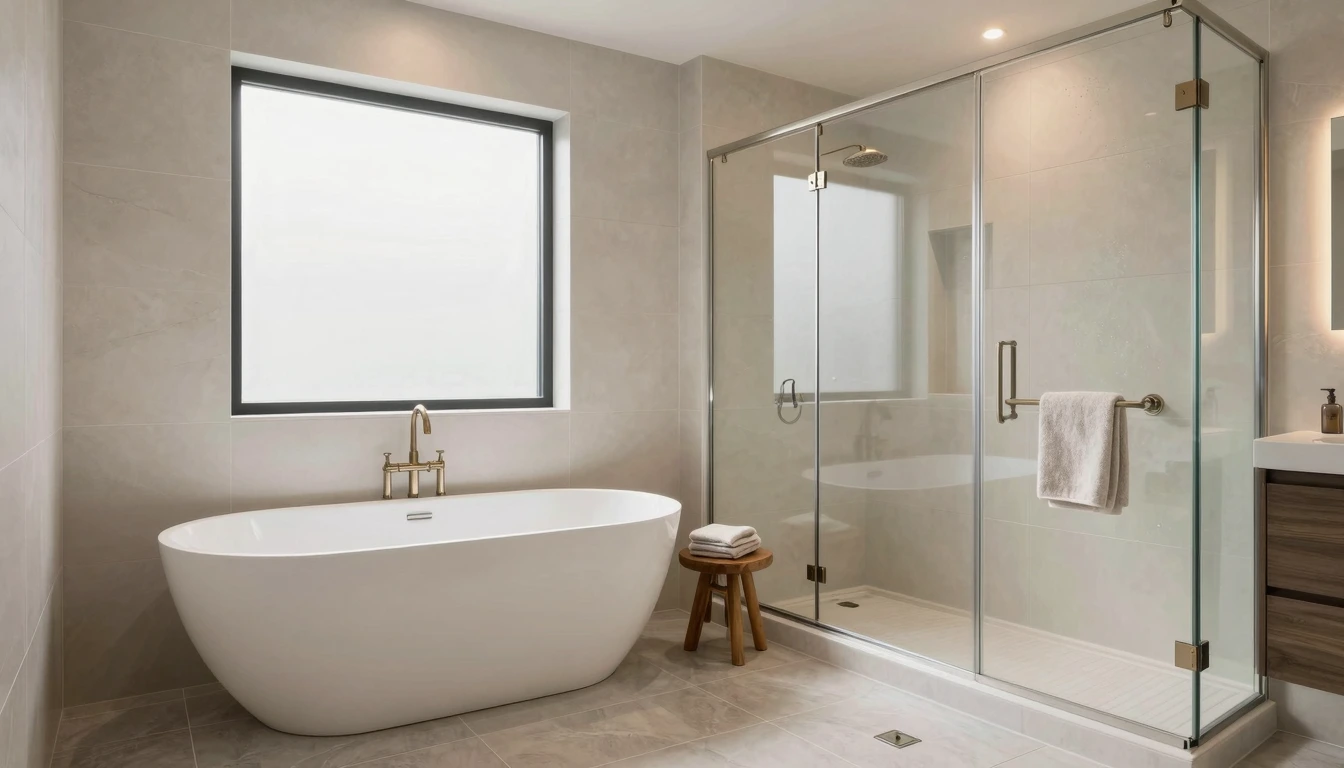
Trying to fit both a comfortable shower and a proper bathtub into one bathroom can quickly become a space-planning puzzle. The best walk-in shower with tub combination ideas do more than place two fixtures in the same room—they manage splashing, circulation, cleaning, privacy and visual balance without making the bathroom feel cramped.
The main challenge is deciding whether the tub should sit inside the shower’s waterproof zone, beside it, behind the same glass enclosure or in a separate but coordinated area. That choice affects drainage, ventilation, installation cost and how comfortably different household members can use the room.
This guide covers 15 realistic layouts, from compact alcove arrangements to spacious wet rooms. Each option explains where it works best, what it requires and which limitations to consider before remodeling.
What Makes a Shower and Tub Combination Work?
A successful walk-in shower and tub combination begins with a clear bathing zone. The shower spray, tub access and walking path should not compete for the same limited floor space. Before choosing a layout, measure the room carefully and note the positions of doors, windows, plumbing lines and ventilation.
The most practical arrangement depends on who uses the bathroom. A family may prioritize an easy-to-clean built-in tub, while a primary bathroom may benefit from a freestanding tub and larger shower. Waterproofing, drainage and slip-resistant flooring are more important than decorative finishes, especially when the bathtub sits inside a wet room.
Budget also matters. Keeping the shower and tub near existing plumbing usually costs less than moving supply and waste lines across the bathroom.
Walk-In Shower and Tub Combination Ideas at a Glance
| Design idea | Best suited for | Space requirement | Budget level | Main consideration |
|---|---|---|---|---|
| Full wet room | Medium to large bathrooms | Moderate to generous | High | Complete waterproofing |
| Tub inside glass shower | Primary bathrooms | Moderate | High | Splash control |
| Side-by-side layout | Long bathrooms | Moderate | Moderate | Clear circulation |
| Alcove tub beside shower | Family bathrooms | Compact to moderate | Moderate | Efficient use of walls |
| Partial glass divider | Open modern bathrooms | Moderate | Moderate | Water containment |
| Compact soaking tub | Small bathrooms | Compact | Moderate | Tub depth and access |
| Corner tub arrangement | Awkward room shapes | Moderate | Moderate to high | Efficient corner use |
| Shared tiled platform | Contemporary bathrooms | Generous | High | Cleaning around the tub |
| Shower behind the tub | Wide bathrooms | Moderate to generous | High | Safe tub clearance |
| Linear wet-zone layout | Narrow bathrooms | Long and narrow | Moderate to high | Drainage slope |
| Built-in storage wall | Busy households | Moderate | Moderate to high | Recess depth |
| Accessible combination | Aging-in-place homes | Generous | High | Entry and support |
| Enclosed warm wet room | Cold climates | Moderate | High | Ventilation and warmth |
| Natural spa-inspired layout | Calm primary bathrooms | Moderate to generous | Moderate to high | Moisture-safe materials |
| Budget-conscious update | Existing bathrooms | Existing footprint | Low to moderate | Limited layout changes |
1. Create a Fully Open Bathroom Wet Room
A full wet room treats the shower and bathtub area as one continuously waterproofed zone. The floor usually slopes toward one or more drains, while the tub sits directly on the tiled surface without a raised shower tray.
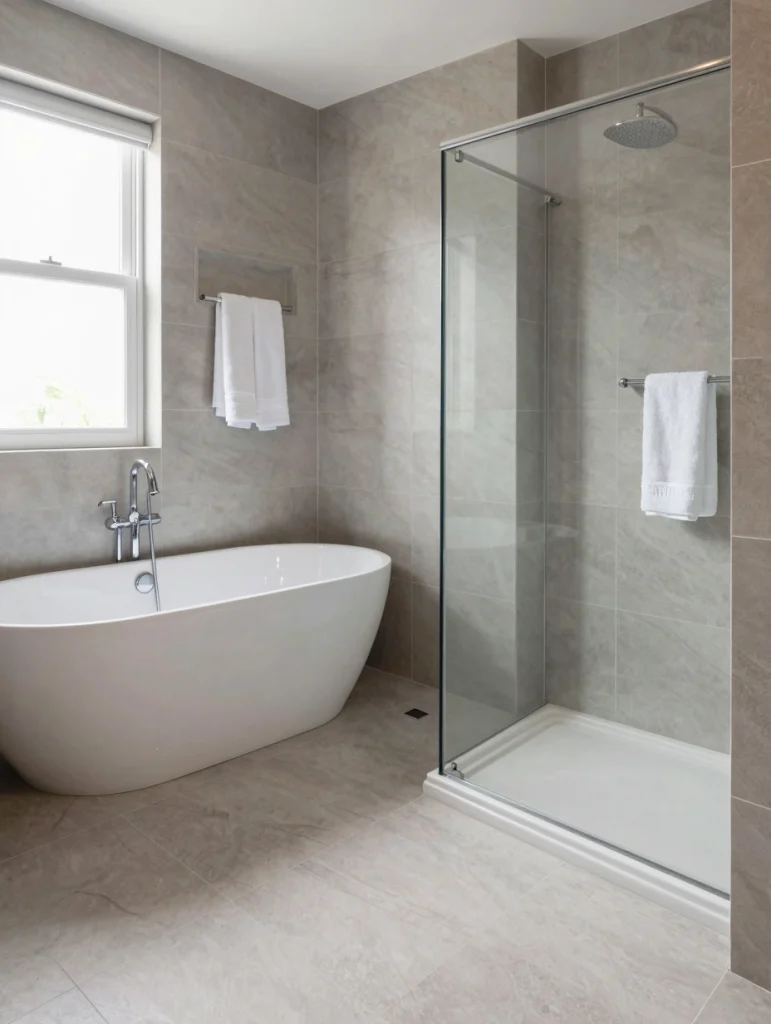
This layout works well in medium or large bathrooms where the bathing zone can be separated from the vanity and toilet. It creates an open appearance and makes a bathroom wet room with bathtub feel like one coordinated feature rather than two unrelated fixtures.
Large-format porcelain tile can reduce grout maintenance, although smaller textured tiles may offer better grip underfoot. Waterproofing must extend beyond the visible shower area because spray and standing moisture can travel farther than expected.
The disadvantage is that a poorly planned wet room may leave the tub exterior, nearby towels and surrounding floor constantly damp. A properly sized glass screen can limit spray while retaining the open character.
2. Place a Freestanding Bathtub Inside the Glass Shower Enclosure
A walk-in shower with freestanding tub places both fixtures behind the same glass wall or door. The bathtub becomes the visual centerpiece, while the shower is positioned at one end of the enclosure.
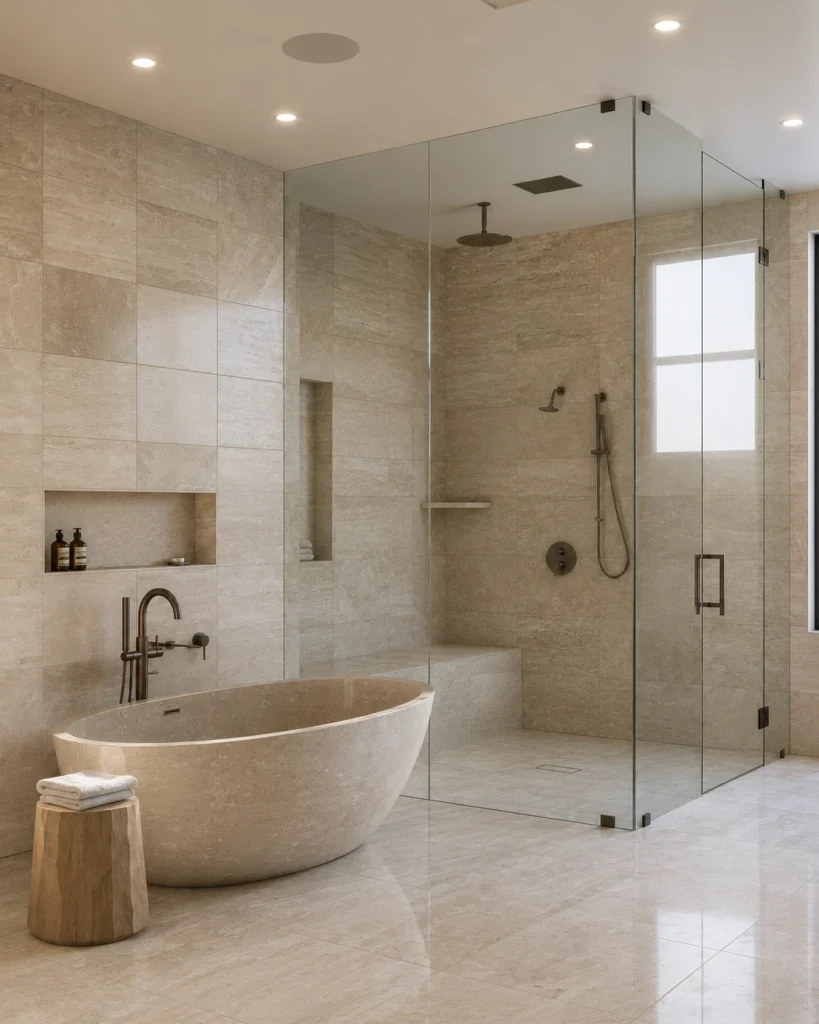
This arrangement is most suitable for primary bathrooms with enough width for the tub, shower controls and a comfortable walking path. It also simplifies water containment because the entire bathing zone is enclosed.
Choose a tub shape that leaves access for cleaning around its base. A tightly fitted tub may look attractive in drawings but become difficult to maintain once installed. Floor-mounted fillers also require careful waterproofing where the plumbing penetrates the floor.
A premium version might include frameless glass, wall-mounted controls and book-matched tile. A more affordable interpretation can use a compact acrylic tub, standard glass panels and durable porcelain tile.
3. Use a Side-by-Side Shower and Tub Layout
Placing the walk-in shower beside the bathtub is one of the most straightforward arrangements. The fixtures share one wall and can often use nearby supply and drainage lines, which may reduce remodeling complexity.
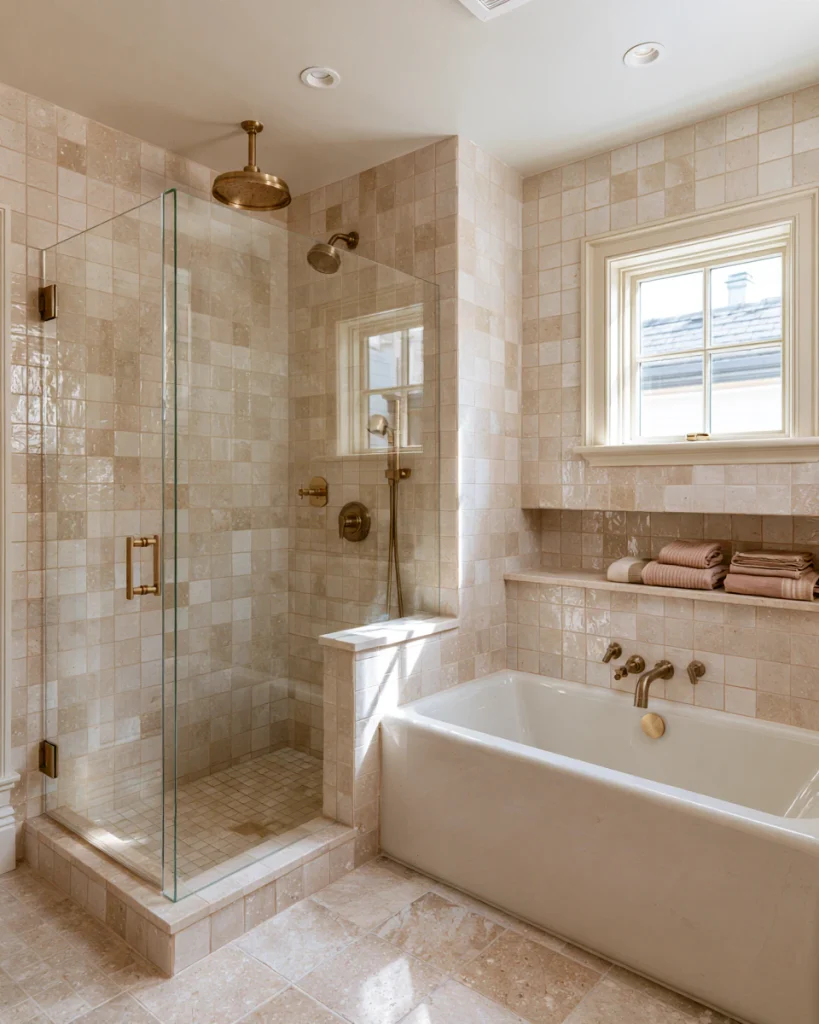
A walk-in shower beside bathtub layout works particularly well in rectangular bathrooms. The shower can occupy one end of the room, with the tub extending beside it beneath a window or feature wall.
For visual consistency, repeat the same wall tile or metal finish across both areas. The fixtures do not need to match exactly, but they should feel deliberately connected.
The main planning mistake is allowing the tub rim or filler to obstruct the shower entrance. Maintain a clear path into the shower and confirm that the glass door, if used, can open without hitting the tub.
4. Combine an Alcove Tub With a Separate Walk-In Shower
An alcove tub is enclosed on three sides, making it a practical option for households that need a bathtub but prefer a separate shower. The tub can occupy one short wall while the walk-in shower fills the adjoining corner.
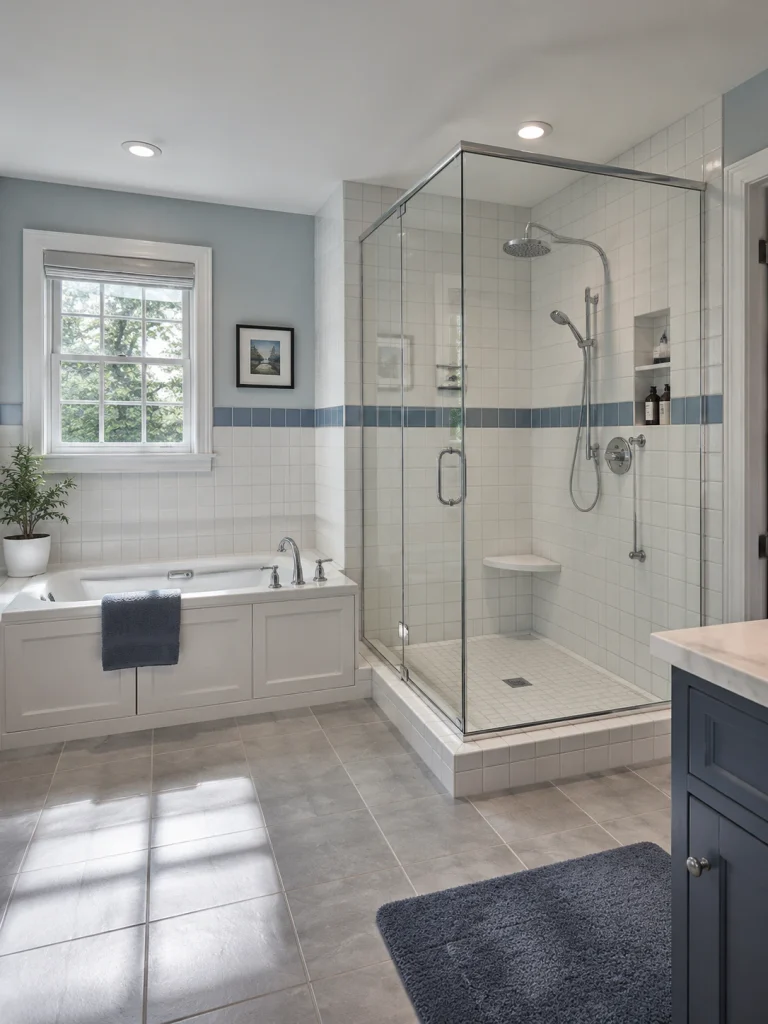
This combined shower and bathtub layout is especially useful in family bathrooms because built-in tubs are generally easy to access, clean and pair with wall-mounted storage. The surrounding ledge can hold bath products without adding separate furniture.
Use coordinated tile to make the two zones feel unified. A glass shower enclosure keeps the room visually open, while the alcove tub retains a familiar, practical form.
This setup may feel less luxurious than a freestanding-tub design, but it often provides better value and easier maintenance.
5. Separate the Shower and Tub With a Partial Glass Panel
A fixed glass panel can separate the shower spray from the tub without fully enclosing either fixture. It preserves an open layout while providing more water control than a completely exposed wet room.
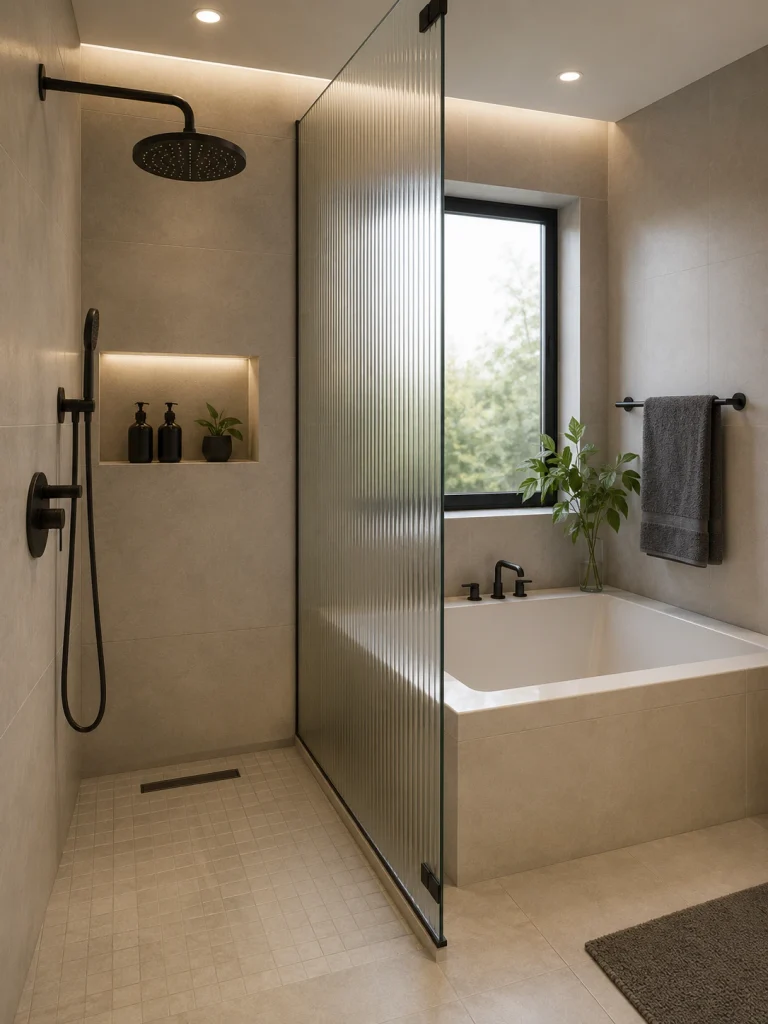
This option works best when the showerhead points away from the open side. The panel should be wide enough to intercept the main spray pattern but not so large that it creates a narrow passage.
Clear glass makes the bathroom appear larger. Fluted or lightly frosted glass offers more privacy and can soften the view of water spots, although textured surfaces may require different cleaning methods.
A partial panel is usually less visually heavy than a framed enclosure. However, it will not contain steam or splashing as effectively as a full glass wall.
6. Choose a Compact Soaking Tub for a Small Bathroom
A deep, short soaking tub can provide meaningful bathing comfort without requiring the length of a standard rectangular model. Pairing one with a corner or wall-mounted walk-in shower can make a small bathroom shower tub combination more practical.
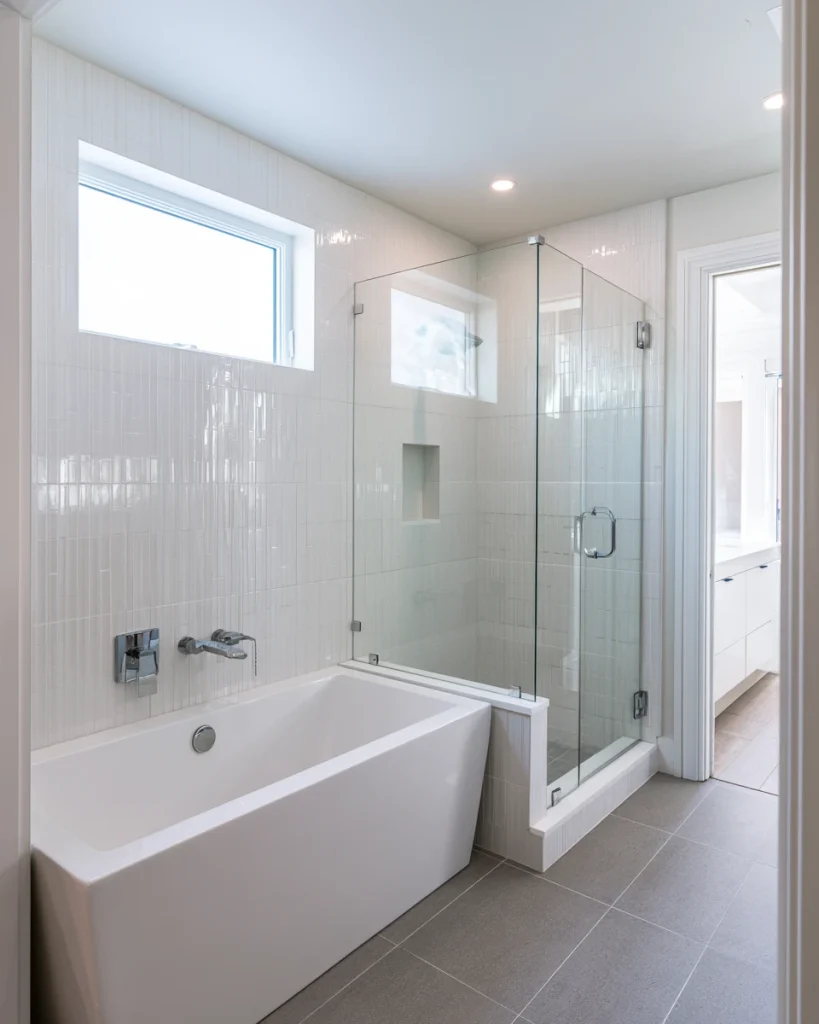
Japanese-inspired soaking tubs and compact oval tubs use vertical depth rather than floor length. They suit adults who primarily want to sit and soak, but the higher sides may be difficult for young children, older adults or anyone with limited mobility.
Position the tub where it does not narrow the bathroom entrance or block access to the shower controls. A wall-mounted filler can save floor space, while recessed niches reduce the need for projecting shelves.
Before buying, check the tub’s filled weight and confirm that the floor structure can support it.
7. Use a Corner Tub to Handle an Awkward Floor Plan
A corner tub can occupy space that might otherwise be difficult to use. The walk-in shower can then sit beside it or along the opposite wall, depending on the room’s shape.
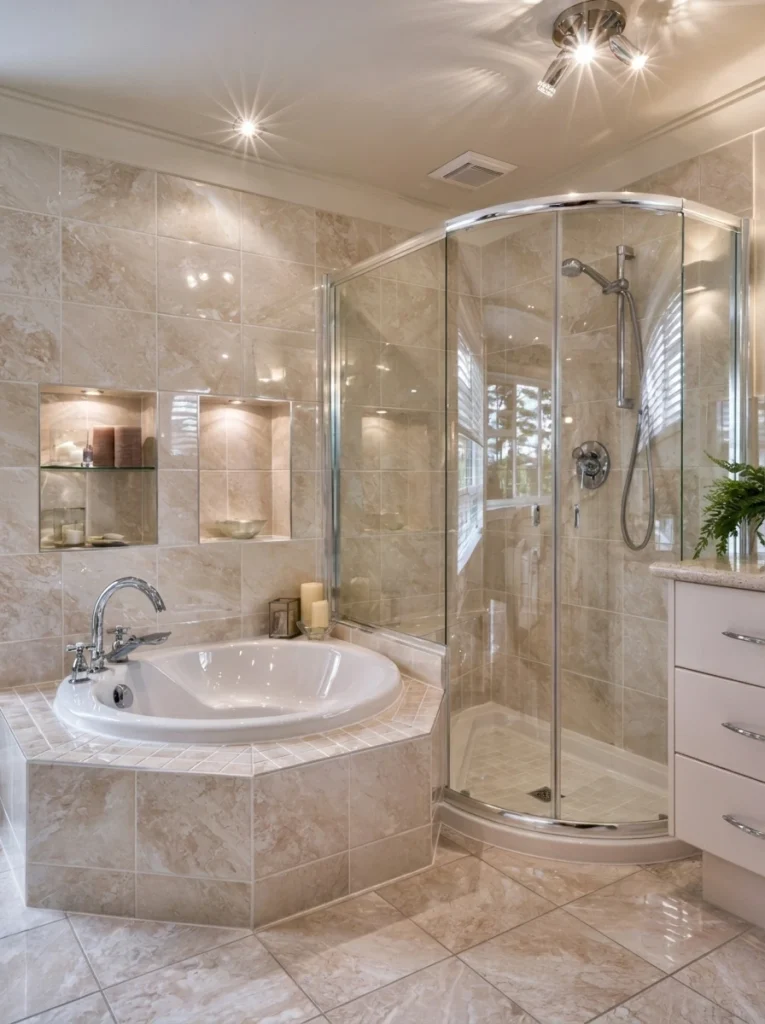
This design is useful in square bathrooms, rooms with angled walls or layouts where doors and windows prevent a conventional arrangement. A compact corner tub can also provide a broader bathing area without extending deeply into the main walkway.
The surrounding deck offers storage for bath products, but wide tiled ledges can become cluttered. Keep the deck narrow enough for cleaning access and include niches where possible.
Corner tubs often hold more water than their appearance suggests, so consider household water use and hot-water capacity before selecting a large model.
8. Set the Tub and Shower on a Shared Tiled Platform
A shared platform raises the bathtub slightly and visually connects it to the shower. The platform can continue into a shower bench, creating one architectural feature across the bathing wall.
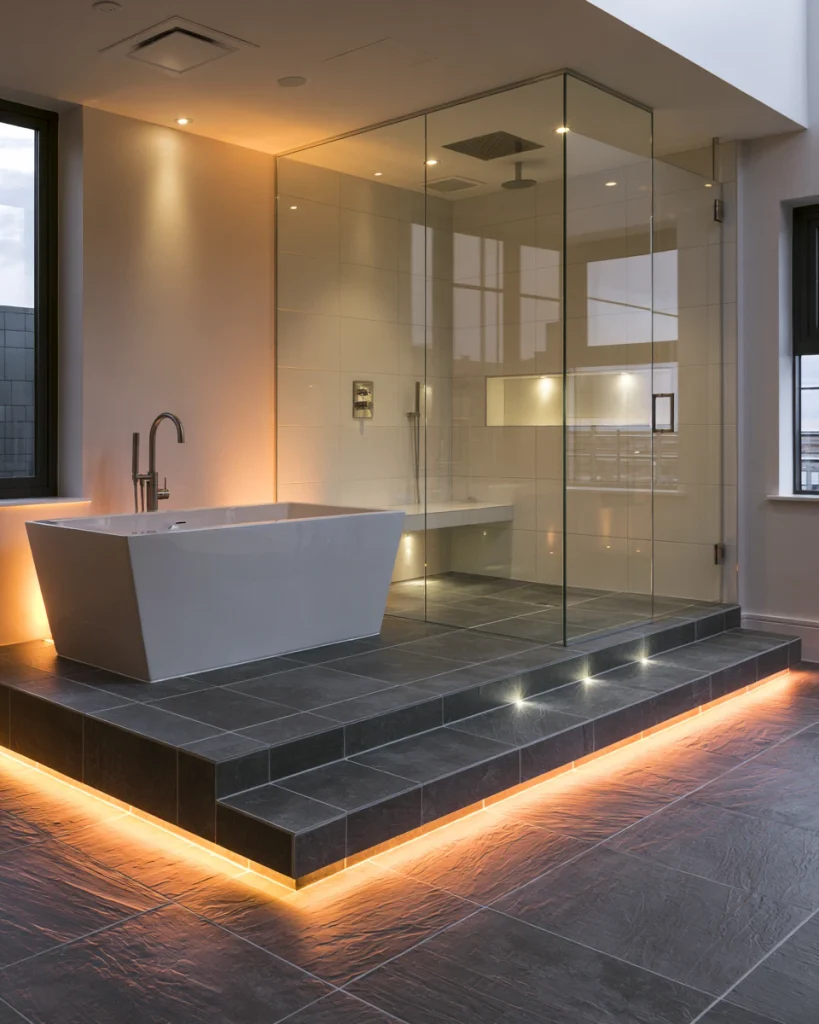
This approach suits contemporary bathrooms with enough space to accommodate the raised structure safely. It also allows concealed plumbing and can help define the wet zone without using multiple walls.
The step must be easy to see and should not sit directly in the main walking path. Choose slip-resistant tile and consider integrated lighting beneath a ledge only where the electrical installation is appropriate for wet locations.
The platform adds construction work and may make cleaning around a freestanding tub more difficult. It is best used when the design benefit justifies the extra detailing.
9. Position the Walk-In Shower Behind the Bathtub
In a wide bathroom, the bathtub can sit in front of a glass-enclosed shower. The tub remains visible from the entrance, while the shower occupies the deeper part of the room.
This arrangement creates a layered design and works well when the room has a strong focal wall. A low tub allows the shower tile and fittings to remain visible rather than disappearing behind a bulky fixture.
Leave enough space to walk safely around the tub and reach the shower entrance. Avoid creating a narrow passage where wet feet, sharp tub corners and glass edges meet.
This layout usually requires generous floor area. In a smaller bathroom, it can make both fixtures difficult to access.
10. Arrange the Wet Zone in One Linear Row
A linear arrangement places the bathtub and shower along the same long wall. It is a useful solution for narrow bathrooms where placing fixtures opposite each other would restrict circulation.
The bathtub may sit at the far end, with the shower closer to the entrance, or the order may be reversed depending on the window and plumbing positions. A continuous glass wall can enclose the entire wet zone.
Repeating one tile across the shower and tub wall creates a longer visual line. Built-in niches can also run horizontally to provide storage without reducing the passage width.
Drainage requires careful planning because water must not collect around the tub or flow toward the dry area. A linear drain may help in some designs, but its suitability depends on floor construction and local requirements.
11. Add a Storage Wall Between the Tub and Shower
A narrow partition can separate the fixtures while providing recessed storage on one or both sides. Shower niches can face the shower, while open shelves or a towel recess face the tub.
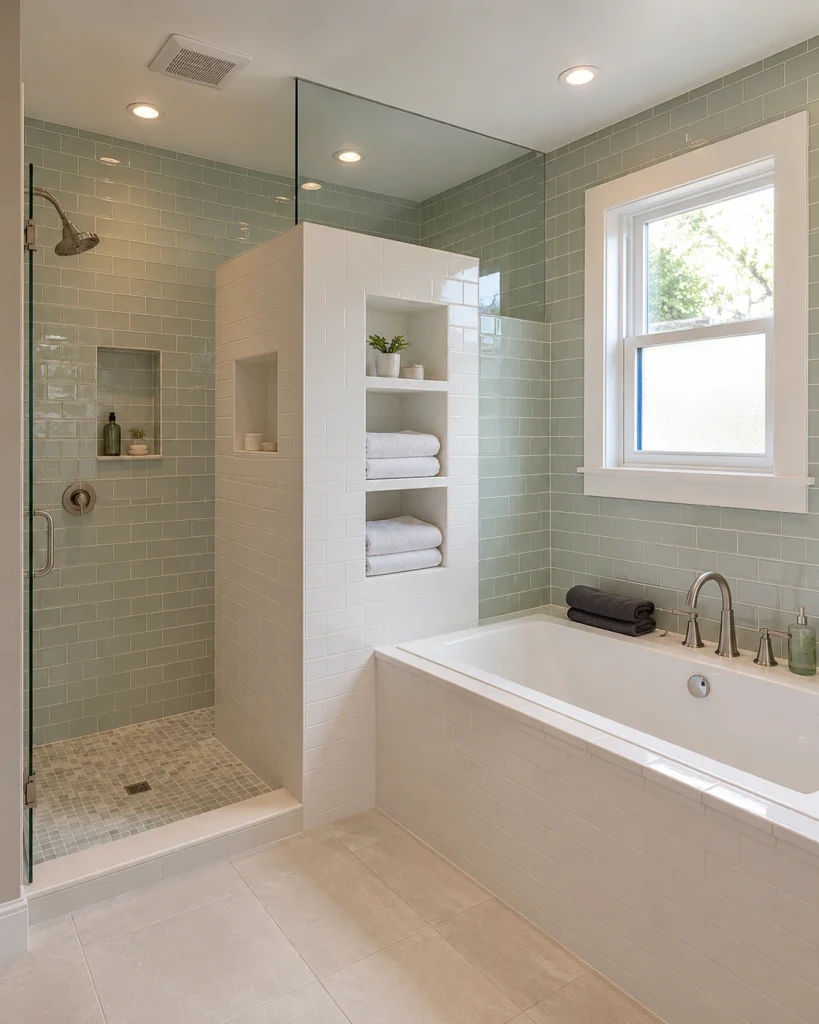
This design solves two problems at once: it limits splashing and creates storage without adding freestanding cabinets. It is especially useful in busy household bathrooms where bath and shower products need separate locations.
The wall should not make either area feel boxed in. Keeping it below ceiling height or combining it with glass above can preserve borrowed light.
A built-in partition costs more than a simple glass screen and must be fully waterproofed on exposed surfaces. Poorly planned niches can also weaken the wall or interfere with plumbing.
12. Plan an Accessibility-Conscious Shower and Tub Combination
Households planning for long-term use may want a low-threshold shower, wider entrance, secure grab bars and a bathtub selected for safer entry. The two fixtures should not create obstacles for someone using a mobility aid.
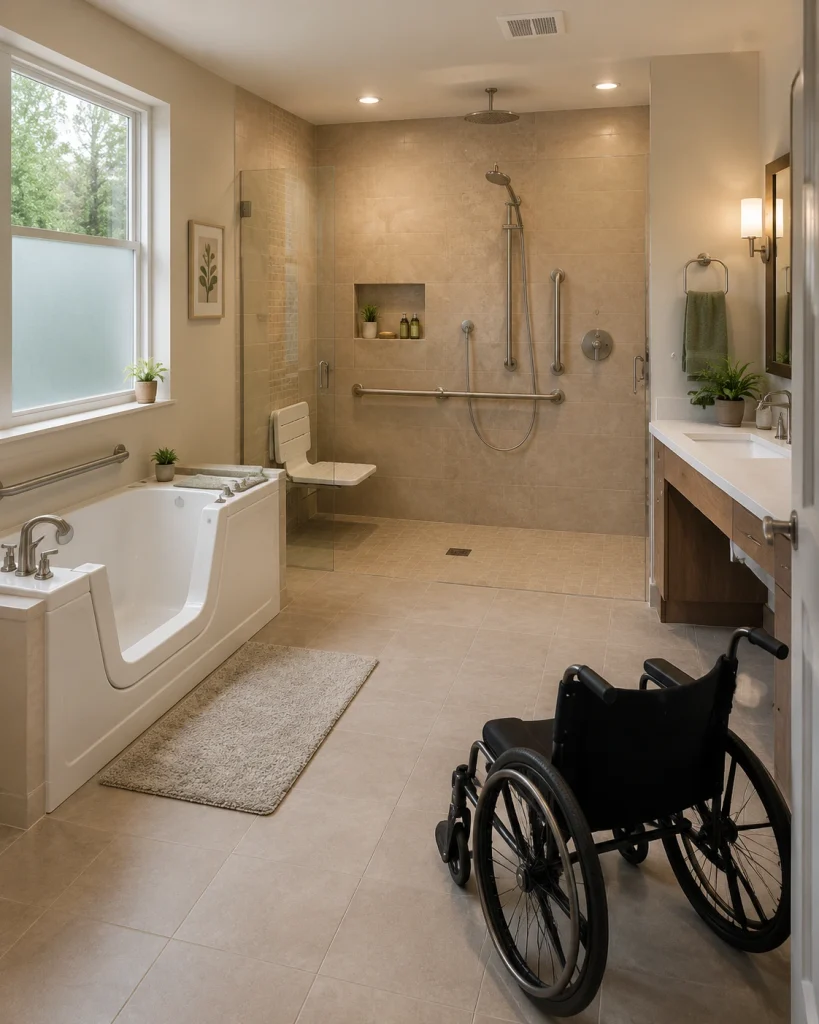
A curbless shower can improve access, but it requires precise floor slopes and drainage. Reinforcement should be installed behind walls where support bars may be needed, even when the bars are added later.
The bathtub may be a standard low-sided model, a walk-in tub or a compact tub with a stable transfer ledge. Each option has trade-offs. Walk-in tubs improve entry for some users but require the bather to remain seated while the tub fills and drains.
Accessibility needs vary considerably, so consult a qualified designer, occupational therapist or contractor when the bathroom must accommodate specific mobility requirements.
13. Enclose the Wet Room for Better Warmth
In cold climates, a fully open shower and tub area may feel uncomfortable because warm air escapes quickly. A glass enclosure helps retain heat and keeps drafts away from both fixtures.
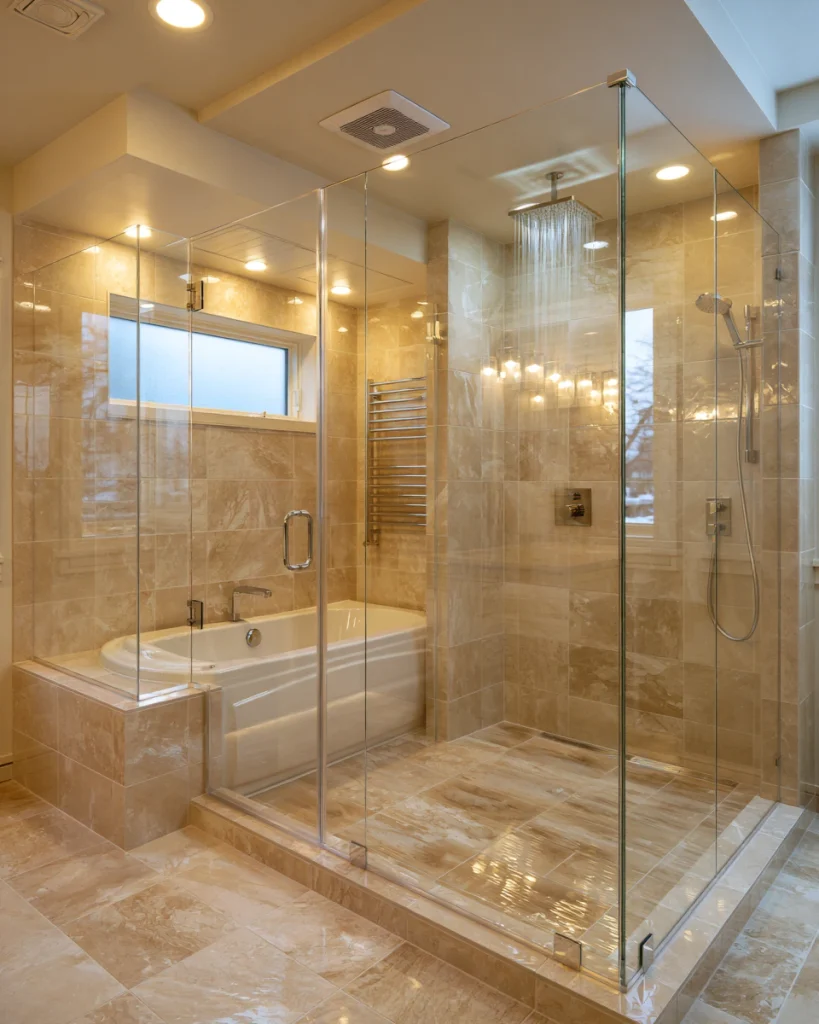
This glass-enclosed shower and tub design can include a door, fixed panels and a tiled ceiling or partial upper opening. Underfloor heating may improve comfort, but it should be treated as a supplementary feature rather than a solution for poor insulation.
Ventilation remains necessary even when warmth is a priority. A humidity-controlled exhaust fan can remove moisture after bathing without requiring the fan to run continuously.
The enclosure will require regular glass cleaning and may make the bathroom feel smaller. Use clear glass and consistent finishes to reduce visual heaviness.
14. Create a Natural Spa-Inspired Tub and Shower Zone
A spa-inspired layout combines simple materials, warm lighting and uncluttered storage rather than relying on expensive decorative features. A freestanding or built-in tub can sit beside a walk-in shower finished in stone-look porcelain, textured ceramic or neutral tile.
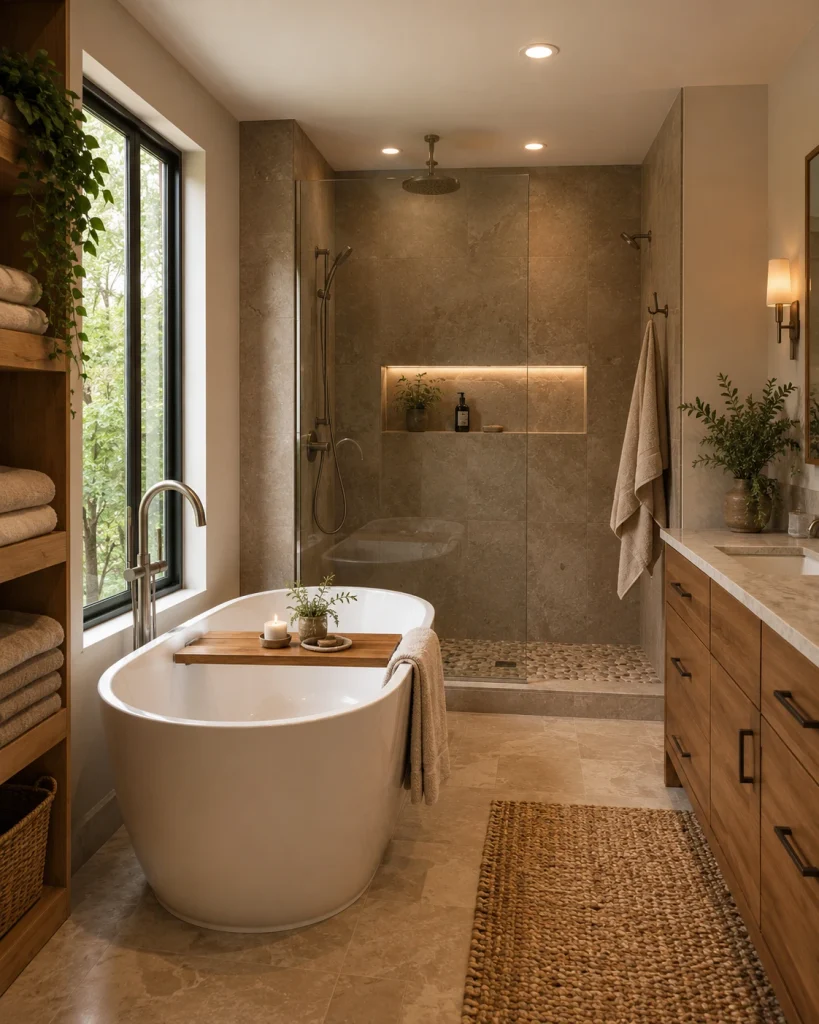
Wood-look accents can add warmth, but actual wood should be used carefully in constantly wet areas. Porcelain tile, moisture-resistant cabinetry and properly sealed composite materials are often easier to maintain.
Include layered lighting: bright task lighting for cleaning and grooming, plus softer lighting for evening use. A recessed shelf with a small moisture-tolerant plant can add a natural detail without crowding the floor.
The common mistake is choosing highly textured surfaces everywhere. Rough stone and deep grout lines may create the desired appearance but can demand more frequent cleaning.
15. Update an Existing Shower-and-Tub Layout Without Moving Plumbing
A complete wet-room conversion is not the only way to improve a bathroom. Keeping the tub and shower in their current locations can reduce cost while still creating a more unified design.
Replace mismatched surrounds with coordinated tile, update the shower glass, install consistent fixtures and improve lighting. A frameless fixed panel can make an older bathroom feel more open without changing the entire floor plan.
This budget-conscious approach works well for landlords, resale-focused renovations and homeowners who need functional improvements rather than structural changes. It also reduces the risk of discovering unexpected complications beneath the floor.
Its limitation is that the original layout may remain imperfect. Cosmetic improvements cannot correct a shower entrance that is too narrow or a tub that blocks circulation.
Space Planning and Approximate Measurements
Measurements should be treated as planning references rather than legal minimums. Always confirm fixture specifications, local building requirements and accessibility needs before construction.
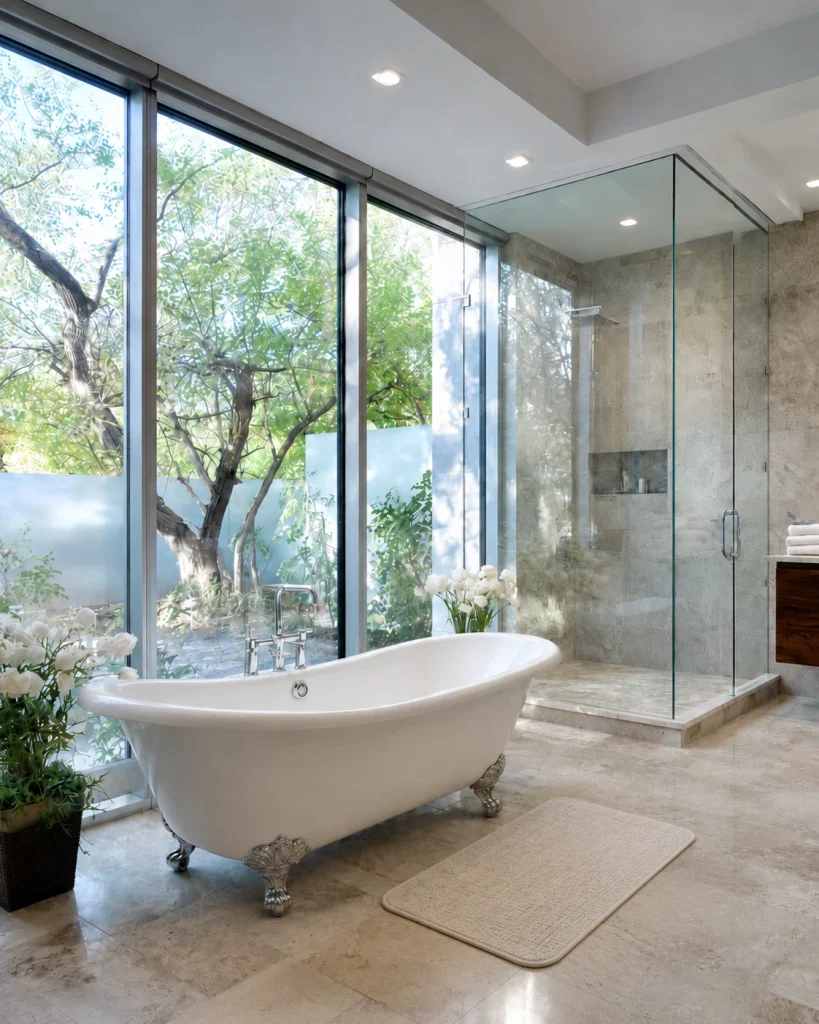
Many standard alcove tubs are approximately 60 inches long and 30 to 32 inches wide. Compact soaking tubs may be shorter, while freestanding models commonly require additional clearance for cleaning and plumbing access.
A walk-in shower often feels more comfortable when it provides roughly 36 inches or more in each direction, although the usable size depends on the door position, showerhead and household needs. A clear walking path of approximately 30 to 36 inches is a useful planning goal where the room allows.
Also consider:
- Clearance for glass doors and bathroom entry doors
- Space to reach shower controls without standing beneath cold water
- Access around freestanding tubs for cleaning
- Safe placement of bath mats and towel hooks
- Floor slope toward the drain
- Adequate ventilation above the enclosed wet zone
- Access panels for concealed plumbing where required
Create a scaled floor plan before selecting fixtures. Even a few inches can determine whether the bathroom feels comfortable or congested.
Budgeting for a Walk-In Shower With Tub Combination
Low-Cost Improvements
Keep the existing tub, shower and plumbing positions. Improve the room with new wall finishes, updated fixtures, a fixed glass panel, better storage and brighter lighting.
Replacing a shower curtain with glass can provide a strong visual improvement, but only when the existing tub and floor are properly waterproofed. New grout, sealant and coordinated accessories can also make the bathing zone feel more intentional.
Mid-Range Upgrades
A mid-range project may replace both fixtures while preserving the general layout. This level can include a compact soaking tub, tiled shower, recessed niches, improved ventilation and semi-frameless glass.
Spend first on waterproofing, drainage and reliable fixtures. Decorative tile can be limited to one feature wall while durable, affordable tile covers the larger surfaces.
Larger Investments
Full wet rooms, relocated plumbing, custom glass, curbless showers, structural reinforcement and premium tubs require greater investment. These changes may also involve floor reconstruction, electrical work and ventilation upgrades.
The most expensive layout is not automatically the most suitable. A well-proportioned side-by-side design may function better than a complicated wet room in a modestly sized bathroom.
Materials and Maintenance Considerations
Porcelain tile is a practical choice for shower-and-tub combinations because it is durable, water-resistant and available in many finishes. Ceramic tile may cost less and works well on walls, although some products are less suitable for heavily used floors.
Natural stone offers variation and texture but generally requires more sealing and careful cleaning. Stone-look porcelain provides a similar appearance with lower maintenance.
For floors, prioritize slip resistance over polish. Small mosaic tiles provide additional grout lines for traction but require more grout cleaning. Large-format tile has fewer joints but needs precise installation to maintain proper drainage slopes.
Clear glass keeps the room visually open but shows mineral deposits more readily. Frosted or fluted glass offers privacy and may disguise some spotting, though textured glass can take longer to clean.
Use moisture-resistant paint outside the tiled zone and ensure sealants remain intact around penetrations, tub edges and glass channels. Ventilation is essential in humid areas, particularly when the tub and shower share an enclosure.
Useful Bathroom Technology
A humidity-sensing exhaust fan can activate when moisture rises and shut off after the bathroom dries. This helps manage condensation without relying on household members to remember the fan.
Other useful additions include leak sensors near concealed plumbing, programmable floor heating in cold climates and dimmable lighting for different bathing routines. Electrical fixtures and controls must be suitable for bathroom locations and installed according to applicable requirements.
Common Mistakes to Avoid
Fitting Too Much Into the Room
A large tub, wide shower and oversized vanity may each fit on paper but leave no comfortable circulation. Prioritize the fixture used most often and select a smaller secondary fixture where necessary.
Treating Waterproofing as a Surface Finish
Tile and grout are not the complete waterproofing system. Use an appropriate membrane and have penetrations, corners and transitions detailed correctly by qualified installers.
Placing the Showerhead Toward the Opening
A poorly directed showerhead can send water beyond a partial glass panel. Review the spray direction, glass width and user position before finalizing plumbing locations.
Forgetting How the Tub Will Be Cleaned
Freestanding tubs placed too close to walls are difficult to clean behind. Leave workable access or choose a built-in model with sealed edges.
Ignoring Ventilation
An enclosed wet room can trap humidity, leading to persistent condensation and slower drying. Install adequate mechanical ventilation and maintain airflow beneath or around doors where appropriate.
Choosing Slippery Flooring
Highly polished tile may become hazardous when wet. Select a floor finish intended for wet areas and use a layout that drains without puddling.
Moving Plumbing Without a Clear Benefit
Relocating drains and supply lines can consume a large portion of the budget. Move plumbing only when it meaningfully improves access, circulation or fixture placement.
How to Choose the Right Walk-In Shower With Tub Combination
Begin with the room dimensions and existing plumbing. Identify which fixture your household uses most frequently, then give that fixture the most convenient position and comfortable amount of space.
For small bathrooms, consider an alcove tub with a separate corner shower or a compact soaking tub. Long rooms often suit a linear or side-by-side arrangement. Larger primary bathrooms can accommodate a freestanding tub inside a wet room or in front of the shower.
Next, consider maintenance. Built-in tubs, simple glass panels and porcelain tile generally require less effort than freestanding tubs, heavily textured stone and large glass enclosures.
Finally, match the project to your long-term plans. A family home may benefit from a practical tub and accessible shower, while an aging-in-place renovation should prioritize safe entry, reinforcement and circulation. Once the layout is selected, have the plumbing, waterproofing, drainage, electrical work and structural conditions reviewed by qualified professionals.
Frequently Asked Questions
Can a bathtub be installed inside a walk-in shower?
Yes. The tub can sit inside a fully waterproofed shower enclosure or wet room. The floor, walls, drain placement and areas around plumbing penetrations must be designed to manage regular water exposure.
Is a shower-and-tub wet room suitable for a small bathroom?
It can be, especially when a compact soaking tub and fixed glass panel are used. However, a fully open wet room may spread water across too much of a very small bathroom, so careful splash control is essential.
Does a walk-in shower with a tub need two drains?
Not always. The tub normally has its own waste connection, while the shower floor requires appropriate drainage. The exact plumbing arrangement depends on the layout, floor structure and local requirements.
Is a freestanding tub harder to clean than a built-in tub?
It can be. Dust and moisture may collect behind or beneath the tub, particularly when it is placed close to a wall. Built-in tubs have sealed edges but require grout and ledge maintenance.
What type of glass is best between a walk-in shower and bathtub?
Clear tempered safety glass creates the most open appearance. Frosted or fluted safety glass offers more privacy. Thickness, support and installation should follow the glass manufacturer’s specifications and local requirements.
Can I keep my existing bathtub and add a walk-in shower?
Possibly. The feasibility depends on available floor space, plumbing access, drainage and door clearance. Keeping the tub may reduce costs if the remaining layout can accommodate a comfortable shower.
How do I keep an enclosed shower-and-tub area warm without trapping moisture?
Use an appropriately enclosed glass design, adequate bathroom heating and effective mechanical ventilation. A humidity-sensing fan can help remove moisture after bathing.
Is a walk-in shower with a tub good for resale?
It can appeal to buyers who want both bathing options, especially in a primary or family bathroom. Function, workmanship and room proportions are generally more important than choosing the most elaborate layout.
Conclusion
The best walk-in shower with tub combination ideas balance bathing preferences with the actual size, plumbing and maintenance demands of the room. Compact bathrooms often work best with an alcove or short soaking tub, while larger spaces can support shared wet rooms, freestanding tubs and glass-enclosed layouts.
Before choosing finishes, confirm circulation, drainage, cleaning access and ventilation. A simpler arrangement that preserves existing plumbing may provide better value than a complex redesign that crowds the room.
The most useful next step is to draw the bathroom to scale and compare two or three fixture arrangements. From there, you can coordinate the project with related bathroom storage ideas so towels and toiletries remain accessible without cluttering the wet zone.