ESP8266 Nodemcu Webserver using Arduino IDE (Example of Controlling LED over WiFi)
One of the major applications of the ESP8266 is in creation of a web server to manage projects over WiFi and in this tutorial, am going to show you how this can be achieved with the help of the Arduino IDE.
Before proceeding you can make reference to my other tutorial introducing the ESP8266 NodeMCU and how to prepare Arduino IDE for programming NodeMCU.
What is a Webserver?
A web server is a combination of hardware and software used for storing content for websites and delivering that content to clients that request for it. This content can be text, images, video or application data.
Web Server and Client Communication.
The transfer of data between a Web server and client is done using an internet communication protocol known as HTTP (HyperText Transfer Protocol). The content of most web pages is encoded in Hypertext Markup Language (HTML) and can be either static for example text and images or dynamic.
The web server in our case is the ESP8266 NodeMCU and the web client can be any web browser or mobile application.
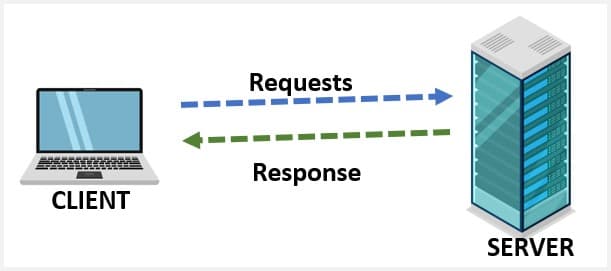
To access files from the webserver from a web client, you need to send an HTTP GET request to the web server. The server also responds through HTTP protocol and sends the files to the client. These files are mostly HTML documents. If the requested files are not available on the web server or if the server is down due to some technical reasons, you will see a message of error 404 on the web browser.
ESP8266 Operating Modes
ESP8266 can act as a web server either when connected to an existing WiFi network or as a network of its own allowing other devices to connect directly to it to access web pages. This means ESP8266 can work as a web server in three modes; Station mode, Soft Access Point mode and a combination of the previous two modes.
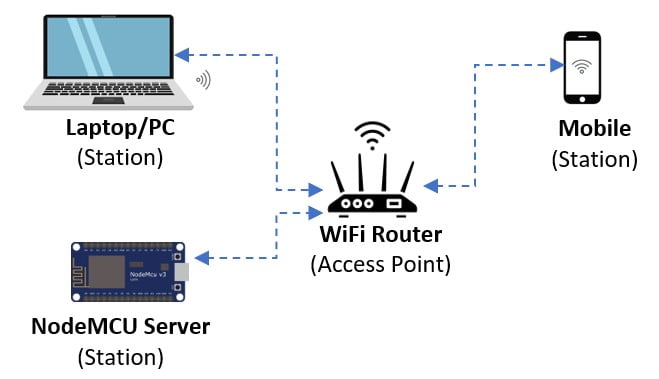
Station (STA) Mode
In this mode, the ESP8266 is connected to a pre-existing Wi-Fi network like a wireless router. The IP address used for the ESP8266 is assigned by the router and other connecting devices have to be connected to the same network as the ESP8266.
Soft Access Point (AP) Mode
In this mode the ESP8266 creates its own WiFi network, allowing other stations to connect to it. The created network has its own SSID and IP address that is used to deliver web pages to all devices connected to this network.
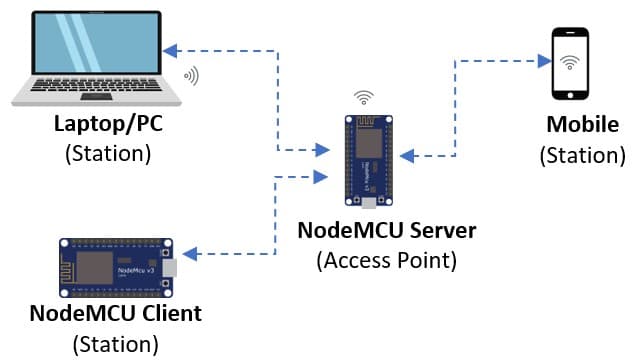
It is called a Soft Access Point because it lacks the hardware infrastructure of a common AP for example it does not have access to a wired network like a WiFi router. It’s like a Virtual AP and this impacts performance.
The main limitation of this mode of operation is the number of connections it can manage which is five and if your application has a heavy data flow, I recommend that you limit it to 4 connections.
Also, the created network is not connected to the internet therefore it is used in applications on local networks with a few devices.
Controlling LEDs over WiFi using ESP8266 NodeMCU Webserver in STA mode.
I will now demonstrate a simple application of the ESP8266 NodeMCU as a web server where I’ll be turning an LED on and off via a webpage using a mobile phone or any other device that can access internet.
Since am using ESP8266 in Station (STA) mode, the ESP8266 module and other devices accessing the web server created must use the same Wi-Fi network.
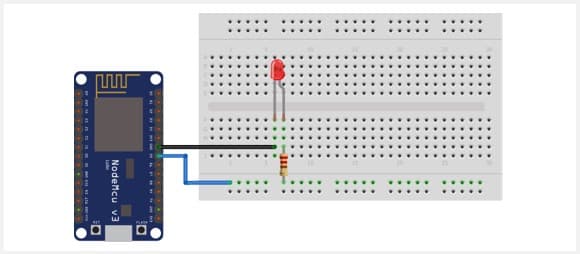
Connecting LED to ESP8266 NodeMCU.
This setup is very simple and only involves connecting the LED to the NodeMCU pin D2 which is GPIO4.
Code for ESP8266 NodeMCU web server to control LEDs.
The code is written using Arduino IDE therefore before proceeding make sure you know how to set up Arduino IDE to use ESP8266 NodeMCU.
#include<ESP8266WiFi.h>
#define LED D2   //LED at GPIO4 D2
const char* ssid = "YOUR WIFI ID";
const char* password = "WiFi password";
unsigned char status_led=0;
WiFiServer server(80);
void setup() {
Serial.begin(115200);
pinMode(LED, OUTPUT);
digitalWrite(LED, LOW);
// Connect to WiFi network
Serial.println();
Serial.println();
Serial.print("Connecting to ");
Serial.println(ssid);
WiFi.begin(ssid, password);
while (WiFi.status() != WL_CONNECTED) {
delay(500);
Serial.print(".");
}
Serial.println("");
Serial.println("WiFi connected");
// Start the server
server.begin();
Serial.println("Server started at...");
Serial.println(WiFi.localIP());
}
void loop() {
// Check if a client has connected
WiFiClient client = server.available();
if (!client) {
return;
}
// Wait until the client sends some data
Serial.println("new client");
while (! client.available())
{
delay (1);
}
// Read the first line of the request
String req = client.readStringUntil('\r');
Serial.println(req);
client.flush();
// Match the request
if (req.indexOf("/ledoff") != -1) {
status_led=0;
digitalWrite(LED, LOW);
Serial.println("LED OFF");
}
else if(req.indexOf("/ledon") != -1)
{
status_led=1;
digitalWrite(LED,HIGH);
Serial.println("LED ON");
}
// Return the response
client.println("HTTP/1.1 200 OK");
client.println("Content-Type: text/html");
client.println("Connection: close");
client.println("");
// Display the HTML web page
client.println("<!DOCTYPE HTML>");
client.println("<HTML>");
client.println("<head><meta name=\"viewport\" content=\"width=device-width, initial-scale=1\">");
client.println("<link rel=\"icon\" href=\"data:,\">");
// CSS to style the on/off buttons
client.println("<style>html { font-family: Helvetica; display: inline-block; margin: 0px auto; text-align: center;}");
client.println(".button { background-color: #FF0000; border: none; color: white; padding: 16px 40px;");
client.println("text-decoration: none; font-size: 30px; margin: 2px; cursor: pointer;}");
client.println(".button2 {background-color: #008000; border: none; color: white; padding: 16px 40px;");
client.println("text-decoration: none; font-size: 30px; margin: 2px; cursor: pointer;}");
// Web Page Heading
client.println("<h1>LED CONTROL<h1>");
// Display and ON/OFF buttons
client.println("<p><a href="\"/ledon\"\""> <button class="\"button\"">ON</button></a>");
client.println("<p><a href="\"/ledoff\"\""><button class="\"button2\"">
client.println("</body></html>");
delay(1);
Serial.println("Client disonnected");
Serial.println("");
}
Code description
First, you need to include the ESP8266WiFi.h Library which includes the necessary functions for connecting the ESP8266 NodeMCU with a WiFi network. You can be download this library from here.
#include<ESP8266WiFi.h>
#define LED D2   //LED at GPIO4 D2
const char* ssid = "YOUR WIFI ID";
const char* password = "WiFi password";
unsigned char status_led=0;
WiFiServer server(80);
Then declare the GPIO pins to connect LEDs. I have used GPIO4.
Add the SSID and Password of your Wi-Fi Network.
I have also declared an auxiliary variable to store the current state of the output pin using unsigned char status_led=0;
Since am creating an HTTP Server, I’ll use Port 80 which is the default port for HTTP servers. It is the port from which a computer sends and receives Web client-based communication and messages from a Web server and is used to send and receive HTML pages or data.
In the setup() function, begin serial communication with baud rate of 115200 and configure the GPIO4 pin as OUTPUT and set the output pin to LOW.
Serial.begin(115200);
pinMode(LED, OUTPUT);
digitalWrite(LED, LOW);
The next code snippet is for starting the WiFi connection using the network credentials given earlier and if the connection is successful, the web server connection is made and a message “Server started at…” followed by the IP address of the ESP8266 is printed on the serial monitor. This IP address acts as a URL used in a client’s web browser to access the Web Server.
Serial.println();
Serial.println();
Serial.print("Connecting to ");
Serial.println(ssid);
WiFi.begin(ssid, password);
while (WiFi.status() != WL_CONNECTED) {
delay(500);
Serial.print(".");
}
Serial.println("");
Serial.println("WiFi connected");

server.begin();
Serial.println("Server started at...");
Serial.println(WiFi.localIP());
In the loop() function, the first code snippet is for having the server check for available client requests and if there is none, it keeps on checking. If there is a request from a client then the server will proceed with a response to the request.
WiFiClient client = server.available();
if (!client) {
return;
}
// Wait until the client sends some data
Serial.println("new client");
while (! client.available())
{
delay (1);
}
The next part of the code is for determining how the server handles the client’ request. I have used the variable ‘req’ to store the HTTP request.
In this application, if the LED is OFF and you click the button, the client sends a request to turn ON the LED and if the LED is OFF then a request is sent to turn it ON.
String req = client.readStringUntil('\r');
Serial.println(req);
client.flush();

if (req.indexOf("/ledoff") != -1) {
status_led=0;
digitalWrite(LED, LOW);
Serial.println("LED OFF");
}
else if(req.indexOf("/ledon") != -1)
{
status_led=1;
digitalWrite(LED,HIGH);
Serial.println("LED ON");
}
I have used two URLs to differentiate between the two requests, that is, ‘/ledoff’ and ‘/ledon’. Each of these URLs will be attached to a button so that when that button is clicked, the linked URL is sent to the server based on the status of the LED.
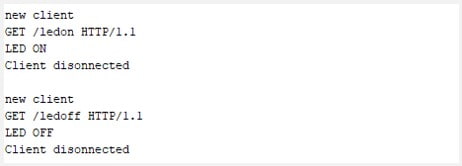
The request sent by the client to the server will be in the format GET /ledon HTTP/1.1 or GET /ledoff HTTP/1.1 and you can observe these URLs in the serial monitor.
The server then resolves this request from the client and after performing the required action, it sends the necessary HTTP response to the client.
HTTP headers always start with a response code ( HTTP/1.1 200 OK) and a content-type so the client knows what’s coming, then a blank line:
client.println( ) method is used to send a webpage to the client.
client.println("HTTP/1.1 200 OK");
client.println("Content-Type: text/html");
client.println("Connection: close");
client.println("");
Displaying the Web page.
The server response is in form of a web page which is essentially an HTML document and the next snipppet of code is for rendering the webpage onto a web browser with the corresponding HTML elements and CSS styling for building our webpage.
client.println("<!DOCTYPE HTML>");
client.println("<HTML>");
client.println("<head><meta name=\"viewport\" content=\"width=device-width, inital-scale=1\">");
client.println("<link rel=\"icon\" href=\"data:,\">");
// CSS to style the on/off buttons
client.println("<style>html { font-family: Helvetica; display: inline-block; margin: 0px auto; text-align: center;}");
client.println(".button { background-color: #FF0000; border: none; color: white; padding: 16px 40px;");
client.println("text-decoration: none; font-size: 30px; margin: 2px; cursor: pointer;}");
client.println(".button2 {background-color: #008000; border: none; color: white; padding: 16px 40px;");
client.println("text-decoration: none; font-size: 30px; margin: 2px; cursor: pointer;}");
// Web Page Heading
client.println("<h1>LED CONTROL<h1>");
// Display and ON/OFF buttons
client.println("<p><a href="\"/ledon\"\""> <button class="\"button\"">ON</button></a>");
client.println("<p><a href="\"/ledoff\"\""><button class="\"button2\"">
client.println("</body></html>");
The connection with the client is finally closed using client.stop();
When this code is uploaded to the ESP8266 NodeMCU board and you open the Arduino IDE serial monitor, the IP address of the available WiFi network will be shown. For example, in my case the address is 192.168.1.11 as shown below;

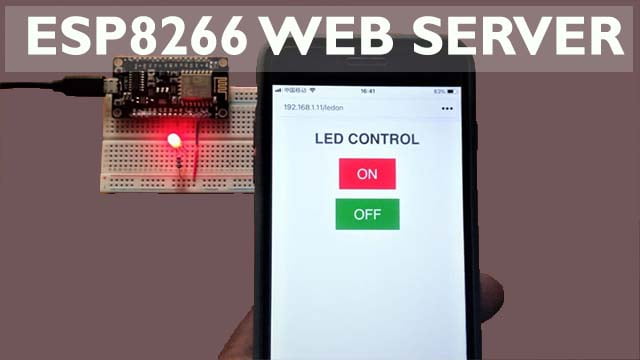
You can now be able to control the LED by entering this IP address in a browser using any device that can access internet using the WiFi network of the NodeMCU for example your phone or computer. The web page will appear as shown below.
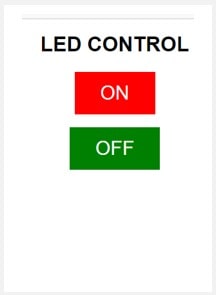
The LED can be is then turned on and off from the webpage above. Whenever a given button is pressed the corresponding status of the LED is shown on the serial monitor.
The concept of ESP8266 being used as a web server is used in a number of applications and I have done other projects based on this idea which you can also check out for further reference using the links below.
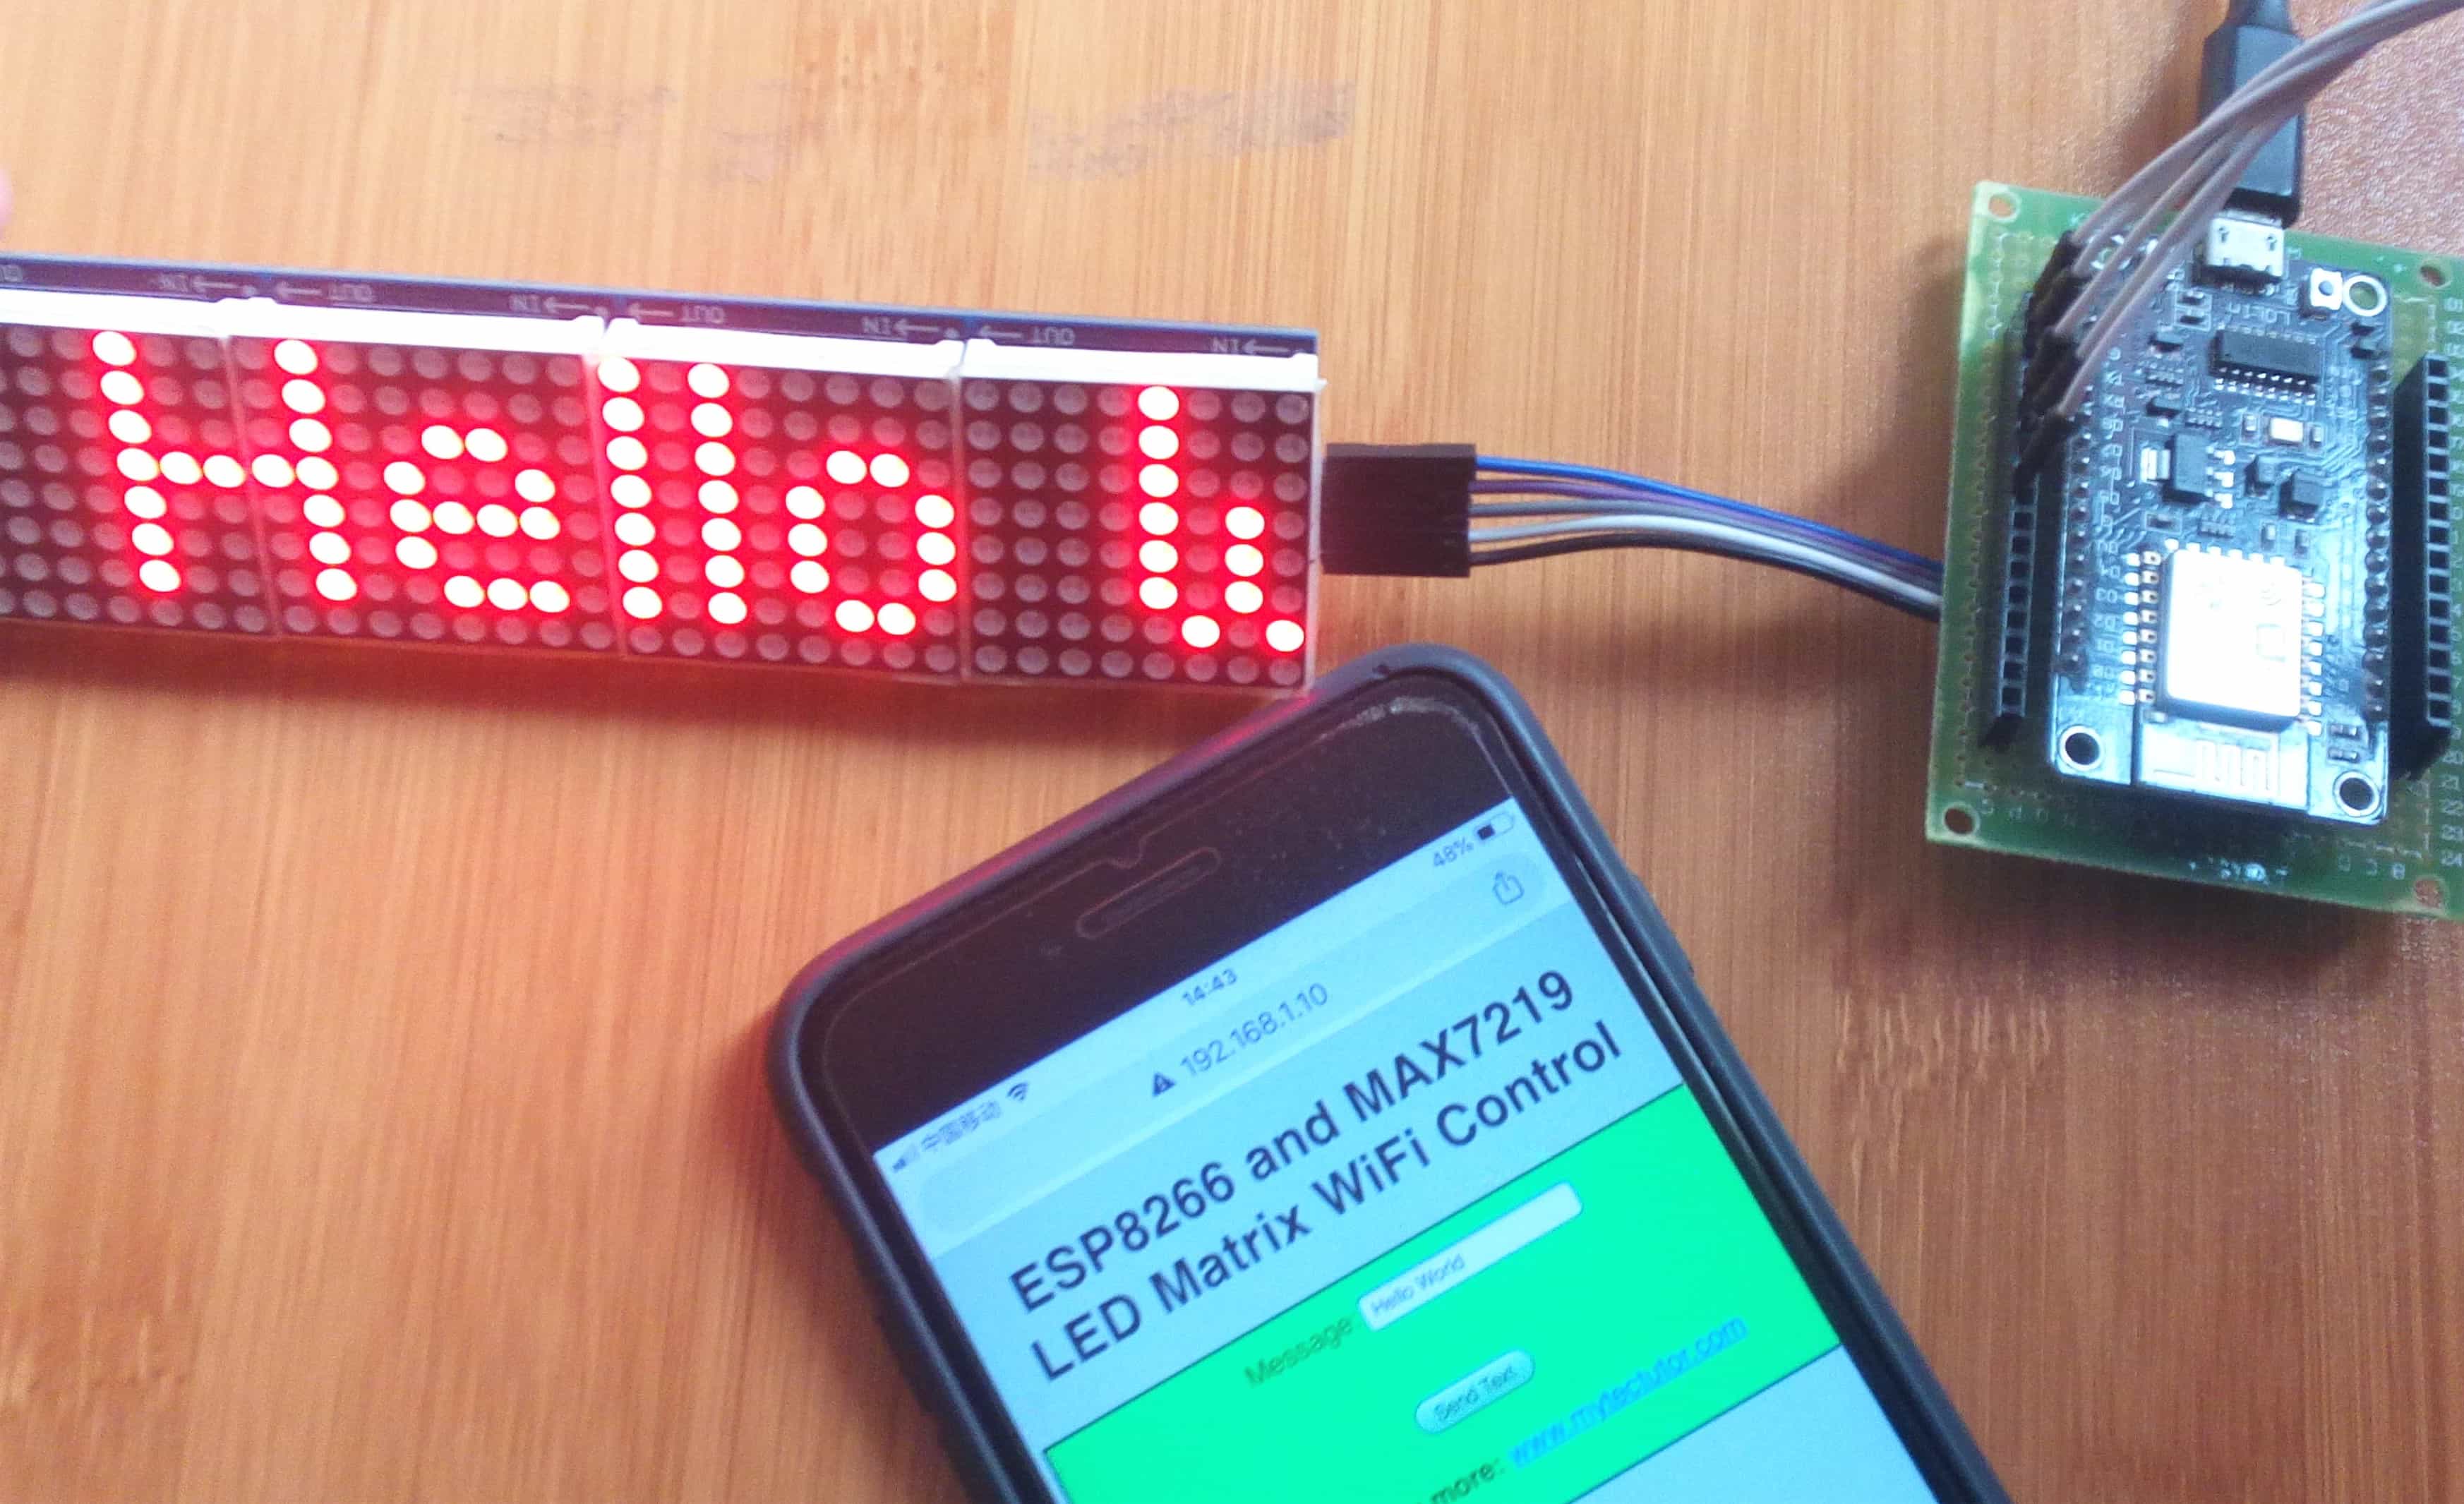
- How to control MAX7219 LED Matrix using ESP8266 NodeMCU over Wi-Fi.
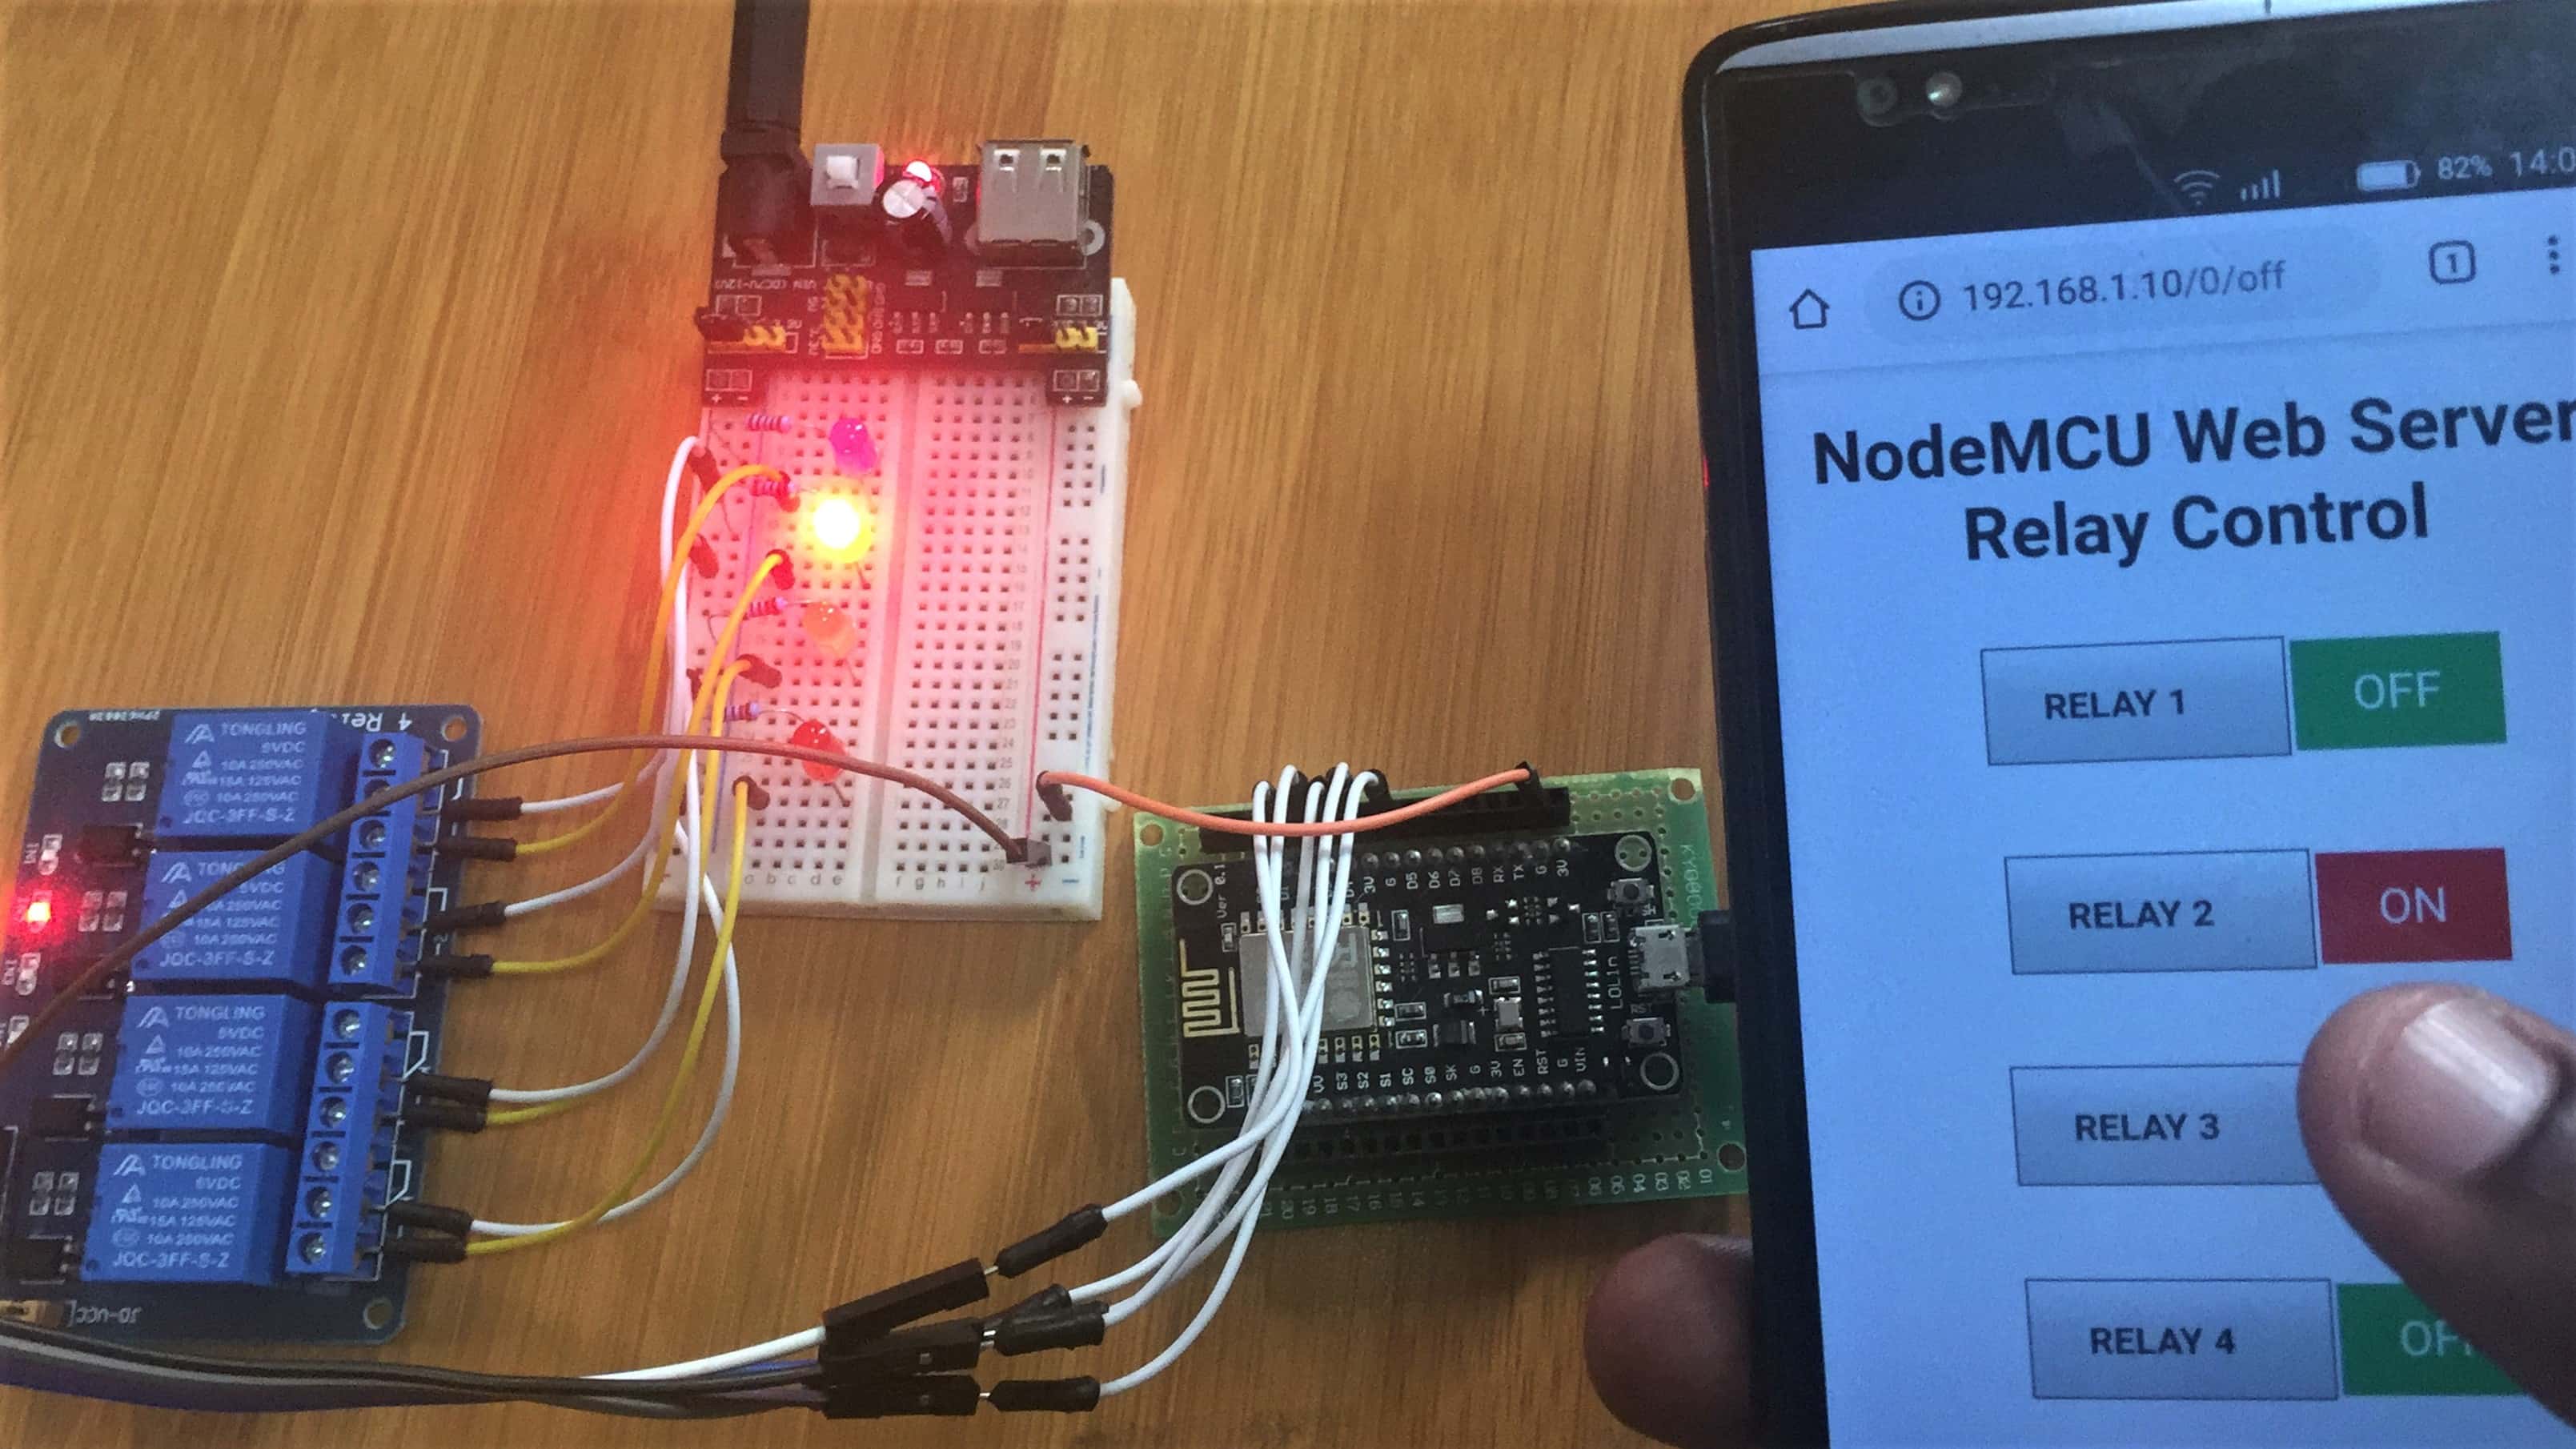
- Controlling a 4 Channel 5V Relay over Wi-Fi using ESP8266 NodeMCU.