How to Install WordPress and XAMPP on local computer.(Step-by-step guide)
Developers and website owners are encouraged to have local working models on their computers for websites they are creating or those that are already running on the internet. Any changes made on a local website will only be visible on that specific computer.
Installing WordPress locally on your computer enables you to test out the various features of themes and plugins before implementing these changes on your live website. This prevents the live website from breaking down in case some changes are not appropriate.
Since WordPress includes PHP and Database management, to run a WordPress website on a local computer you need to install a local web server.
Examples of local servers include WAMP, LAMP, MAMP and XAMPP. WAMP is used for Windows, LAMP for Linux, MAMP for Mac and XAMPP can be used for any operating system and is the one I’ll be installing for step-by-step guide.
What is XAMPP?
XAMPP a free software package used to set up a local web server environment on your computer. Actually, XAMPP is an acronym for;
- X – Cross-platform, meaning it runs on computers using any operating system
- A – Apache remote HTTP server used for exchange of files, images, or documents among clients.
- M – MySQL is a relational database management system (RDBMS) using Structured Query Language (SQL). In WordPress it is used for management of databases.
- P – PHP which is open-source server-side scripting language used to create dynamic websites and works well with MYSQL.
- P – Perl is a high level, general-purpose, interpreted dynamic programming language used in a number of applications including web development.
XAMPP also includes other useful tools such as the phpMyAdmin database administration tool, FileZilla FTP server, Mercury mail server and JSP server Tomcat.
Installing XAMPP
First download the executable file for XAMPP by going to apachefriends.org and there you can download XAMPP ‘.exe’ file for Windows, Linux or OS X depending on the version of operating system you are using.
Run the executable file after downloading and XAMPP will be installed on your computer. In this case I’ll go through the installation on a Windows 10 machine.
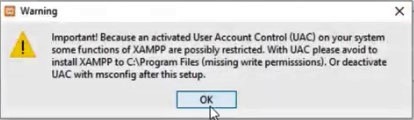
The first warning message will be informing you not to install XAMPP in the same location as other program files on your computer. Press ‘Ok’ and continue.
The screenshots below show a step-by-step guide through the rest of the installation process.
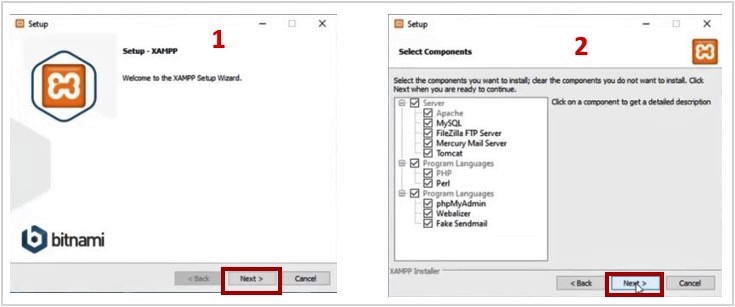
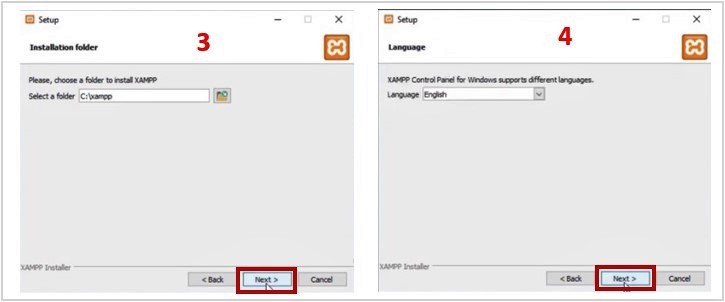
Select the folder where to install XAMPP and as pointed out earlier this folder should be different from where other program files are stored. Also choose the language.
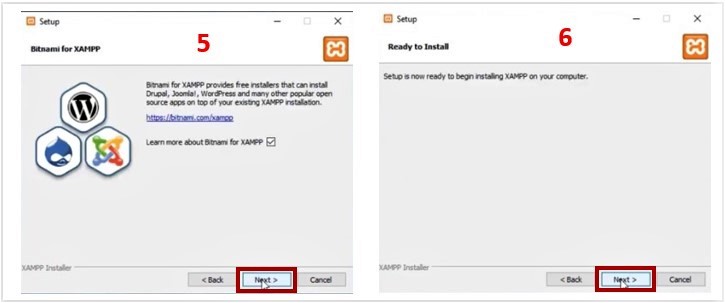
The installation process takes sometime depending on the speed of your internet connection. If your Firewall is active, you will get a security alert blocking the Apache HTTP Server which you have to ‘Allow Access’ and proceed with the installation.

After installation is complete, click Finish and the XAMPP control panel will open if the option for starting the Control Panel is checked as shown in step 9 below.
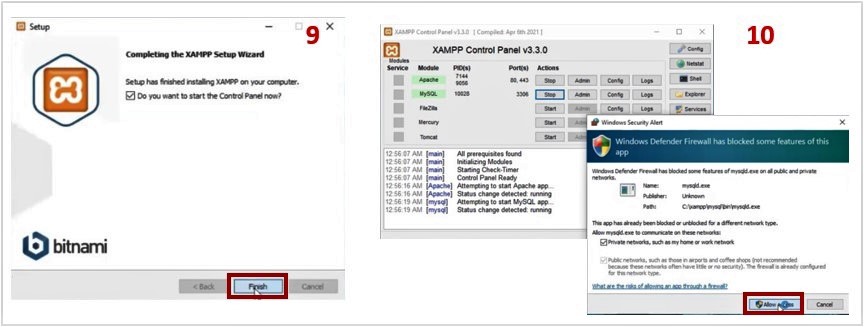
Step 10 shows the security alert that you get from the Firewall when you start MySQL module in the XAMPP Control Panel. This will always come up whenever you start any of the modules for the first time after installation and in all instances, you need to ‘Allow Access’ and continue.
Creating a Database for WordPress.
Before installing WordPress locally on your computer, you need to create a MySQL database using XAMPP.
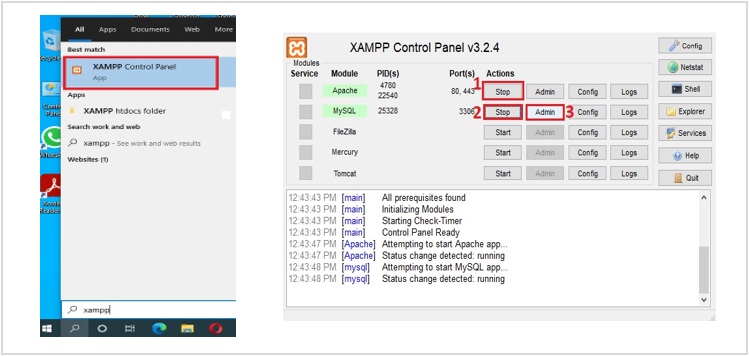
First you need to start the Apache and MySQL modules in XAMPP as shown below. In this case I have accessed the XAMPP Control Panel from the Windows search.
Then open the phpMyAdmin tool that is used to handle a number of MySQL operations over the web including creation of databases.
To open this tool, click on the ‘Admin’ button after staring the MySQL module in XAMPP Control Panel as shown below.
This will open the phpMyAdmin tool window below. You can also access this tool using the URL http://localhost/phpmyadmin/ after starting the Apache and MySQL modules in XAMPP.
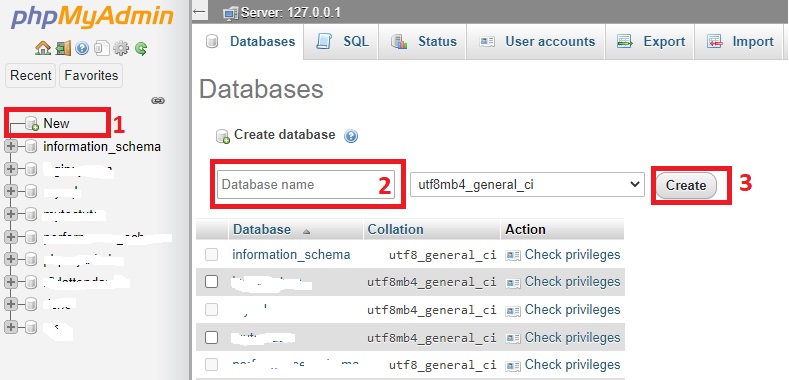
To create a database, click on ‘New’ then enter the database name and press ‘Create’ as illustrated below.
Downloading WordPress.
WordPress is currently the mostly widely used Content Management System (CMS) worldwide and is used to run a number of websites ranging from large corporations’ sites to individual blogs.
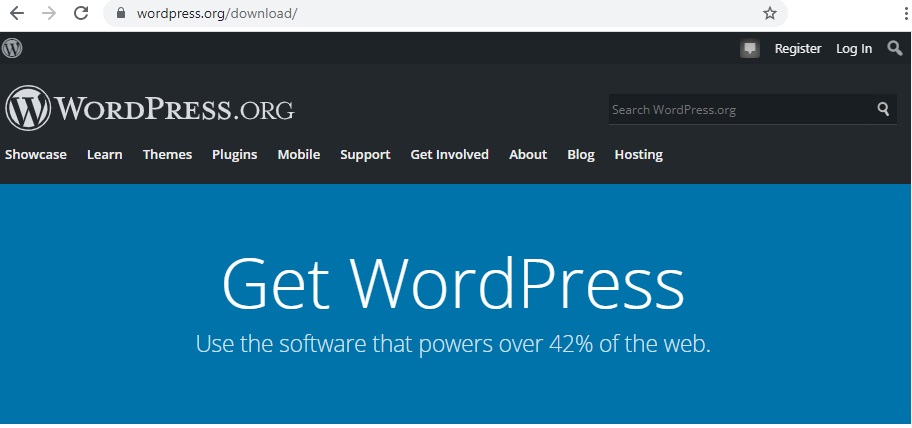
You should download WordPress from wordpress.org and in order to avoid confusion, make sure the web page looks like the one shown below.
When you scroll down on this page you will find where to download the current version of WordPress which will be saved as a zip folder.

To be able to use XAMPP as a local host for WordPress, the downloaded WordPress files have to be included in XAMPP server.
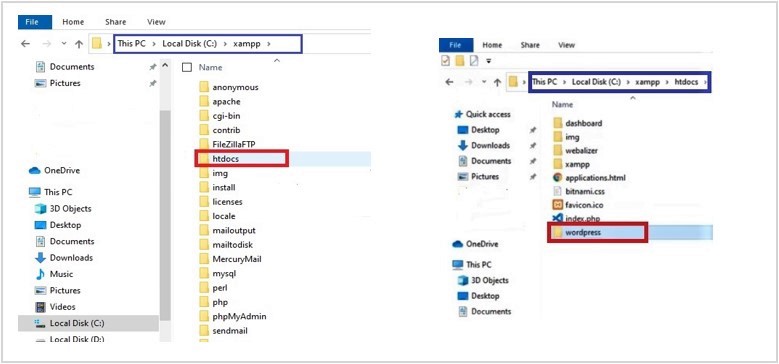
Go to the folder where you installed XAMPP, in my case it is C://xampp and inside that folder locate the htdocs subfolder.
Unzip the WordPress folder downloaded earlier and cut and paste this extracted folder into htdocs folder as illustrated below.
Installing WordPress locally.
To begin installing WordPress open any browser and enter the URL http://localhost/wordpress/. Make sure the Apache and MySQL modules are running before accessing this URL.
I’ll use the screenshots below for a step-by-step guide on how to proceed with installation.
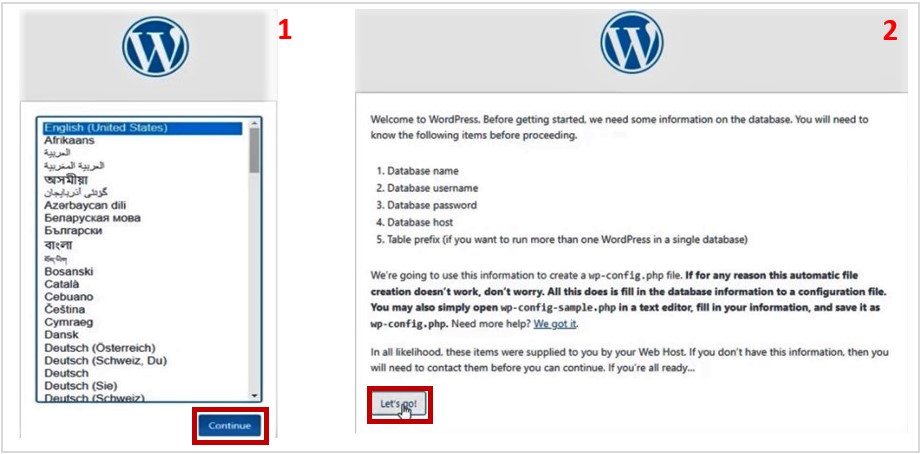
In the next step enter the details of the database that was created earlier using phpMyAdmin especially the Database Name.
For the Username enter “root” and since no password was created for the database just leave this space empty.

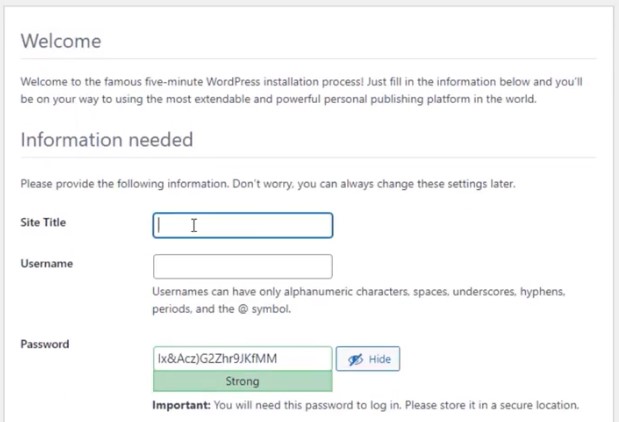
Next fill in the data that will later be used to sign in into the WordPress dashboard. This includes the site title, username, password and email. Then press Install WordPress and wait for the installation to complete.
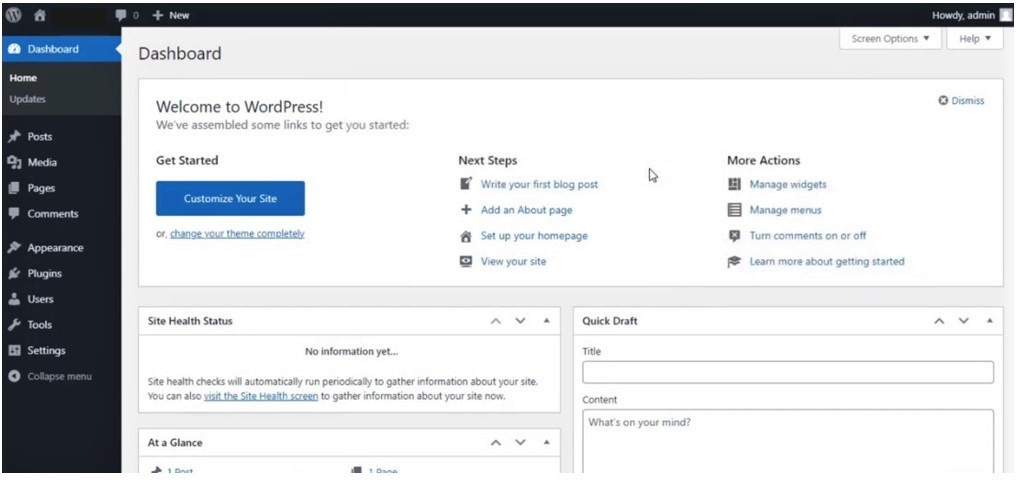
When the installation is done you can then login to WordPress.
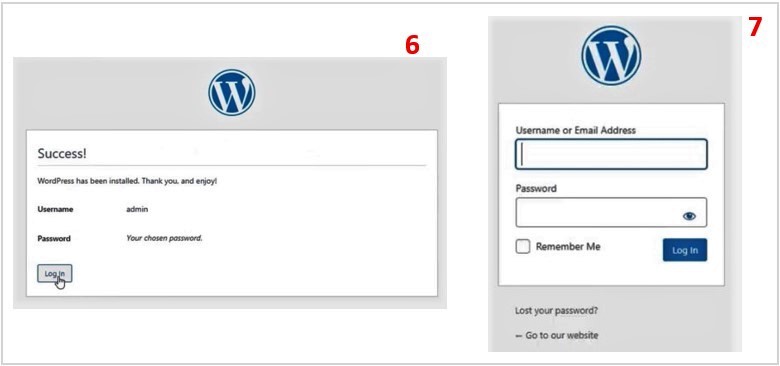
Then you can be able to access the WordPress dashboard as shown below.