A potentiometer is among the commonest devices used in electronics projects. It is used where there is need for varying resistance in order to control current and voltage. The easiest example is for adjusting volume in a radio by turning a knob clockwise or counter clockwise. Behind the knob is a potentiometer for varying the resistance to set the volume.
How a potentiometer works.
Potentiometers are nothing but variable resistors that can provide a variable resistance by simply varying its knob. Potentiometers come in different forms but they are generally classified basing on their Resistance (R-ohms) and Power (P-Watts) ratings.
The value or resistance decides how much opposition it provides to the flow of current. The greater the resistor value the smaller the current will flow. Some standard values for a potentiometer are 500Ω, 1K, 2K, 5K, 10K, 22K, 47K, 50K, 100K, 220K, 470K, 500K, 1 M.
The Power (wattage) rating determines how much current the potentiometer can allow. The higher the power rating the bigger the resistor gets and it can also stand more current. In our case the potentiometers have a power rating of 0.3W and hence can be used only for low current circuits.
Potentiometer hardware overview
Unlike the usual resistors that have two terminals, a potentiometer has three terminals which are arranged as shown below.

Terminals 1 and 3 are connected to a resistive material whose total resistance is equal to the rated resistance of the potentiometer for example 10kΩ. If you measure the resistance across terminals 1 and 3 you get the total resistance of the potentiometer.
Terminal 2 is connected to a movable shaft attached to a wiper that moves across the resistive material whenever the potentiometer knob is rotated.
If we have a 10kΩ potentiometer and the wiper is placed exactly at 30% from terminal 1, then if we measure the resistance between 1 and 2 we will get 30% of 10kΩ which is 3.0kΩ and measuring across terminal 2 and 3 will give a resistance of 7.0kΩ.
Since a potentiometer is a resistor with one variable end, the terminals 1 and 2 or terminals 2 and 3 can be used to obtain the variable resistance and the knob can be used to vary the resistance and set the required value.
Connecting the potentiometer to Arduino.
A potentiometer is connected to one of the analog pins of the Arduino so that we can be able to take analog voltage measurements. For the Arduino UNO these pins are marked A0 to A5.
Arduino boards contain a 10-bit analog to digital converter that it will map input analog voltages between 0 and the operating voltage (5V or 3.3V) into integer values between 0 and 1023 with 0 representing 0 volts, and 1023 representing 5 volts.

When you rotate the knob of the potentiometer, resistance decreases and the current starts flowing. As the current increases the voltage increases and there is a change in voltage which is detected by the analog input A0 pin of the Arduino.
Code for interfacing potentiometer with Arduino.
The analogRead() function is used to read the analog voltage value of the potentiometer which you can then scale to the value you want to write based on the reading from the potentiometer. In my case I write the values of the voltage, resistance and percentage turned by the knob. These values are then be displayed on the serial monitor.
float RT = 10000;// the rated potentiometer value 10k
float R;// the unknown resistance value R

int potPin = A0; // potentiometer is connected to analog 0 pin
int potValue; // variable used to store the value coming from the sensor
int percent; // variable used to store the percentage value

void setup() {
Serial.begin(9600); // initialize the serial communication
}
void loop() {

potValue = analogRead(potPin); // get a reading from the potentiometer, assign the name potValue
percent = map(potValue, 0, 1023, 0, 100); // convert reading to a percentage
float voltage = potValue * (5.0 / 1023.0);  //
convert to voltage
R = ( voltage * RT)/5.0;   // get value of unknown resistance

Serial.print("Analog Reading: "); // print out the analog value from A0
Serial.print(potValue);
Serial.print(", Voltage =");// prints the text "Voltage ="
Serial.print(voltage);
Serial.print("v, Resistance="); //prints the text "Resistance ="
Serial.print(R);
Serial.print(" ohms");
Serial.print(", Percentage: "); // print out the percentage
Serial.print(percent);
Serial.println("%");
delay(1000); // wait a second
}
From the above code you can observe that pin A0 has not been declared in the setup part of the code. This is because analog pins are automatically set as input even if they are not declared.
When this code is uploaded to the Arduino and the potentiometer knob is rotated clockwise or counter clockwise, the analog reading, the voltage, resistance and percentage of rotation is displayed on the serial monitor as shown below.

The above setup can be used to test a potentiometer before using it in any other project. If the values on the serial monitor do not change when the knob is rotated then the potentiometer may be faulty.
How to control LEDs using a potentiometer.
After learning how a potentiometer is interfaced with Arduino and how it can be used to adjust various parameters through varying the voltage and resistance, we can be able to apply it in a number of applications.
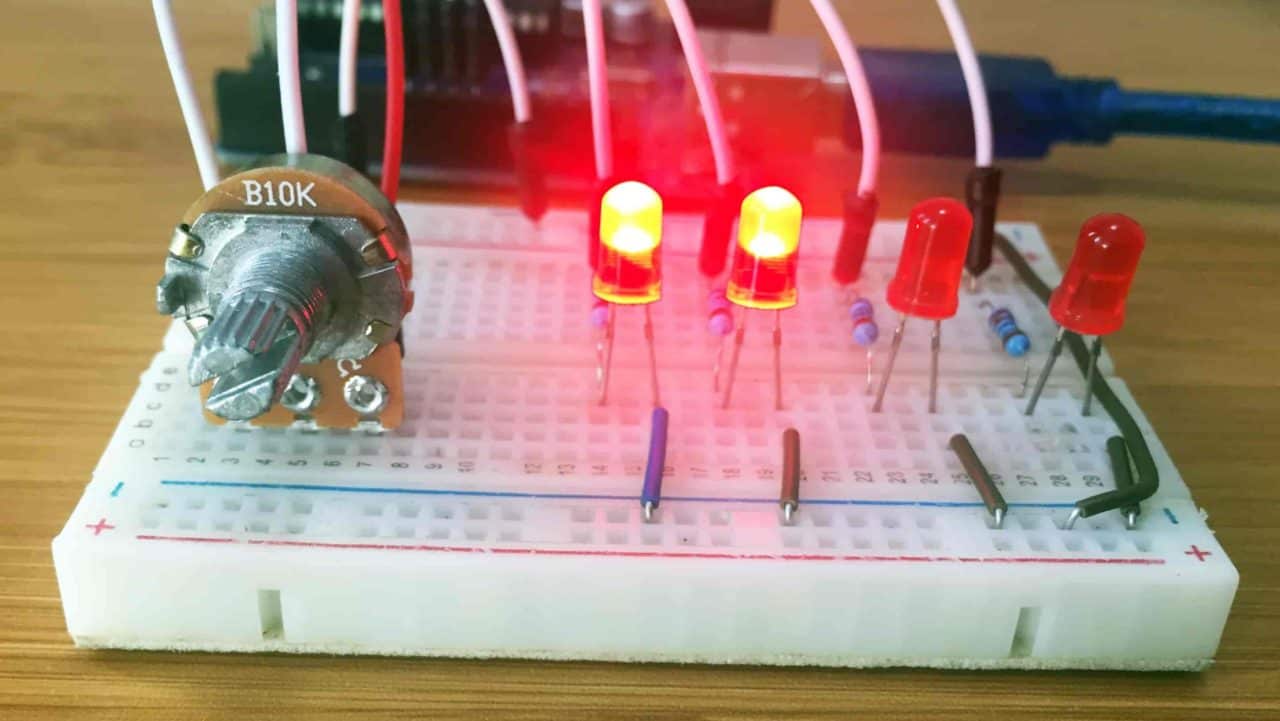
I will now show you how we can control the sequential lighting of LEDs using a potentiometer. The setup will be as shown below.

Code for controlling LEDs using a potentiometer.
The map() function is used to convert the analog readings got from the potentiometer into percentages. Then these percentages are used to create conditions for lighting of the LEDs.
int potPin = A0; // potentiometer is connected to analog 0 pin
int led1 = 8; // red LED connected to digital PIN 13
int led2 = 9; // red LED connected to digital PIN 12
int led3 = 10;
int led4 = 11;
int potValue; // variable used to store the value coming from the sensor
int percent; // variable used to store the percentage value

void setup() {
pinMode(led1, OUTPUT); // LED is declared as an output
pinMode(led2, OUTPUT);
pinMode(led3, OUTPUT);
pinMode(led4, OUTPUT);
}

void loop() {
potValue = analogRead(potPin); // read the value from the potentiometer and assign the name potValue
percent = map(potValue, 0, 1023, 0, 100); // convert potentiometer reading to a percentage
if (percent <= 5) { //if the percentage is less than 5%...
    digitalWrite(led1, LOW);
    digitalWrite(led2, LOW);
    digitalWrite(led3, LOW);
    digitalWrite(led4, LOW);
}
else if(percent > 5 && percent <= 25){
    digitalWrite(led1, HIGH);
    digitalWrite(led2, LOW);
    digitalWrite(led3, LOW);
    digitalWrite(led4, LOW);
}
else if(percent > 25 && percent <= 50){
    digitalWrite(led1, HIGH);
    digitalWrite(led2, HIGH);
 digitalWrite(led3, LOW);
    digitalWrite(led4, LOW);
}
else if(percent > 50 && percent <=75){
    digitalWrite(led1, HIGH);
    digitalWrite(led2, HIGH);
    digitalWrite(led3, HIGH);
    digitalWrite(led4, LOW);
}else {
    digitalWrite(led1, HIGH);
    digitalWrite(led2, HIGH);
    digitalWrite(led3, HIGH);
    digitalWrite(led4, HIGH);
}
}
The LEDs will light one by one when the potentiometer knob is rotated clockwise and will go off sequentially when turned counter clockwise.


