28BYJ-48 Stepper Motor control using ULN2003 driver and Arduino.
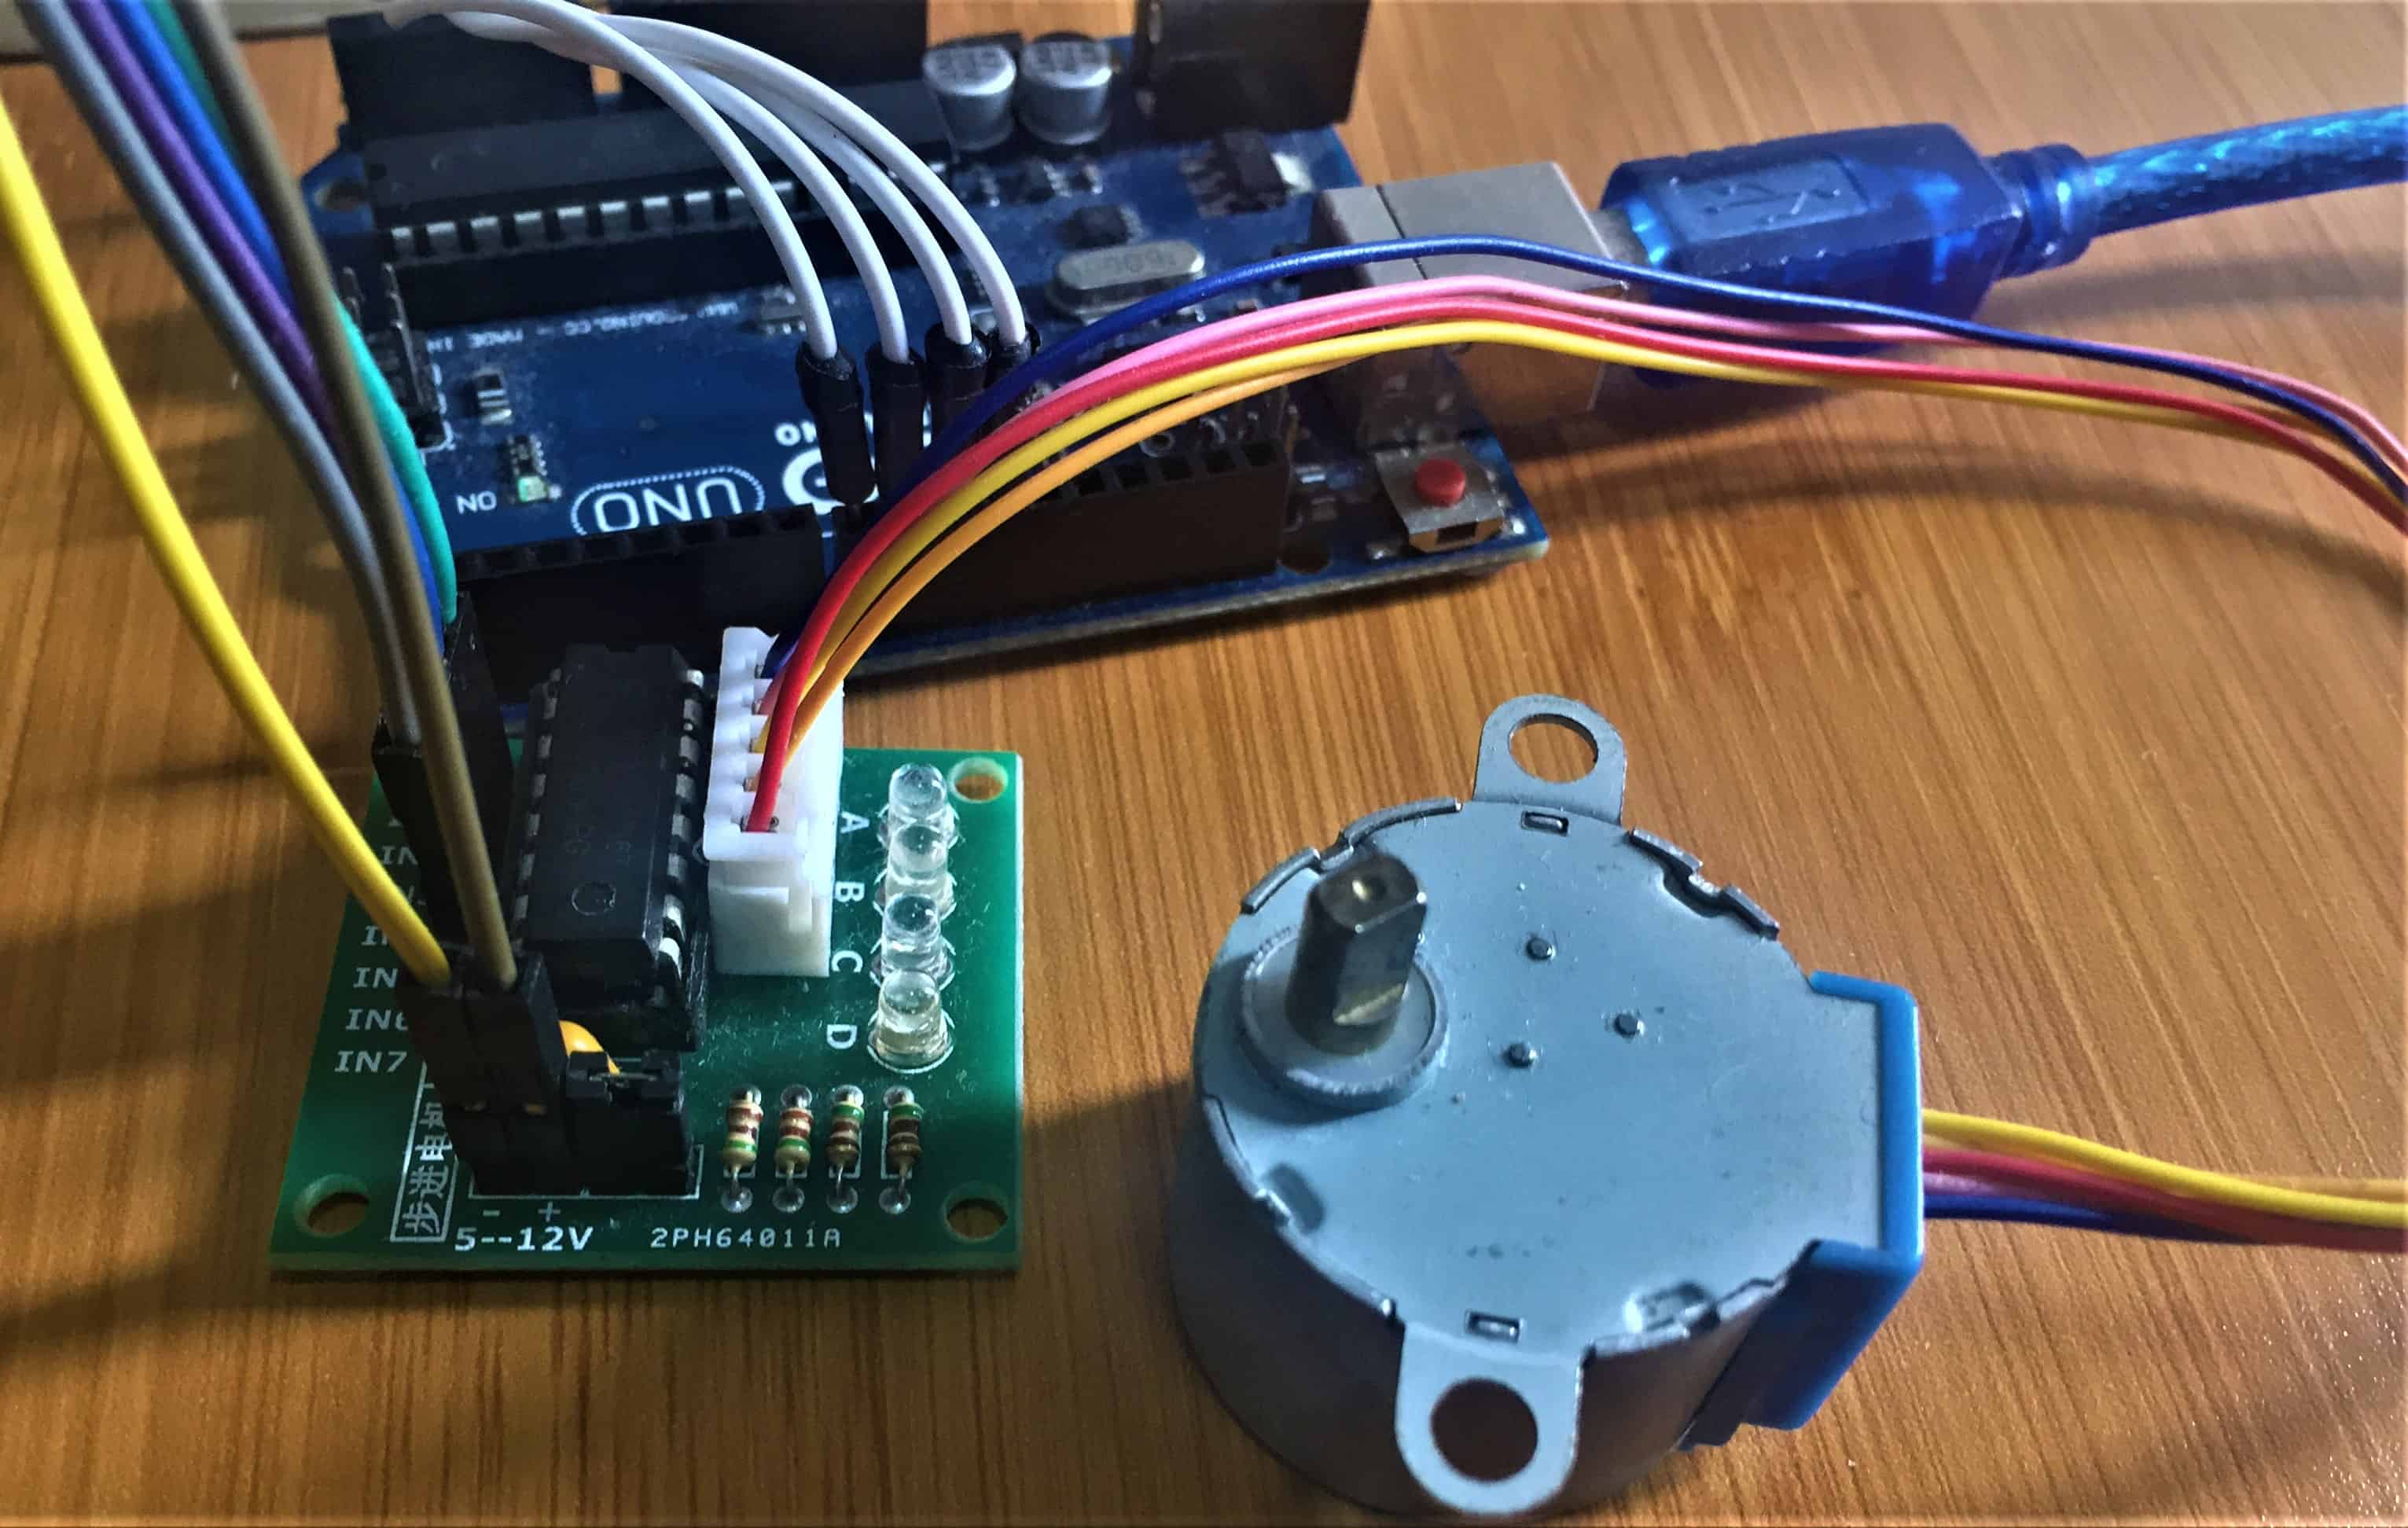
Stepper Motors are used in a wide variety of devices ranging from 3D printers and CNC machines to DVD drives, heating ducts and even analog clocks. They are very useful when you need to position something very accurately for example in 3D printers to position the printhead correctly and in CNC machines where their precision is used to position the cutting head.
How are Stepper motors different from Servo motors?
A servo motor’s motor shaft can be moved to a precise angle, most servos only rotate 180 or 270 degrees although there are modified servos that can spin a full 360 degrees. A servo motor is “aware” of its position and can be moved to a specific angle even if an external force moves the motor shaft.
I have another tutorial with details on the working of a servo motor and how to use it with Arduino which you can make reference to from the link below;
Steppers, on the other hand, are “unaware” of their position. They can be moved to an exact position in reference to where they start stepping (i.e 36 degrees clockwise) but unlike servos they can be misaligned if their shaft is moved by an external force.
Because they move in discrete steps stepper motors are not often used where smooth continuous rotation is required. However with the use of gearing and micro stepping they can approach a smooth rotation and their ability to be very accurately positioned often outweighs the roughness of their movement.
Another advantage stepper motors have over DC motors is the ability to move at very slow speeds without stalling, in fact stalling really isn’t a concept with stepper motors. They also pack a lot of torque into a comparably small package.
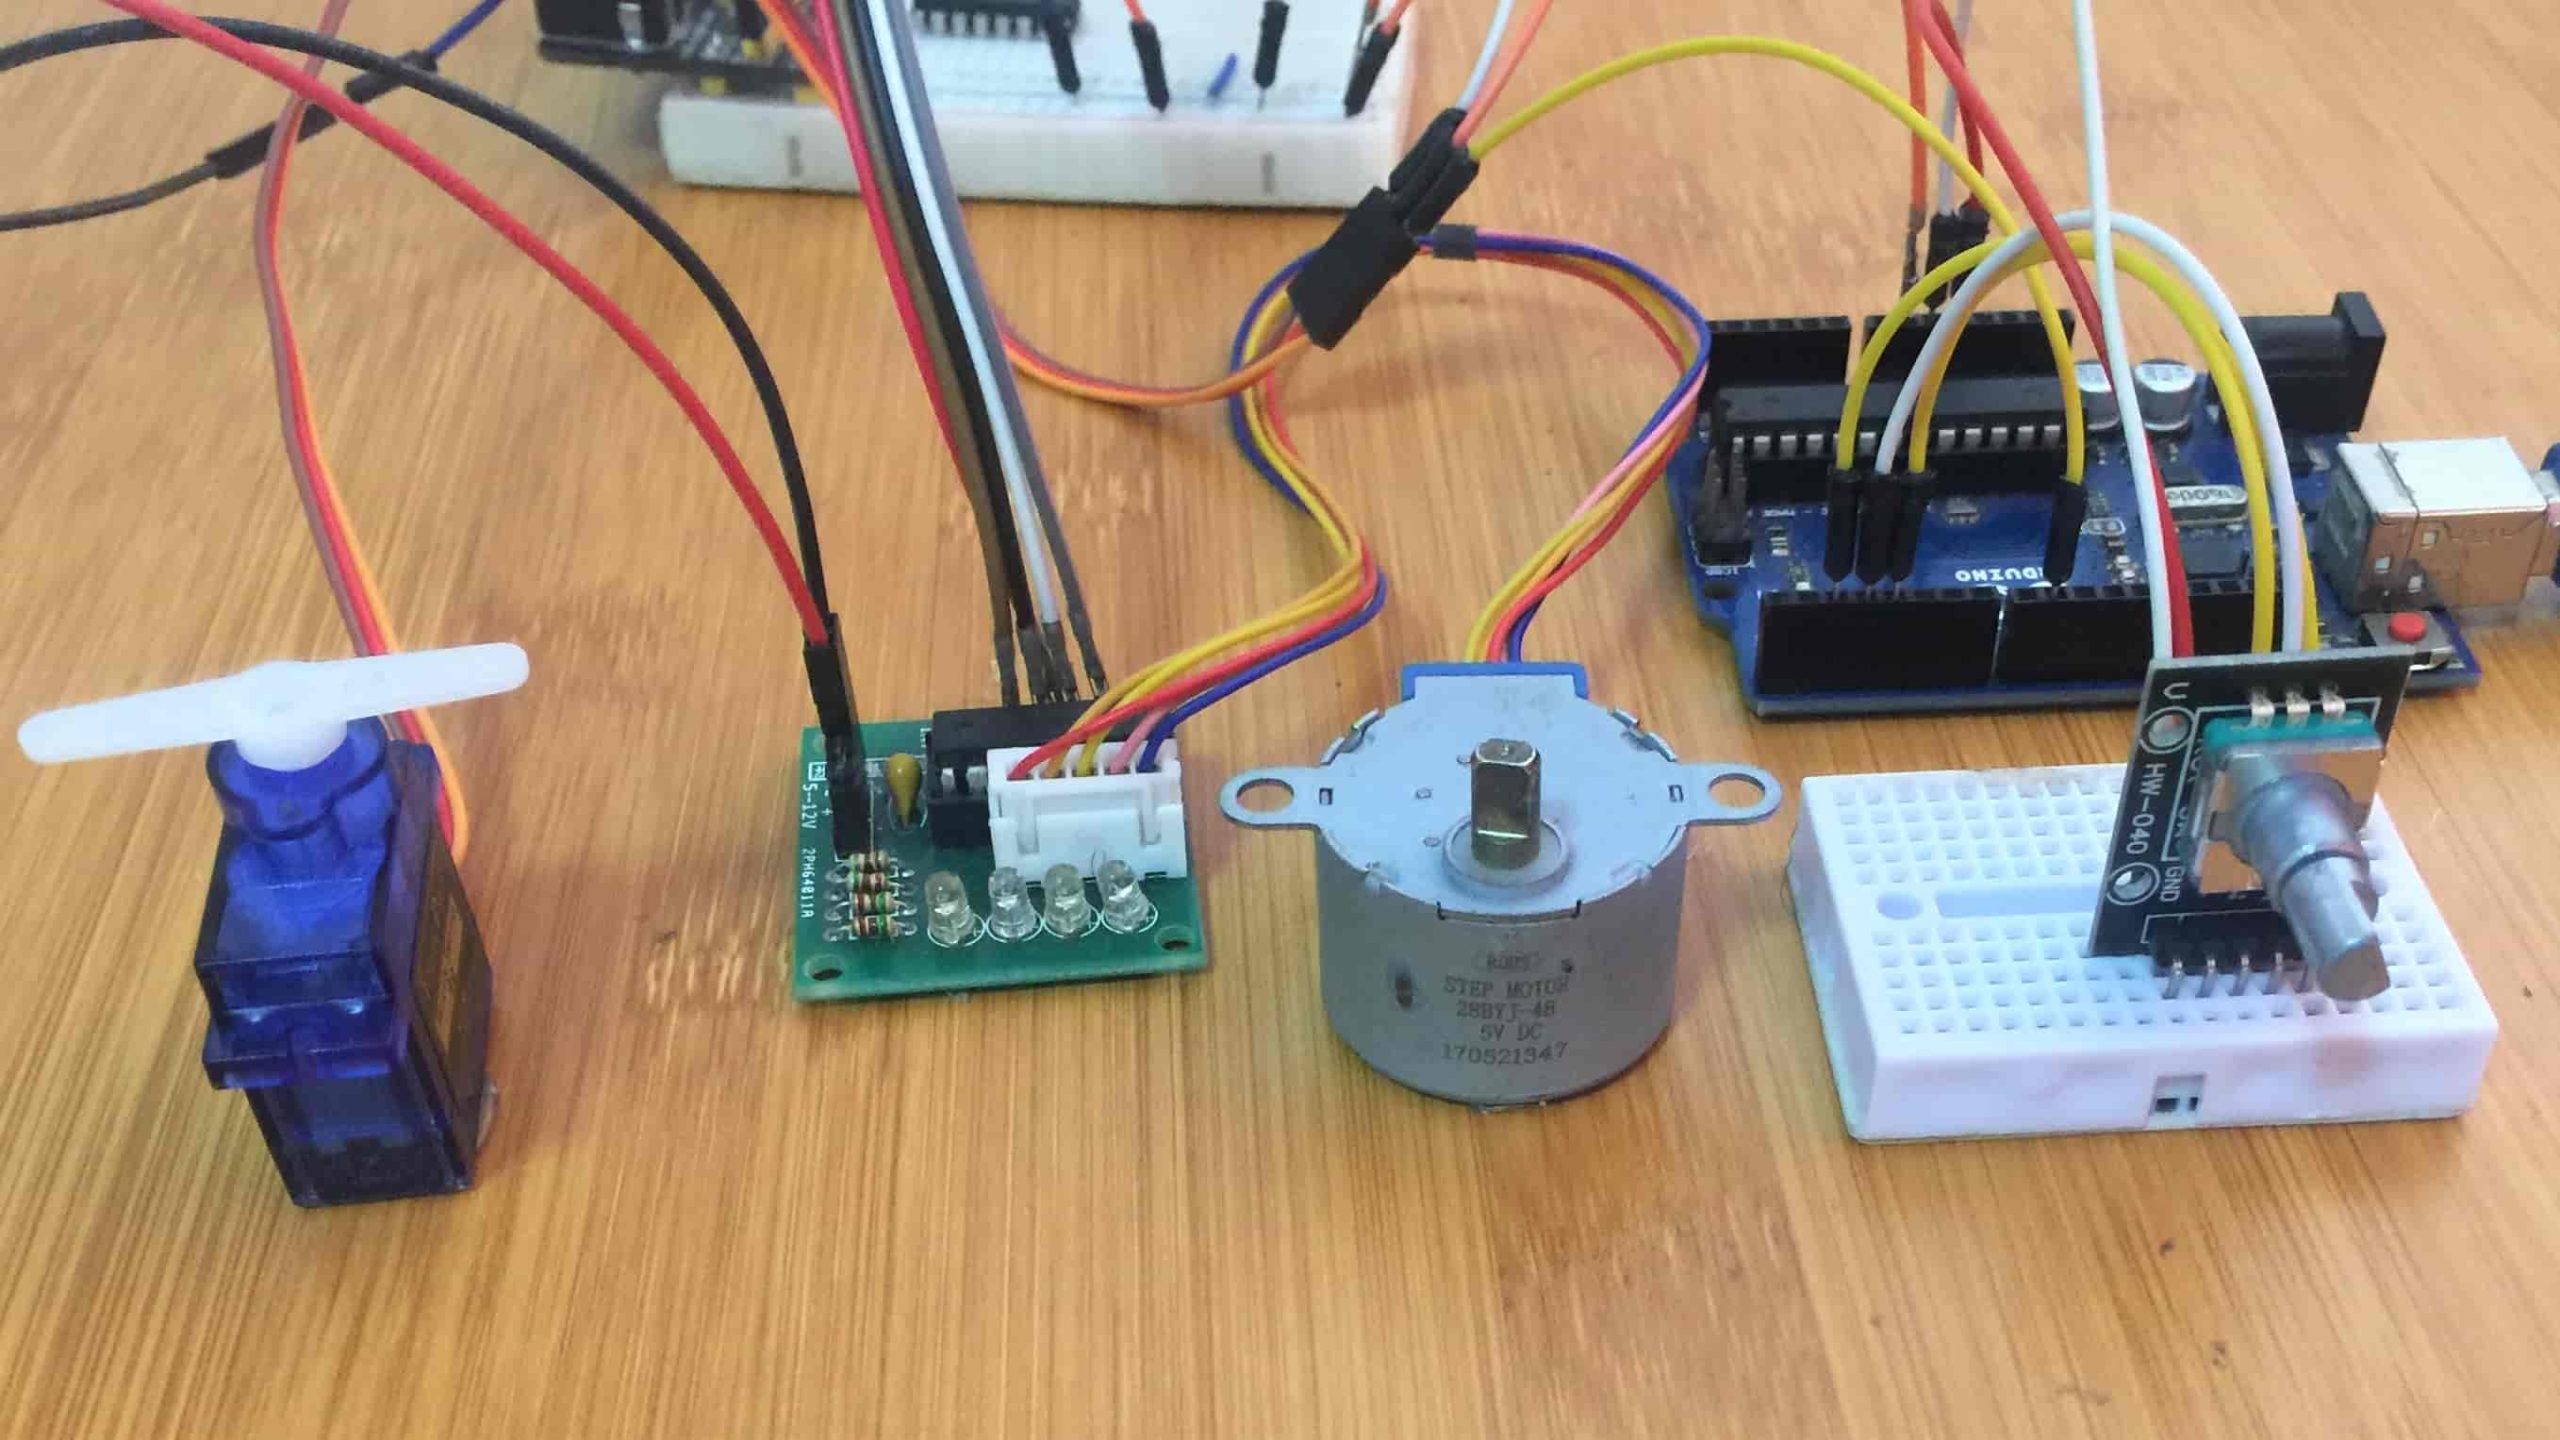
28BYJ-48 Stepper motor.
The 28BYJ-48 is a 5-wire unipolar stepper motor that moves 32 steps per rotation internally but has a gearing system that moves the shaft by a factor of 64. The result is a motor that spins at 2048 steps per rotation.
It should be noted that some of these motors may have a different gearing system so the number of steps per rotation of your motor may not be the same. The 28BYJ-48 runs on 5 volts.
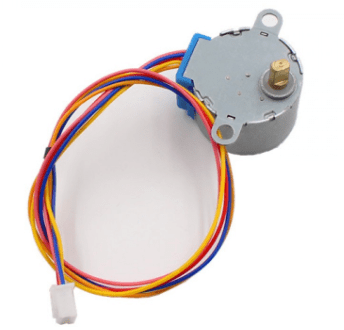
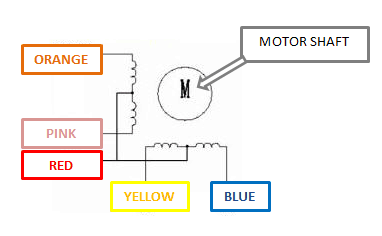
The 28BYJ-48 stepper motor has 4 coils of wire that are powered in a sequence to make the magnetic motor shaft spin. When using the full-step method, 2 of the 4 coils are powered at each step. The default stepper library that comes pre-installed with the Arduino IDE uses this method.
Why we need Driver modules for Stepper motors.
Stepper motors may require current far exceeding the limits of microcontrollers (in this case Arduino), which is why a microcontroller must never be directly connected to a motor. Motors can also induce back EMF which can potentially damage I/O ports and making the use of clamping diodes an absolute must. This is achieved with the help of a number of motor drivers, the ULN2003 stepper driver being among the commonest.
The ULN2003 stepper motor driver
The ULN2003 IC
The ULN2003 is a high voltage and high current Darlington array IC. It contains seven open collector Darlington pairs with common emitters.
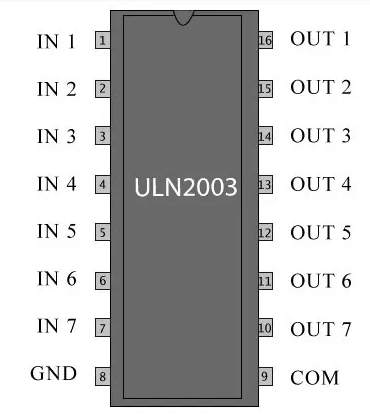
A Darlington pair is an arrangement of two bipolar transistors.
Each channel or Darlington pair in ULN2003 is rated at 500mA ,50V and can withstand peak current of 600mA. This is more than the Arduino Uno can handle. The inputs and outputs are provided opposite to each other in the pin layout.
How to connect the ULN2003 motor driver shield to Arduino.
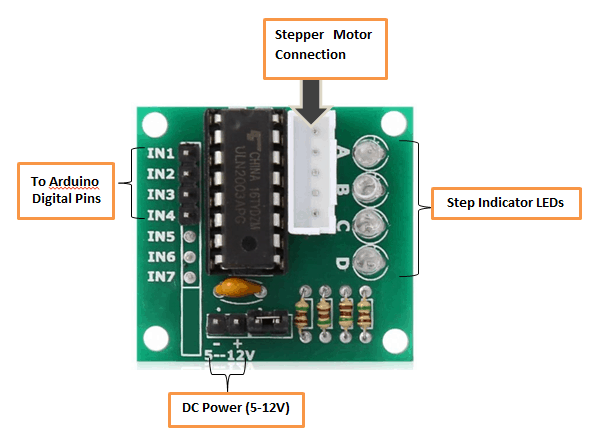
NEVER use the 5-volt power from your Arduino to power a stepper motor. Always use a separate power supply to power your stepper motors!
Also remember to connect the Ground of the Arduino with the ground of the Diver module.
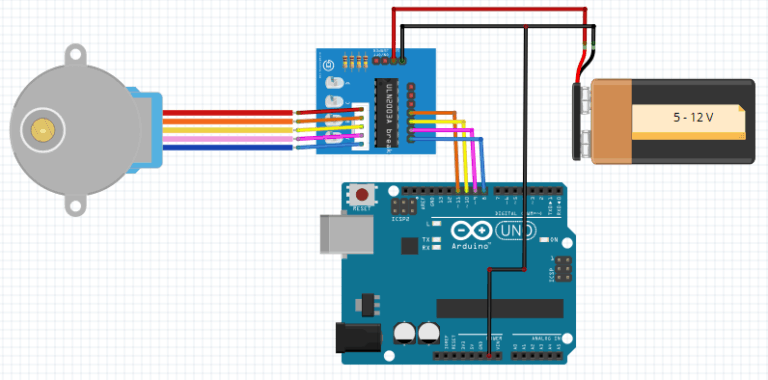
Code for controlling the 28BYJ-48 Stepper Motor with Arduino.
This code uses the Stepper.h library. The sequence of the pins in the code is 8,10,9,11. This enables proper sequencing of the motor coils which if not done properly the motor will just vibrate without moving.
This code will make the stepper motor rotate one revolution in one direction and the rotate in the opposite direction.
//Include the Arduino Stepper Library
#include <Stepper.h>
const int stepsPerRevolution = 2048; //this has been changed to 2048 for the 28BYJ-48
// initialize the stepper library on pins 8 through 11:
Stepper myStepper(stepsPerRevolution, 8,10,9,11); //note the modified sequence
void setup() {
  // set the speed (needed to be reduced for the 28BYJ-48):
  myStepper.setSpeed(8);
  // initialize the serial port:
  Serial.begin(9600);
}
void loop() {
  // step one revolution  in one direction:
   Serial.println("clockwise");
  myStepper.step(stepsPerRevolution);
  delay(1000);
   // step one revolution in the other direction:
  Serial.println("counterclockwise");
  myStepper.step(-stepsPerRevolution);
  delay(1000);
}
}
28BYJ-48 Stepper motor control using IR remote
After knowing the general working principles of the 28BYJ-48 stepper motor and it’s control using the ULN2003 driver we can now do something more interesting. I’ll now demonstrate how to control the motor using an IR remote.
Before proceeding you should already have the knowledge of the working of the IR receiver or you can make reference to this post:
The setup is as shown below and only involves addition of an IR receiver to enable controlling of the motor using a remote.
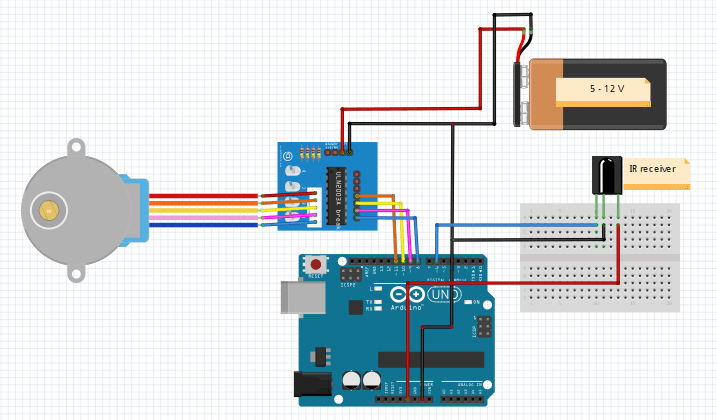
Code for controlling the 28BYJ-48 Stepper motor using IR remote and Arduino.
#include <IRremote.h>
#include <Stepper.h>
#define code1 16724175 // code received from button no. 1
#define code2 16718055 // code received from button no. 2
#define code3 16743045 // code received from button no. 3
int RECV_PIN = 6; // the pin where you connect the output pin of sensor
IRrecv irrecv(RECV_PIN);
decode_results results;
const int stepsPerRevolution = 2048; //this has been changed to 2048 for the 28BYJ-48
// initialize the stepper library on pins 8 through 11:
Stepper myStepper(stepsPerRevolution, 8,10,9,11); //note the modified sequence
void setup() {
  // set the speed (needed to be reduced for the 28BYJ-48):
  myStepper.setSpeed(8);
  // initialize the serial port:
  Serial.begin(9600);
  irrecv.enableIRIn(); // Start the receiver
}
void loop() {
    if (irrecv.decode(&results)) {
    unsigned int value = results.value;
    switch(value) {
    case code1:  // step one revolution  in one direction:
                 myStepper.step(stepsPerRevolution);
                 delay(2000);
                 break;
    case code2: // step one revolution in the other direction:
                myStepper.step(-stepsPerRevolution);
                delay(2000);
                break;
    }
    irrecv.resume(); // Receive the next value
}
}
