Many Windows users often get issues with connecting to wireless networks including not seeing the wireless icon, not seeing any wireless networks or having difficulty connecting to a network that another device is able to access.
In this tutorial, I will give various solutions on how you can troubleshoot WiFi connection problems on Windows laptop or PC.
Check these basics before further troubleshooting
More often than not you may find you don’t actually need to do a lot of troubleshooting for your WiFi issue so before you begin attempting the fixes I have provided make sure you cross check the areas below;
- Confirm that your WiFi router is powered and connected to the internet
- If your laptop has a WiFi button make sure it is pressed
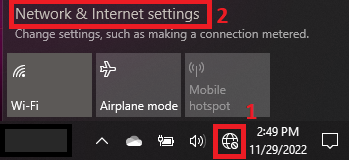
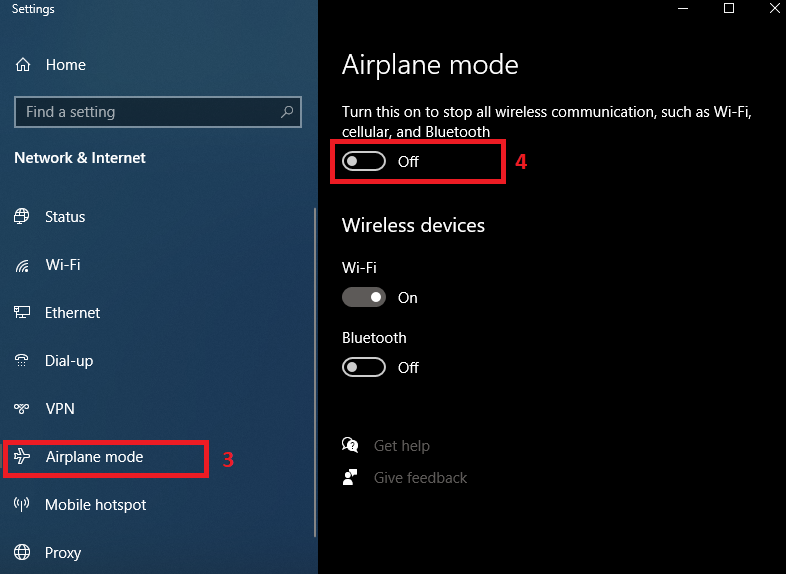
- Check that you have not turned on Airplane mode . You can check this by clicking on the network icon in the bottom right corner, then Network & Internet settings to access the Airplane mode and make sure it is turned off.
In case the above then you can proceed with the solutions given below.
1. Uninstall and Reinstall WiFi Adapter in Device Manger
You need to check that the WiFi adapter is installed and available to use by your PC. To confirm this you can first uninstall and then reinstall this adapter in the Device Manager.
Open Device Manager by right clicking on the windows logo and navigate to Network adapters
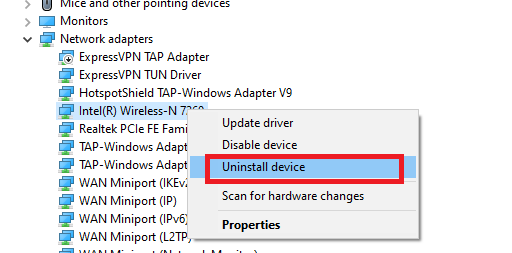
Select the WiFi adapter. Right click on the adapter and select Uninstall device.
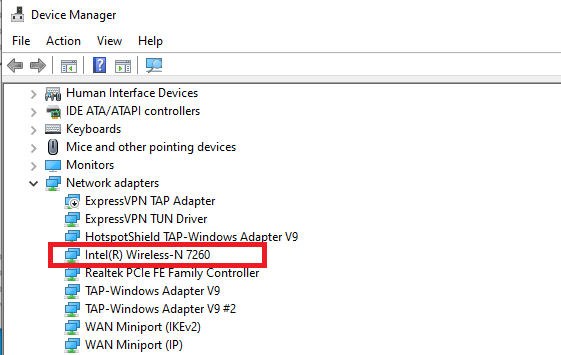
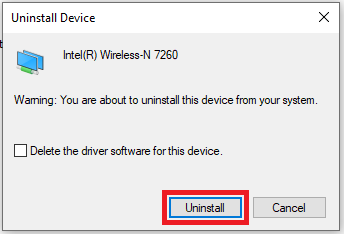
Do not delete the driver software from your device therefore leave that option unchecked when prompted. Click Uninstall and then you will see that the wireless adapter is no longer part of the list of Network adapters.
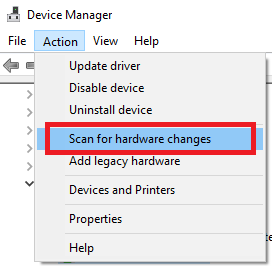
Then you can reinstall the adapter by navigating to Action in the Device Manager and select Scan for hardware changes. This will reinstall the adapter.
When you uninstall and reinstall the network adapters the computer forgets the WiFi networks so you will have to enter the passwords again.
Check if the WiFi icon is now visible and whether you can now connect to a wireless network. If this did not solve your problem you can proceed to the next step.
2. Update WiFi drivers
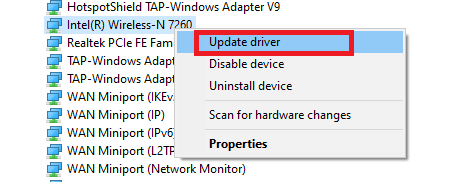
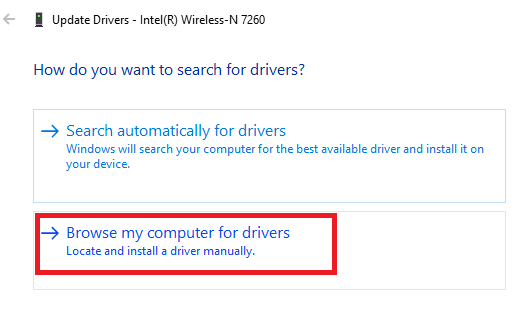
Still in the Device Manager, right click on the wireless adapter and select Update driver. In the next window select Browse my computer for drivers
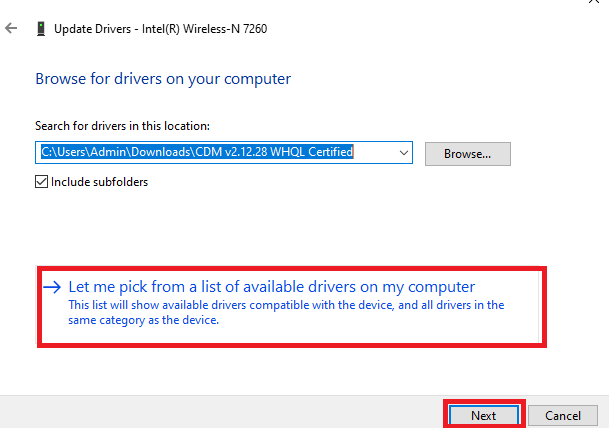
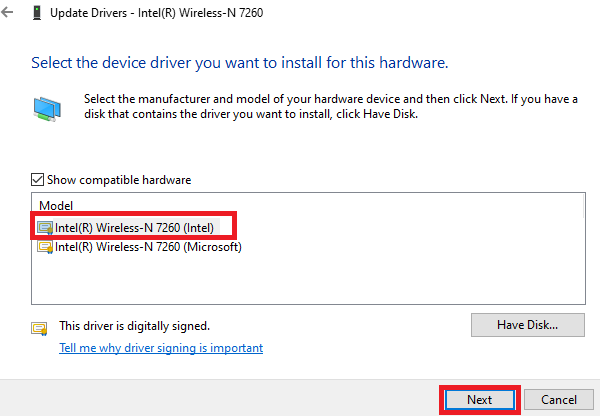
Then select Let me pick from a list of available drivers on my computer. This will show all the available WiFi drivers and you should select the latest of them all and click Next to install the driver.
If this still did not fix your problem, you can proceed to the next solution.
3. Restore Advanced Internet settings
Go to the search bar and look for “internet options” which will open a control panel for Internet Properties. Navigate to Advanced and then select Restore advanced settings>Apply and click OK.
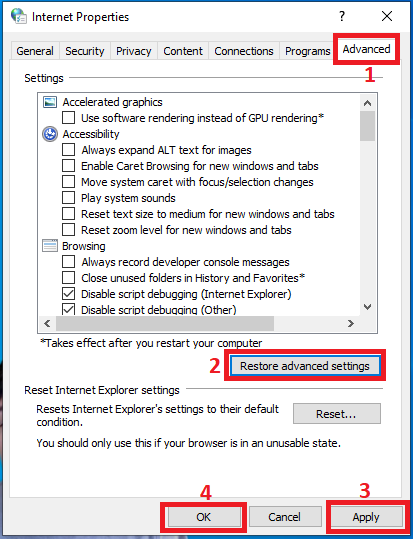
You need to restart your computer and see if this solves your issue.
4. Run Windows Inbuilt Network Troubleshooter
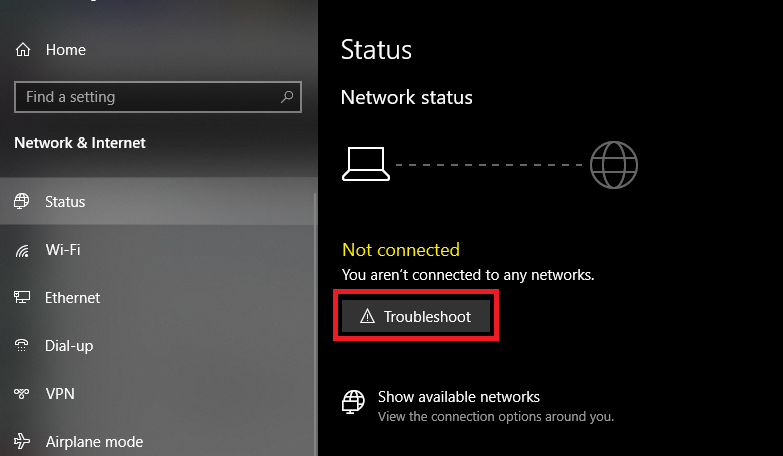
Next you can run the built-in Network troubleshooter for Windows. Go to Settings > Network and Internet. Under Status, click Troubleshoot and the system will automatically diagnose any problems with your network settings or your hardware.
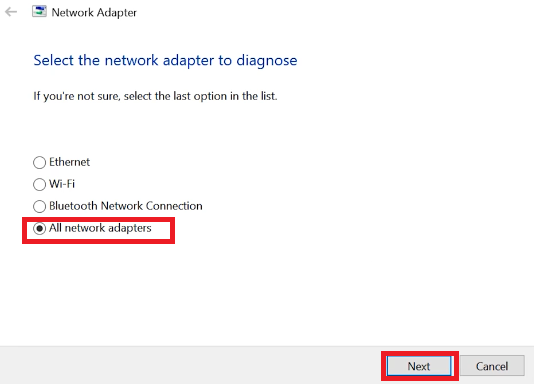
You can either choose a specific network adapter to diagnose or select All network adapters.
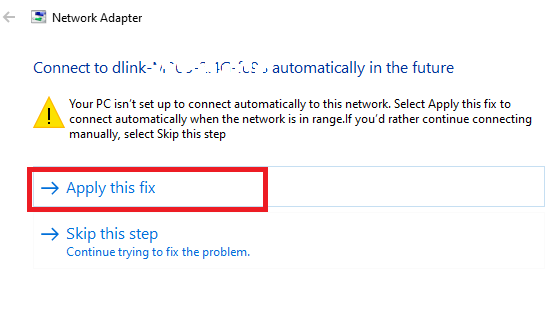
Depending on the issue causing failure to connect to WiFi, the Network troubleshooter will provide a solution. Select “Apply this fix” and then press OK to see if the problem is fixed.
5. Reset All Network Settings
In case the previous solution did not fix your problem then you can as well reset all the network settings
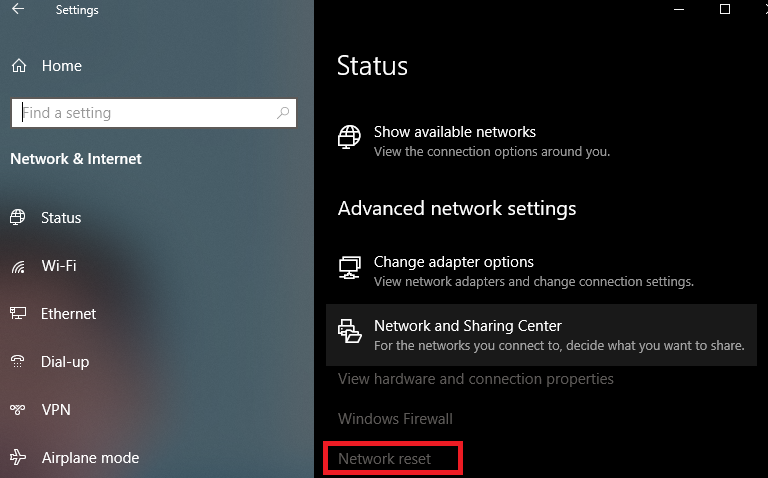
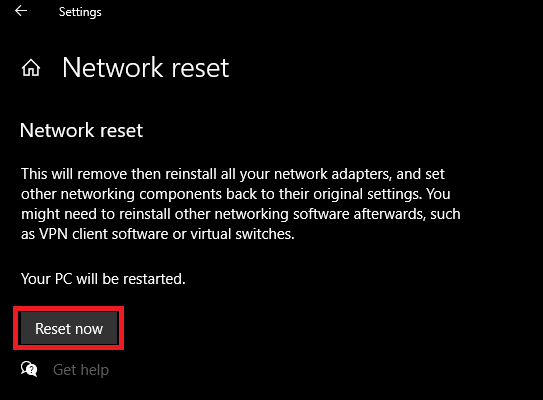
This will reset the computer to the original network settings. After the reset the PC will restart and you can check if the issue has been resolved.
6. Restart Windows Explorer
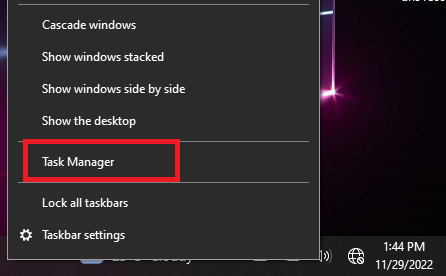
Next you need to Open the Task Manager by right clicking on the bottom taskbar and select Task Manager.
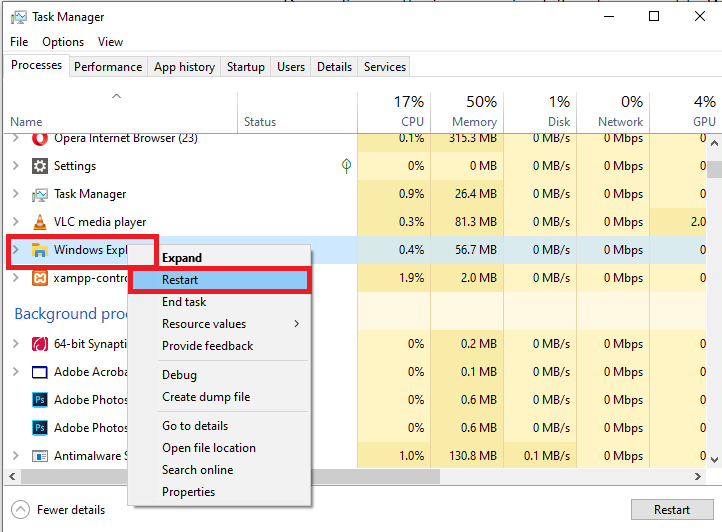
Look for and right click Windows Explorer in the Task Manager and select Restart.
7. Check Windows Services
Still in the Task Manager, navigate to Services and then click Open Services to open the services window where you can be able to edit services.
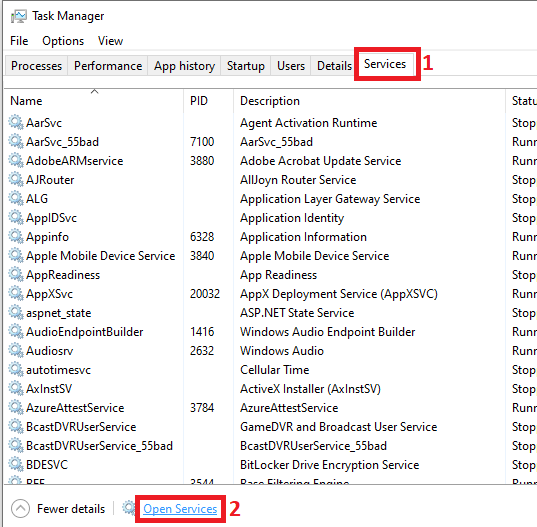
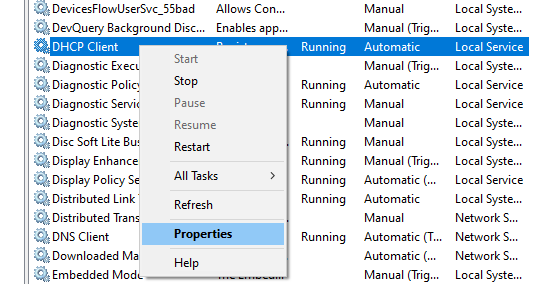
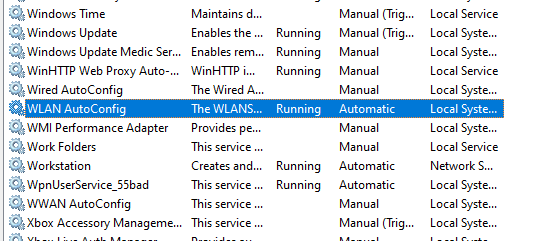
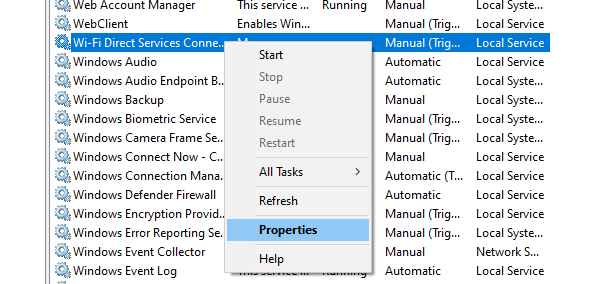
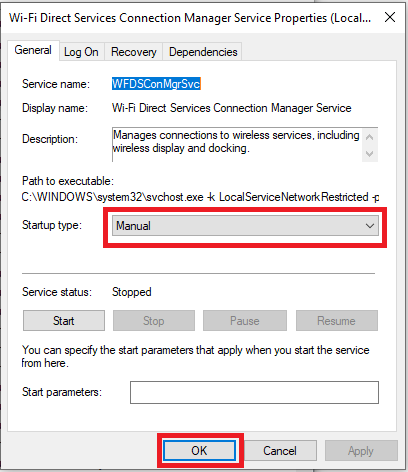
Now you need to make sure the DHCP Client, WLAN AutoConfig and Wi-Fi Direct Services Connection are properly configured since these services affect the way a computer connects the the internet generally.
Check that the DHCP Client service is running and also has a startup type “Automatic”. These settings can be adjusted by right clicking on the DHCP Client service and selecting properties as shown below
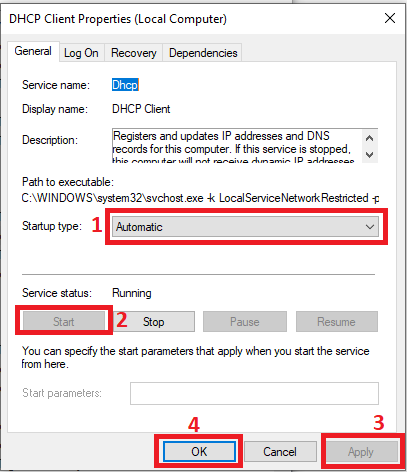
Also check that the WLAN AutoConfig service is running and has a Startup type of Automatic.
Then check that the Wi-Fi Direct Services Connection has a Startup type manual
8. Forget Saved WiFi Networks
In case there is a WiFi network that you were able to connect to initially but are unable to connect to now then you may need to remove that network form your computer and connect to it afresh.
To do this go to the network list and right click on the network you are trying to connect to and select “Forget”.
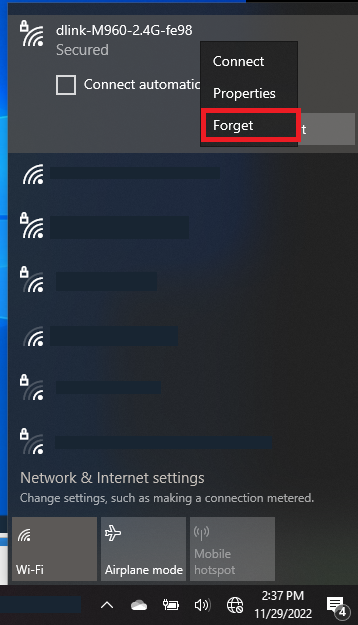
This will erase any saved passwords for this network and you can now connect to it again as if it was the first time.
By now your WiFi connection should have been restored. However if none of the above solutions solve the problem, you can move on to the more technical troubleshooting.
9. Disable Active Probing
This is done in the Registry.
1.Press Windows Logo key + R to open the Run window and type “regedit” and then OK to open the Windows Registry Editor.
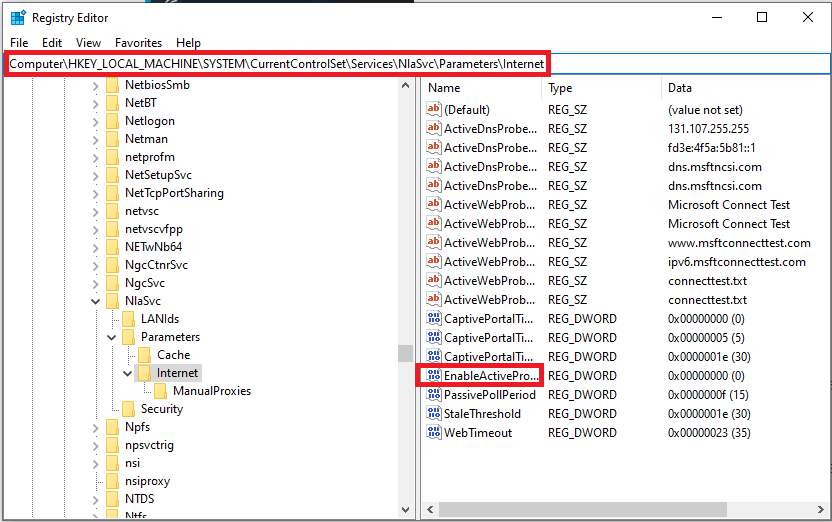
2. Navigate to: ”HKEY_Local_Machine\System\CurrentControlSet\Services\NLASvc\Parameters\Internet\”.
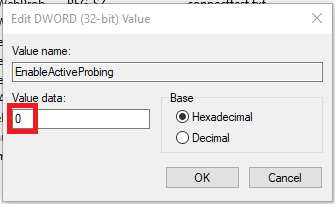
3. Double click ”EnableActiveProbing” and check if its’ value is “1” change it to “0”.
Restart your computer and check if WiFi can be accessed.
10. Reset your Computer’s TCP/IP stack and renew its IP Address
This is done using elevated Command Prompt.
Go to the Start Menu and search for “cmd” to open options for Command Prompt and Select Run as administrator.
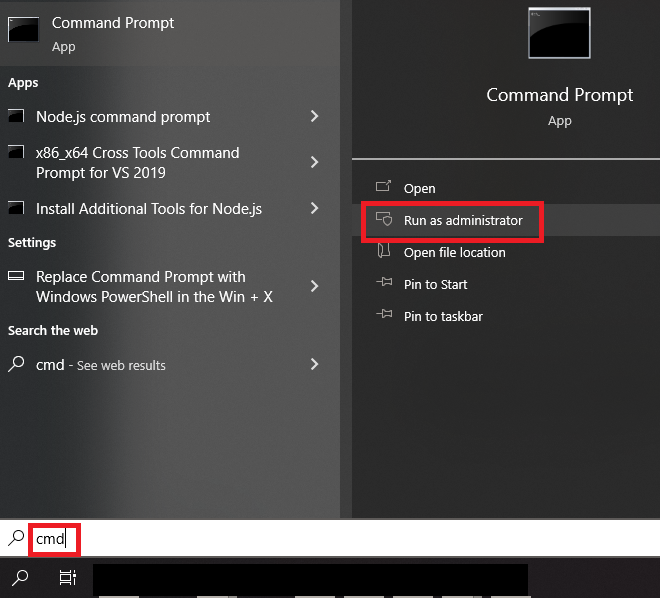
In the elevated Command prompt type and run the following commands one by one, pressing Enter after typing in each one and waiting for one command to be fully executed before typing in the next:
- netsh winsock reset
- netsh int ip reset
- ipconfig /release
- ipconfig /flushdns
- ipconfig /renew
After all of the commands have been successfully executed, close the elevated Command Prompt and restart you computer.
Hope one of the above solutions is able to resolve your problems with WiFi network connectivity.

