ESP32-CAM Module Programing using Arduino IDE. (Getting started)
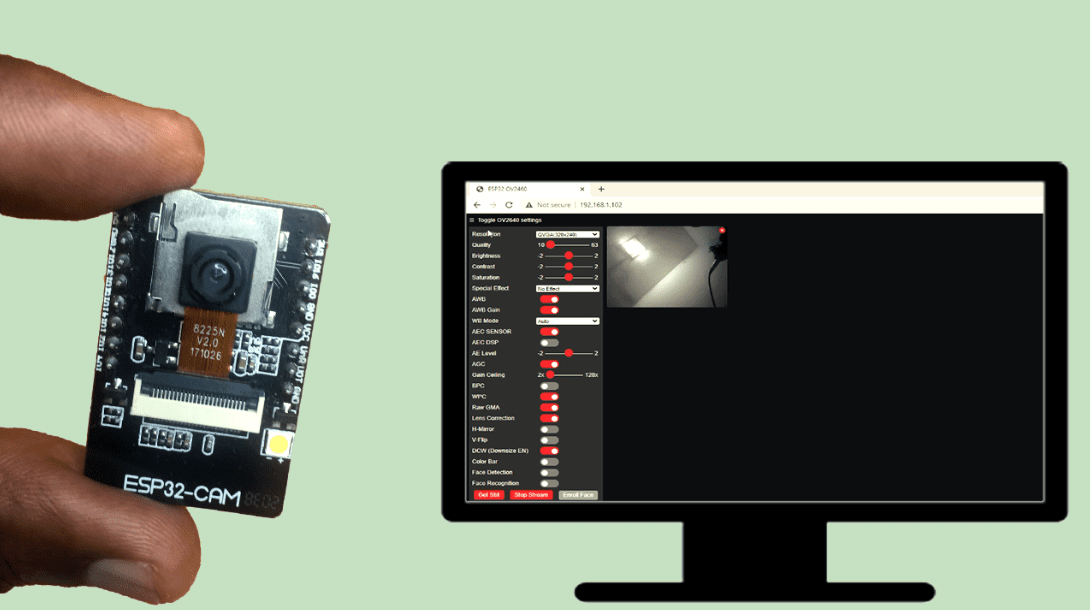
The ESP32-CAM module is based on the ESP32-S microcontroller with a video camera and microSD card slot. This device is not very expensive and this makes it handy for IOT applications involving video streaming features like facial recognition and image tracking.
Structure of the ESP32-CAM module.
The ESP32-CAM module has fewer I/O pins than the generic ESP32 modules. This is because most of the pins are used internally for connecting the camera and microSD card.
This device has components on both sides of the printed circuit board as shown below;
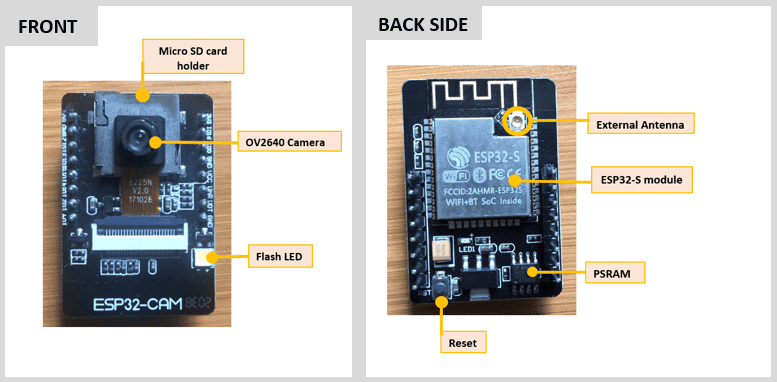
The front side of the board has;
- MicroSD card holder – This can store a maximum of 4GB. Even if you insert a larger storage SD card, only 4GB will be used.
- OV2640 camera – this is a 2MP camera attached to the microcontroller using FPC connector. This camera supports 8-bit compressed data with an image transfer rate of 15 to 60 fps. Outputs images in formats UXGA, SXGA, SVGA and any scaling down from SXGA to 40×30.
- White LED – acts as a flash lamp for the camera.
The main components on the backside include;
- ESP32-S microcontroller
- Provision for an external antenna that can be attached to improve on the strength of the WiFi signal
- Reset switch
- 4MB of external PSRAM
Unlike the generic ESP32 modules, the ESP32-CAM doesn’t come with a USB connector therefore to connect it to a computer you need to use FTDI USB to Serial Adapter for example CP2102 or a FT232RL USB to TTL Serial Converter.
Preparing the Arduino IDE for programming the ESP32 CAM module.
Since we are going to use Arduino IDE to program the ESP32-CAM module, we need to include the ESP32 package in the Arduino IDE using the steps below;
1.In your Arduino IDE, go to File> Preferences
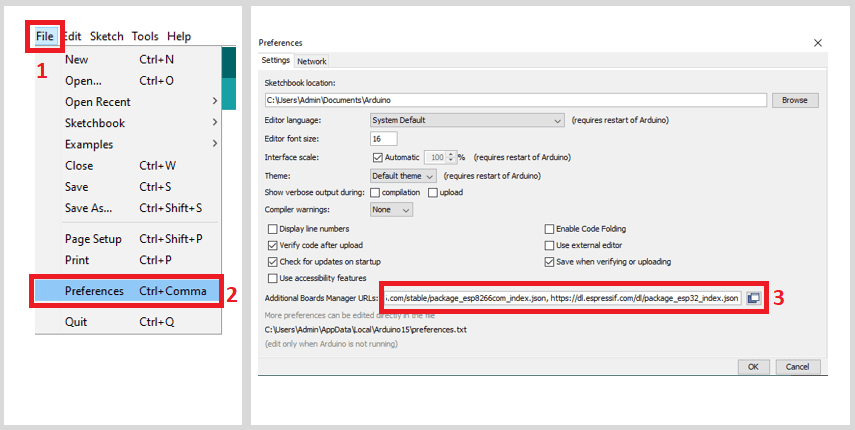
In the “Additional Boards Manager URLs” input the URL: https://dl.espressif.com/dl/package_esp32_index.json and click “OK” to save the changes
Note: In case you have another package URL already input in the additional boards manager field, you have to use a comma to separate the URLs.
2. Then you need to install the ESP32 boards in the Arduino IDE by going to Tools > Board > Boards Manager. Search for ESP32 and install “ESP32 by Espressif Systems“:
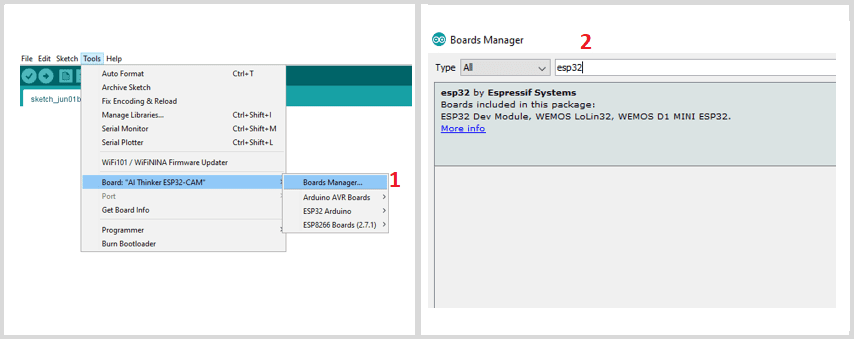
3. Specify the type of ESP32-CAM board in use by going to Tools > Board > ESP32 Arduino and select the board you are using for example in this case we are working with “AI-Thinker ESP32-CAM”.
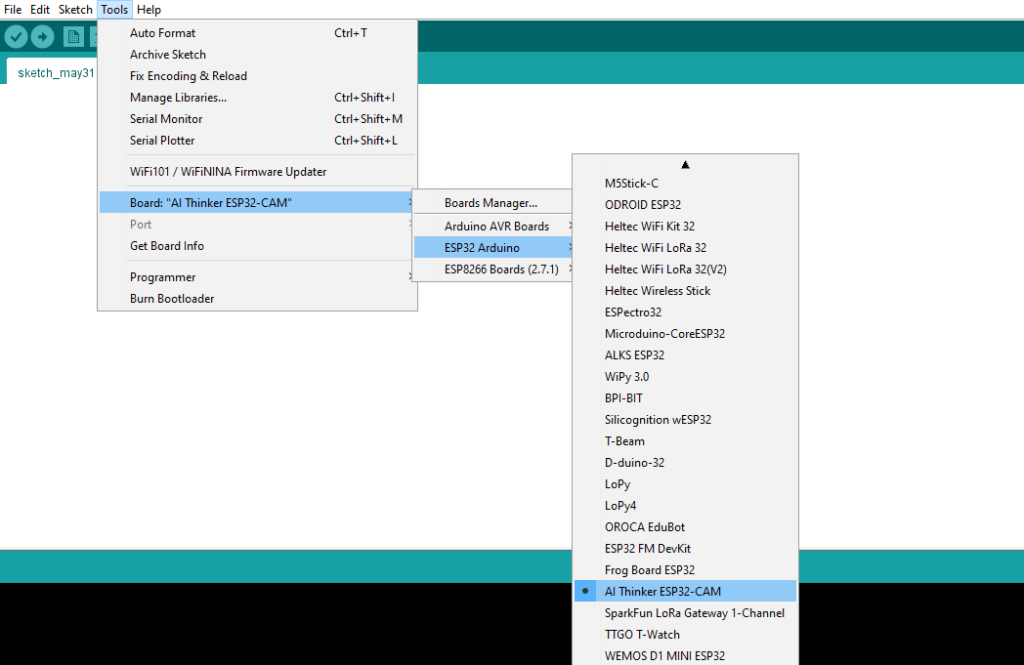
You also need to select the serial port where this board is connected by first plugging the ESP32 board into your computer and in the Arduino IDE go to Tools > Port and select the COM port the ESP32 is connected to.
Connecting ESP32-CAM to FTDI programmer for uploading code.
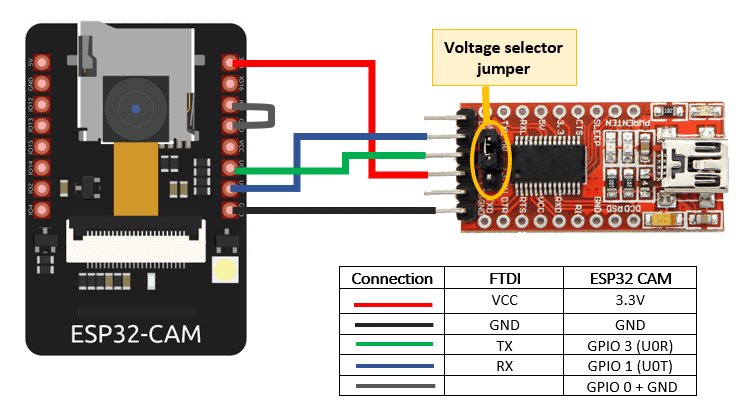
Before uploading code to the ESP-32 CAM via the FTDI programmer, make sure that GPIO O pin is connected to GND. GPIO 0 determines whether the device is in flashing mode or not. When this pin is LOW (GND) then it is in flashing mode and this is when you can upload code. This connection is done as shown below;
Installing drivers for the FTDI Adapter
The FTDI programmer used is the FT232RL FTDI USB to TTL converter and to be able to use this programmer you need to have FTDI drivers installed on your computer.
By default, Windows does not have FTDI drivers installed. If you see nothing in the Arduino IDE under Tools>Serial Ports when the FTDI is plugged into your computer then you need to install the necessary drivers as detailed here.
Power supply considerations.
When uploading code to the ESP32-CAM, you should use 3.3V as indicated above. Don’t forget to move the voltage selection jumper of the FTDI adapter to the right voltage!
We can begin by testing the working of this device by uploading the code for the CameraWebserver example which is part of the ESP32 library which will enable us to build a Video Streaming Server that we can use to get a live stream from the camera by accessing the server’s IP address from our computer or mobile devices.
To access this example, go to File > Examples > ESP32 > Camera and open CameraWebServer
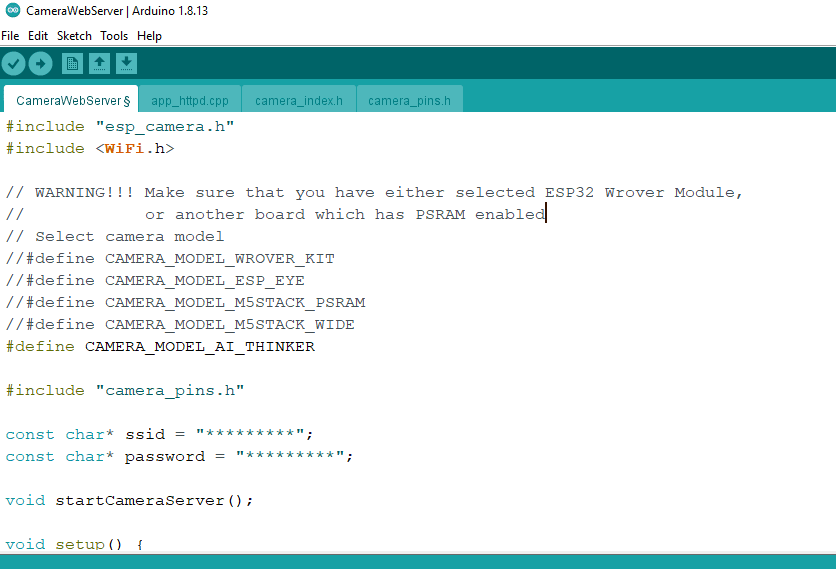
Before uploading this code you should select the correct model of ESP32-CAM in use and also fill in the ssid and password of your WiFi network.
Connecting ESP32-CAM to FTDI programmer for video streaming.
After uploading the CameraWebServer code to the ESP32 CAM board, remove the connection between GPIO 0 and GND.
You may also need to change the voltage supply to 5V like in my case where I was getting the brownout error when I tried to stream video using 3.3V. Don’t forget to change voltage selection jumper on the FTDI adapter!
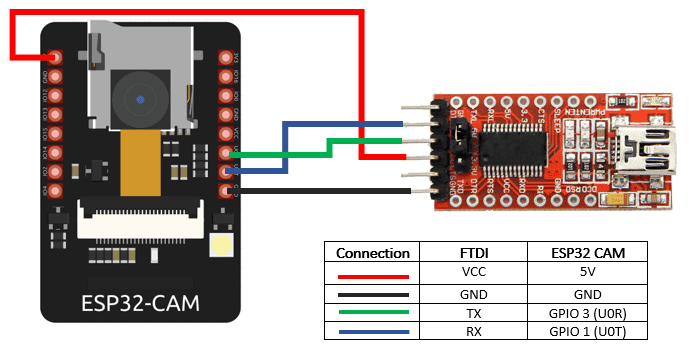
Due to the challenge of having components on both sides of the ESP32-CAM board, it is rather challenging to place this device on a prototyping breadboard. In most cases, you need to use many female-to-female connector wires.
I was also able solder the ESP32-CAM and the FTDI adapter to a solderable breadboard as shown below to reduce on the wiring.
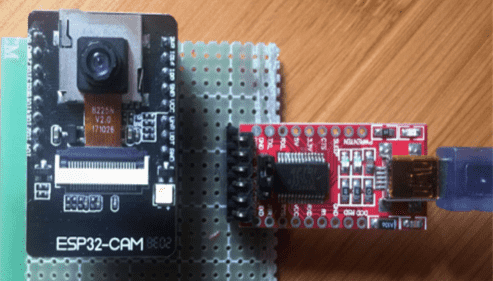
After setting the connection as shown in the figure above, plug the device into your computer and open the Serial Monitor. Set the baud rate of 115,200 bps and press the Reset switch on the ESP32-CAM module.
Some initialization information will come up showing that the board has been connected to a WiFi network and also states the ports and IP address of the webserver as shown below;
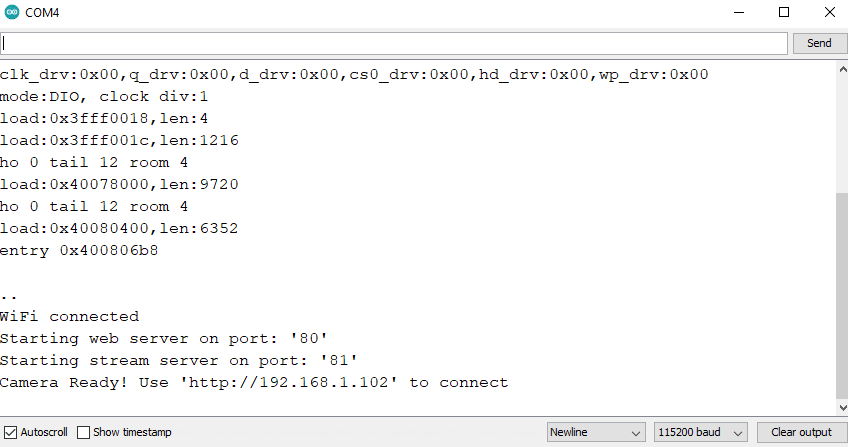
After configuring the ESP32-CAM board as a web server, you can be able to access live video feed from the camera on a webpage using any web browser on the same network as the ESP32 using the URL of the IP address provided in the serial monitor.
The webpage for viewing the video stream appears as shown below.
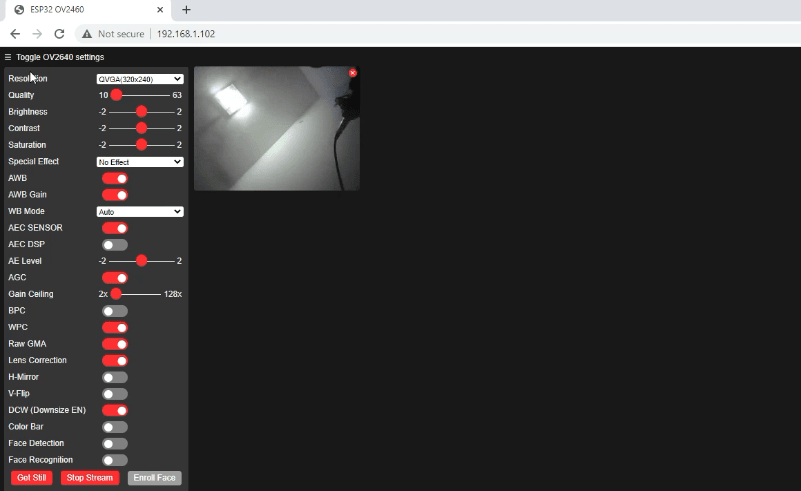
To start streaming video, click on the Start Stream button.
The user interface has a number of controls that you can use to change various aspects of the video stream for example resolution, quality, frame rate and many more.
