WS2812B Leds are very common for use in interior designs for hotels, restaurants and bars, studios and even homes. They are also used as store front displays, hand rails and walkways and retail shop product displays. These led strips are preferred because they can easily be cut into a desired length which allows one to freely design their project.
LED strip lights are flexible and can be bent vertically up to 90 degrees and the back of the strip is fitted with a strong tape, allowing you to peel and stick lights to many different surfaces. Some strips have protection against dust and water.
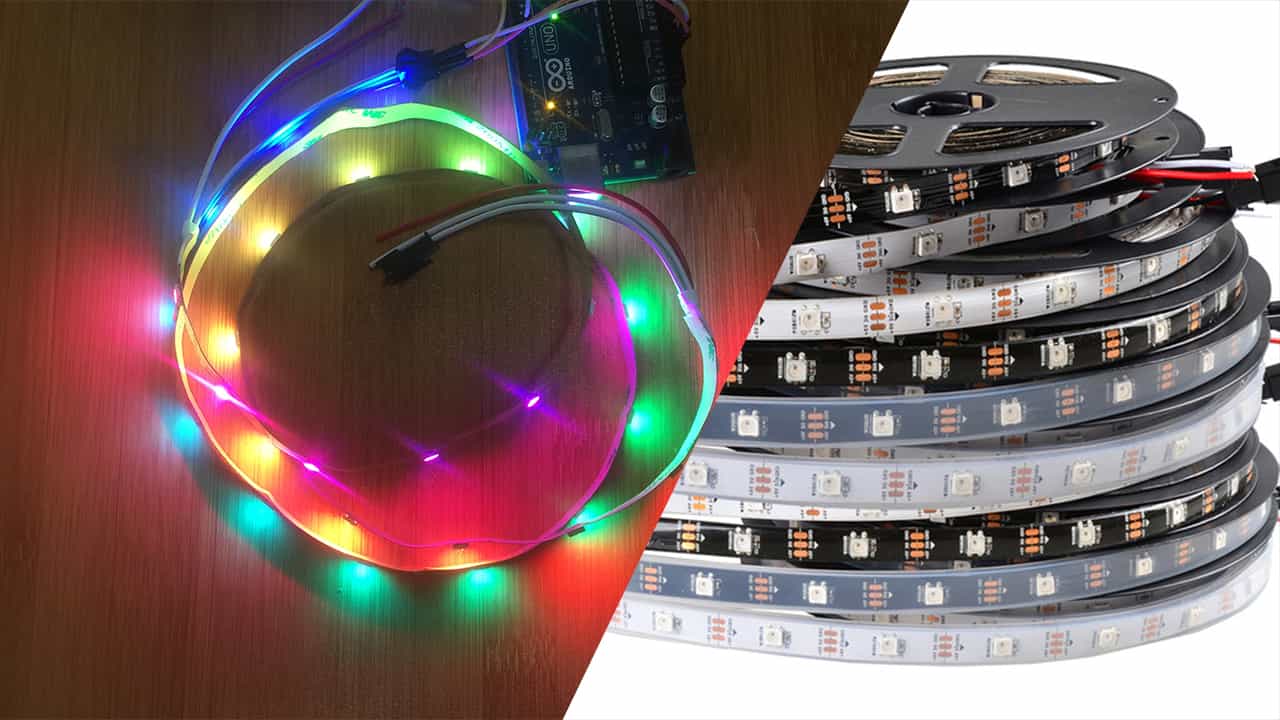
WS2812B Leds description.
This LED strip is made up of type 5050 RGB LEDs integrated with a WS2812B LED driver IC. This allows a communication via a one-wire interface. This means that you can control lots of LEDs using just one digital pin of your Arduino.
Using a microcontroller, you can be able to customize strips for your project to include custom colors, lengths, width, voltage, brightness, and more like in this tutorial I’ll show you how this can be done using Arduino.
Controlling the WS2812B leds Strip with Arduino
The WS2812B leds strip is connected to the Arduino board as shown below. I have included a 330 ohms resistor on the data line to reduce noise on the line.It is also recommended to put a capacitor of around 100uF across the 5V and Ground to smooth out the power supply.

Power supply considerations
The individual RGB leds draws around 20mA to 60mA. If the Arduino is powered via the USB, the 5V pin can handle only around 400mA, and when powered using the barrel power connector, the 5V pin can handle around 900mA. So if you are using more leds, the amount of current that the strip will draw can exceed the limit of the Arduino. Thats why it’s always advisable to use a separate 5V power supply.
Code for running the WS2812B led Strip.
I’ll show you how to control the ws2812b leds strip using two common libraries, the Adafruit_Neopixel.h and Fastled.h libraries. In this first example we are using the Neopixel library. We need to define the pin to which the LED strip data line is connected and the number of LEDs in the strip, in this case they are 30 leds.
#include <Adafruit_NeoPixel.h>

#define PIN 6

// Parameter 1 = number of pixels in strip
// Parameter 2 = pin number (most are valid)
// Parameter 3 = pixel type flags, add together as needed:
//   NEO_KHZ800  800 KHz bitstream (most NeoPixel products w/WS2812 LEDs)
//   NEO_KHZ400  400 KHz (classic 'v1' (not v2) FLORA pixels, WS2811 drivers)
//   NEO_GRB     Pixels are wired for GRB bitstream (most NeoPixel products)
//   NEO_RGB     Pixels are wired for RGB bitstream (v1 FLORA pixels, not v2)
Adafruit_NeoPixel strip = Adafruit_NeoPixel(30, PIN, NEO_GRB + NEO_KHZ800);

void setup() {
 strip.begin();
  strip.show(); // Initialize all pixels to 'off'
}

void loop() {
  // Some example procedures showing how to display to the pixels:
  colorWipe(strip.Color(255, 0, 0), 50); // Red
  colorWipe(strip.Color(0, 255, 0), 50); // Green
  colorWipe(strip.Color(0, 0, 255), 50); // Blue

  // Send a theater pixel chase in...
  theaterChase(strip.Color(127, 127, 127), 50); // White
  theaterChase(strip.Color(127,   0,   0), 50); // Red
  theaterChase(strip.Color(  0,   0, 127), 50); // Blue

  rainbow(20);
  rainbowCycle(20);
  theaterChaseRainbow(50);
}

// Fill the dots one after the other with a color
void colorWipe(uint32_t c, uint8_t wait) {
  for(uint16_t i=0; i<strip.numPixels(); i++) {
      strip.setPixelColor(i, c);
      strip.show();
      delay(wait);
  }
}

void rainbow(uint8_t wait) {
  uint16_t i, j;

  for(j=0; j<256; j++) {
    for(i=0; i<strip.numPixels(); i++) {
      strip.setPixelColor(i, Wheel((i+j) & 255));
    }
    strip.show();
    delay(wait);
  }
}

// Slightly different,
this makes the rainbow equally distributed throughout
void rainbowCycle(uint8_t wait) {
  uint16_t i, j;

  for(j=0; j<256*5; j++) { // 5 cycles of all colors on wheel
    for(i=0; i< strip.numPixels(); i++) {
      strip.setPixelColor(i, Wheel(((i * 256 / strip.numPixels()) + j) & 255));
    }
    strip.show();
    delay(wait);
  }
}

//Theatre-style crawling lights.
void theaterChase(uint32_t c, uint8_t wait) {
  for (int j=0; j<10; j++) {  //do 10 cycles of chasing
    for (int q=0; q < 3; q++) {
      for (int i=0; i < strip.numPixels(); i=i+3) {
 strip.setPixelColor(i+q, c);    //turn every third pixel on
      }
      strip.show();

      delay(wait);

      for (int i=0; i < strip.numPixels(); i=i+3) {
        strip.setPixelColor(i+q, 0);        //turn every third pixel off
      }
    }
  }
}

//Theatre-style crawling lights with rainbow effect
void theaterChaseRainbow(uint8_t wait) {
  for (int j=0; j < 256; j++) {     // cycle all 256 colors in the wheel
    for (int q=0; q < 3; q++) {
 for (int i=0; i < strip.numPixels(); i=i+3) {
          strip.setPixelColor(i+q, Wheel( (i+j) % 255));    //turn every third pixel on
        }
        strip.show();

        delay(wait);

        for (int i=0; i < strip.numPixels(); i=i+3) {
          strip.setPixelColor(i+q, 0);        //turn every third pixel off
        }
    }
  }
}

// Input a value 0 to 255 to get a color value.
// The colours are a transition r - g - b - back to r.
uint32_t Wheel(byte
WheelPos) {
  if(WheelPos < 85) {
   return strip.Color(WheelPos * 3, 255 - WheelPos * 3, 0);
  } else if(WheelPos < 170) {
   WheelPos -= 85;
   return strip.Color(255 - WheelPos * 3, 0, WheelPos * 3);
  } else {
   WheelPos -= 170;
   return strip.Color(0, WheelPos * 3, 255 - WheelPos * 3);
  }
}
The output of this code will be beautiful animation lightings as shown below. You can look through the code and make your own custom lighting designs!
The second example shows how to use the Fastled library.We also begin by defining the data line connection and the number of leds in the strip.
#include <FastLED.h>
#define LED_PIN     6
#define NUM_LEDS    30
CRGB leds[NUM_LEDS];
void setup() {
  FastLED.addLeds<WS2812, LED_PIN, GRB<(leds, NUM_LEDS);

}
void loop() {

  leds[0] = CRGB(255, 0, 0);
  FastLED.show();
  delay(500);
  leds[1] = CRGB(0, 255, 0);
  FastLED.show();
  delay(500);
  leds[4] = CRGB(0, 0, 255);
  FastLED.show();
  delay(500);
  leds[10] = CRGB(150, 0, 255);
  FastLED.show();
  delay(500);
  leds[12] = CRGB(255, 200, 20);
  FastLED.show();
  delay(500);
  leds[18] = CRGB(85, 60, 180);
  FastLED.show();
 delay(500);
  leds[29] = CRGB(50, 255, 20);
  FastLED.show();
  delay(500);

  for (int i = 0; i <= 29; i++) {
    leds[i] = CRGB ( 0, 0, 255);
    FastLED.show();
    delay(40);
  }
  for (int i = 29; i >= 0; i--) {
    leds[i] = CRGB ( 255, 0, 0);
    FastLED.show();
    delay(40);
  }

}

You can also try out the other examples that come with the libraries above from the Arduino IDE for more practice and hope you can be able to apply these strips in your own projects.


