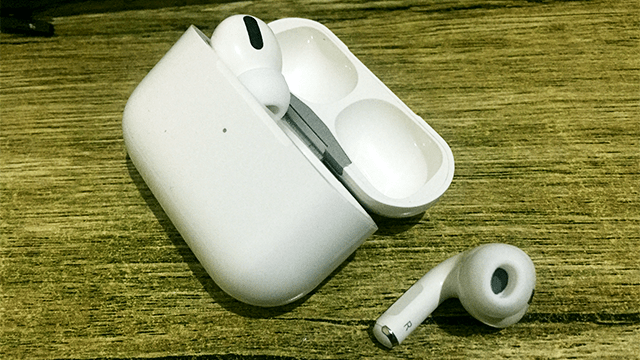
AirPods being Apple products work perfectly with other Apple devices like iPhones, MacBook and Apple watches. However, you may be wondering if AirPods can work with Windows PC and the answer is yes, they do.
Since AirPods use Bluetooth communication, you can easily pair and connect them to a Windows PC just as any other Bluetooth devices like headphones. In this tutorial I’ll give a step-by-step guide on how to pair and connect your AirPods, AirPods Pro or AirPods Max to a Windows 10 PC.
Being Apple products, when using AirPods on a Windows computer you will not be able to access Apple related customization options the way you would when using AirPods with iPhone or Mac. These functionalities include Siri, automatic ear detection, single AirPod listening, automatic device switch and battery life check.
Pairing and connecting AirPods to a Windows 10 computer for the first time.
First, place the AirPods back in their charging case and close the case.
On your computer open the Windows 10 Settings panel. Then go to Devices>Bluetooth & other devices.
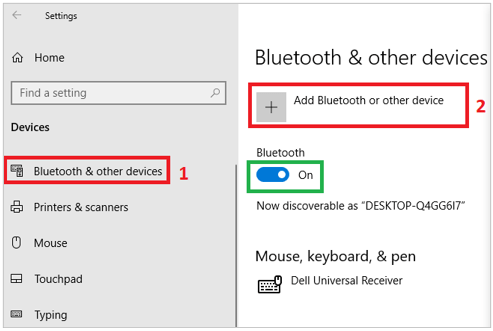
Make sure Bluetooth is turned on which is done using a toggle button as shown above.
Select ‘Add Bluetooth or other device’. A new panel opens where you then choose Bluetooth as the kind of device you want to add.

Now open the charging case leaving the AirPods intact. A green LED will light.
Press and hold the Setup button at the back side of the case until the status LED flashes white.
Your PC should detect the AirPods as one of the Bluetooth devices and then you can select them from the list of devices provided.
Make sure your AirPods are charged at least to 25% when attempting to pair them with your PC. This is because low charge affects Bluetooth connectivity and if the AirPods don’t have sufficient charge, they will not be discovered for pairing.
After connecting the AirPods, “Your device is ready to go!” message is displayed.
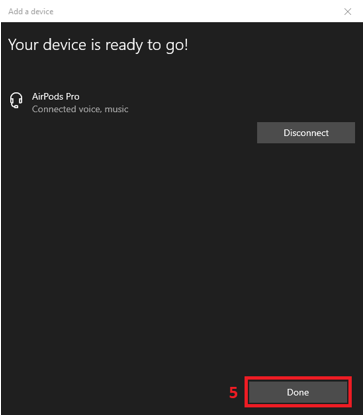
Click Done and you should now be able to use your AirPods with Windows 10 PC.
Reconnecting AirPods to Windows 10 computer after initial pairing.
If the pairing and connecting of AirPods was successfully done the first time, AirPods will be added to the Bluetooth & other devices settings as one of the devices paired with your computer. Next time you want to use your AirPods on Windows 10 computer you just need to make sure Bluetooth is turned on and then open the charging case with the AirPods in place and the computer will automatically detect the AirPods.
In case the AirPods are not automatically detected and connected, you can connect the AirPods from the Bluetooth & other devices settings as shown below. The AirPods will appear as one of the paired audio devices.
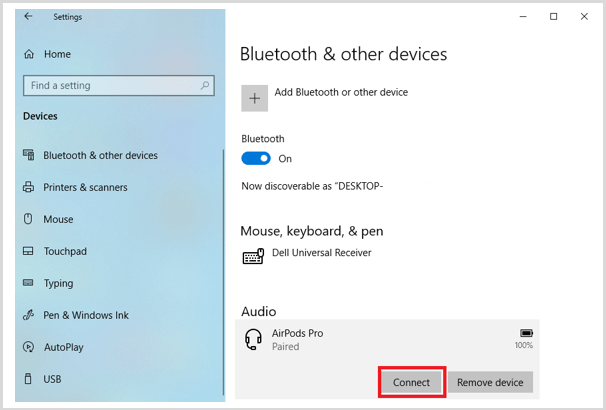
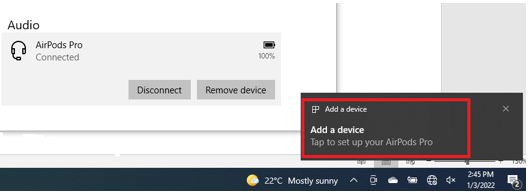
Open the AirPods charging case and click on Connect. A pop-up window will appear prompting you to set up your AirPods on your computer. Click on ‘Add a device’.
Another pop-up opens inquiring whether you want to pair the device. Click Allow
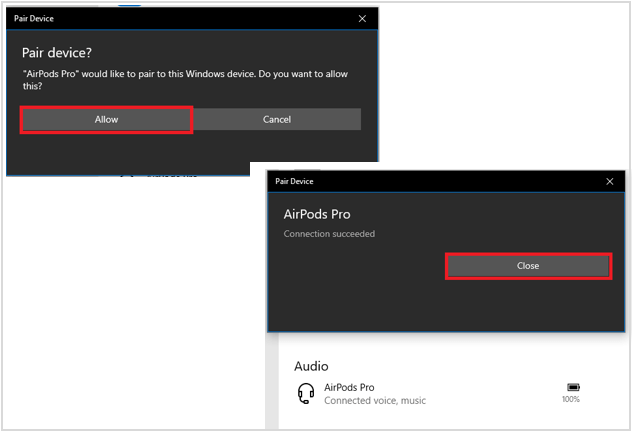
After pairing and connecting the AirPods, a “Connection succeeded” message is displayed. Click close and you can now be able to use your AirPods on a Windows 10 PC.
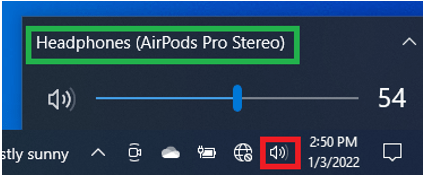
You can check that the AirPods are connected and working by clicking the volume icon in the right bottom tab of your desktop.
How to Change Your AirPods Name on a Windows 10 computer.
After connecting your AirPods to a Windows 10 computer, you may need to use a custom name for this device because initially they show up with the default name like ‘AirPods’. However, the name changes won’t carry over to an iPhone or Mac.
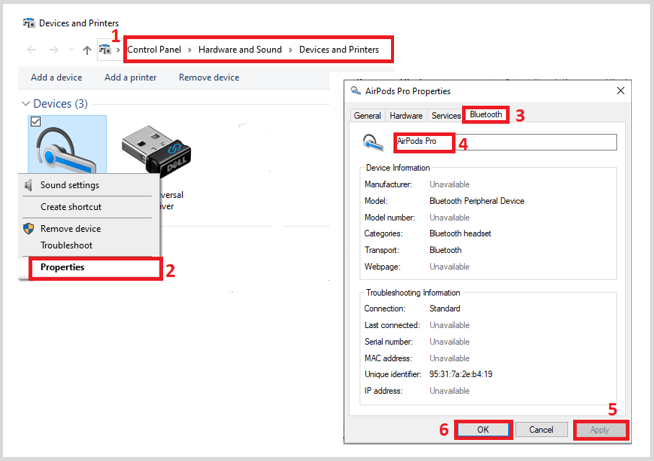
- Open the Control panel and under Hardware and Sound, select View devices and printers to see the devices and printers that are paired and connected to your computer.
- Right click on AirPods and select Properties. A new panel opens with several tabs.
- Switch to the Bluetooth tab.
- You can now modify the AirPods’ name. Then select Apply and OK.
