The HC-05 Bluetooth module is used extensively in many Bluetooth based projects. Bluetooth is a short-range wireless communication technology that allows exchange of data between different devices. It is used in many consumer applications today for example wireless headsets, game controllers, keyboard and mouse and many others.
In this tutorial I will look at the HC-05 Bluetooth module in detail and also show how you can use this device with Arduino.
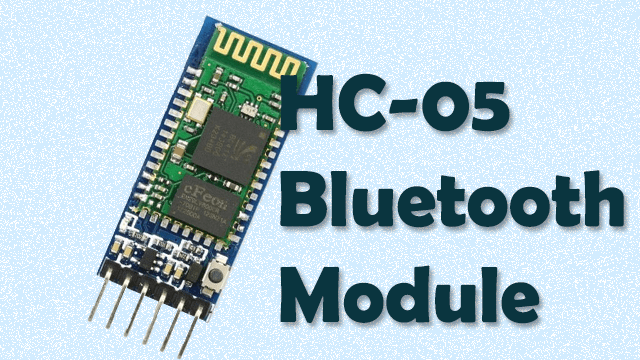
HC-05 Bluetooth module hardware overview.
The HC-05 module is based on the BC417 Bluetooth IC along with a flash memory and operating at 3.3V to 6V. By default, this device comes as a Slave but can also be set as Master thereby making communication between two separate HC-05 modules possible.
The HC-05 module is a Bluetooth SPP (Serial Port Protocol) module, which means it communicates with microcontrollers like Arduino via Serial Communication.
HC-05 bluetooth module has two modes of operation;
- Data mode for exchange of data between devices.
- Command mode used for configuring settings of this module using AT commands for example changing the password for connection, baud rate or Bluetooth device’s name.
In Data mode the default baud rate of HC-05 is 9600bps while in command mode it’s 38400bps.

HC-05 Bluetooth module pin description
There are six pins;
- EN/KEY – thisis the enable pin and when set to high, the module will work in command mode otherwise it is in data mode by default.
- VCC – powersupply pin for connecting +5V.
- GND – ground pin
- TXD – Transmitter pin of the UART Communication.
- RXD – Receiverpin of UART
- STATE – Status indicator pin. This pin goes LOW when the module is not connected to any device. When the module is paired with any device, this pin goes HIGH.
There is an on-board LED used to indicate the status of the connection. When the module is not paired, the LED blinks or flashes repeatedly. Once the module is paired, the LED blinks at a constant delay of 2 seconds.
Connecting HC-05 Bluetooth module to Arduino.
Since am going to use the module in data mode, the Enable and State pins are floated. VCC and GND are connected to the Arduino UNO’s 5V supply and ground, and TX and RX from the module are connected to the Arduino’s RX and TX serial pins respectively.

Why you need a voltage divider on the HC-05 Tx line to Arduino Rx pin.
From the input and output logic voltage characteristics of ATmega328P, the minimum output of Arduino is VOH= 4.1V compared to the max input that the HC-05 can receive at VIH = 4.2V. Since the minimum input voltage of the Arduino is only 100mV more than the max input of the HC-05, there is a high chance that the HC-05 can be damaged when the Arduino TX is connected directly to the HC-05 RX. To avoid this damage, a resistor voltage divider from the Arduino TX pin to the HC-05 RX pin is needed to lower the 5V VCC from the Arduino power to a 3.3V logic, so that data can be transferred safely to the Bluetooth Module.
A voltage divider is not needed between the HC-05 TX line to Arduino RX because the minimum high logic voltage that the Arduino can receive is VIH = 3V and the HC-05 will always be able to supply enough voltage since the minimum logic output that the HC-05 can transmit is VOH = 3.1V. With the typical VOH of the HC-05 being 3.3V, there should not be a problem with the Arduino registering the Bluetooth’s transmitted data as a logic high (1) since the 3.3V signal from the Bluetooth module is enough to be accepted as a high logic by the Arduino Board.
NOTE: If the HC-05 module is on a breakout board, then you may not need the voltage divider because a voltage regulator is included on the board therefore you can connect the RX and TX pins directly to your Arduino board.
Code for using the HC-05 Bluetooth module with Arduino
The code includes the SoftwareSerial.h library which contains the necessary functions for Bluetooth communication using Arduino.
#include <SoftwareSerial.h>
SoftwareSerial bt(0,1); /* (Rx,Tx) */

void setup() {
  bt.begin(9600);
  Serial.begin(9600);
}

void loop() {

    if (bt.available())
    {
     Serial.write(bt.read());
    }
}
First you create an object of the SoftwareSerial class containing the Rx and Tx pins. In my case I have used the default pins 0 and 1 for Arduino UNO.
In the setup, we define baud rate for software serial communication which is 9600.
The loop contains a condition for checking if there is data at the serial port and if there is, print the received characters on the serial monitor.
NOTE: You should unplug the TX and RX lines when uploading code because Arduino uses serial communication when uploading code therefore the pins RX (digital pin 0) and TX (digital pin1) are busy. To avoid this, you can use the other pins of the Arduino board as TX and RX pins, but you have to specify these pins in the object of SoftwareSerial class created in the code sketch.
Connecting a Smartphone to HC-05 Bluetooth module.
In order to have Bluetooth communication between Arduino and a smartphone via HC-05 module, we need a mobile application. There are a number of applications in the Play Store for this purpose which will work with the code above. For purposes of demonstration, I’ll use the Bluetooth Terminal HC-05 Application since it is quite common and easy to use.
After installing the application and connecting the HC-05 Bluetooth module to Arduino, we can then pair these devices using the application following the steps illustrated below.
The default password of the HC-05 module is 1234.

After pairing the smartphone and Arduino via HC-05 module, you can now enter a statement in the application, press “Send ASCII” and that statement will be shown on the serial monitor as shown below.

I have used the HC-05 Bluetooth module with Arduino in a number of projects which you can check out for further reference using the links below.


